Easy Way To Make A Frontal Wig (Hot Glue Gun) | Fold Over Method | Ywigs.Com
- Posted on 16 May, 2018
- Closure Wig
- By Anonymous
✨✨✨OPEN ME✨✨✨
____________________________________
O T H E R W I G M A K I N G V I D E O S:
How to : Make a Lace Closure Wig
https://www.youtube.com/watch?v=R-1LxU...
DIY lace Closure Wig (Under a Hour)
https://www.youtube.com/watch?v=YiR1EM...
How to: Make a Frontal Wig
https://www.youtube.com/watch?v=tc4B0g...
J O I N T H E F A M I L Y
S U B S C R I B E H E R E ✔️ H I T T H E B E L L (https://www.youtube.com/channel/UCaZRo... )
__
IG: theharelife
T W E E T M E
https://twitter.com/TheHareLife
_
S A V E Y O U R C O I N
* Teami Blends - Shayne10 for 10% off
W A T C H M O R E
Chun Li Buns
https://www.youtube.com/watch?v=iUrpft...
Dramatic Wing Cut Crease
https://www.youtube.com/watch?v=RkcXxg...
Tarte Shape Tape Vs Makeup Revolution Concealer
https://www.youtube.com/watch?v=g9NjFd...
DIY Distressed Sweatshirt
https://www.youtube.com/watch?v=VP0X9H...
Bobbi Brown Skin Long-Wear Weightless Foundation Review
https://www.youtube.com/watch?v=fkfBkG...
//P R O D U C T S
- YWigs Peruvian Deep Wave ( 3 Bundles of 12inch & 10inch Frontal)
https://www.ywigs.com/7a-grade-3-bundl...
-Dome Cap
-Canvas head http://amzn.to/2nQPBIP
-Nylon thread http://amzn.to/2C09z9i
-Wig Tripod http://amzn.to/2sa00oq
-White liner
-Mini Glue Gun w/sticks http://go.magik.ly/ml/8lue/
-Tape
T-Pins
B U S I N E S S & PR E-M A I L
FTC | Some Links provided are affiliate links. which mean if you make a purchase through the link I will receive a small commission. Thank you for your support : )
**** I DON'T OWN ANY RIGHTS TO THE MUSIC IN THIS VIDEO****
THANKS FOR WATCHING XOXO-SHAYNE
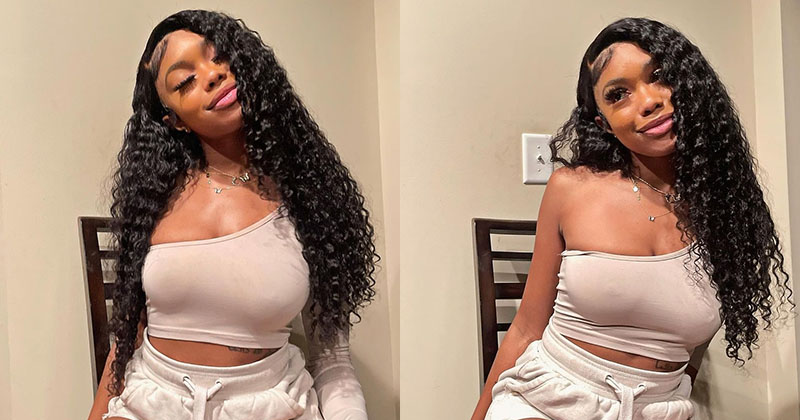
Wait wait. Wait. What'S over, y'all will come back to my channel if you're new to my channel, hey girl, hey, make sure that subscribe button and turn on the notification bill so you'll be notified. Miss homemaker uploads. We are almost at 10k. I would really love to get there by the end of May early June, so make sure I share my videos and help me out make sure you follow me on Instagram and Twitter and the hair life so yeah guys. I'M gon na show you how to do a wig in under an hour. This is the quickest way. If you don't have time, no, not at all whatever the case may be. I got she says I got you. Don'T worry we're gon na get this wig slayed. Okay, okay, so this bottom deep wave hair that I'm wearing is from wild waves. Calm. Thank you guys so much for sending me. This hair know that I have purchased their company with my own money before so I really love this company they're super affordable and they have really great quality, hair, so yeah this video cuz, I'm obviously really excited Saluki, okay guys. So this is the original texture of the hair. This is their Peruvian, deep wave. I have three 12 inch bundles and I was just for you guys. I was running my fingers through there with ease. It was not snagging at all and it did not share. They still has not shed on me, ivko washes and everything cut it and still has not. So that's really really good and you guys can see the bundle size is nice and full. So here's the front. So it was straight a bit at the roots, but that was fine and came together really nicely and it bleached beautifully a recently got a question or one of my older videos on how to protect your canvas head. So what I did was just took some scotch tape and put it on here. This works way better than using a plastic cap, so just take some scotch tape and I just put it around the back and the top of the head, because I know when you use a plastic cap, you get stuck up under there and then, when you scratch Them here it sounds like that over there and that's not cute, so I'm using my 21 inch head already cheap and my pumps are down, and I'm answered exactly how to get this perfect every single time. I'Ll answer that right now conference of your hair in minus 21 inches as you guys can see, the next measurement is ear to ear and mine is 11 inches. There'S two different ways: you can do this. The first way you can measure out your frontal and, as I just told you guys, my ears here is 11 inches. So I will place my measuring tape in the middle of the frontal and I'm gon na show you guys the 11 inches so there's 11 inches and I will cut off the excess. But since your front toe stretches, I would do ten and a half instead of eleven, because it does stretch when you place it on the cap, so you just cut those edges off now. The second way I got this from sociology - and this tip is so Brown y'all, like my friends, whose fits perfectly doing this, so you want to place the cap on your head and I just braided my front so up to get the hair out of the way. So you're gon na align your frontal on your head and the cap on how you would want it like when you put it on so what you're gon na do is take a white pencil. I just have a white little eyeliner. That was a dollar at the beauty, supply store and you're, going to mark the areas on like behind your ear on both sides and then in the middle of the cap, where it stops. So you know exactly where it sits, so it okay, so y'all see where my dots are on my cap and let me show you how bobbies trick is so I told you guys to go to ten and a half, because the frontal stretches right so check this Out i'ma put my measuring tape on there. Look where those dots line up on my measuring tape. Ten and a half six like this trick is foolproof. Like your front tools are gon na lay on your hair perfectly ten and a half you'll see that yo see you, okay, yeah, I'm going to take my frontal and line it up to the markings that we made so the front part of your front so is Gon na look weird, it's not gon na be sitting flat down on the calf or anything. That'S what it's supposed to look like as long as that back part is flat down. You are good sailing having a hard time sticking their tee pins into their canvas head, but you'll see pins. I have right here. This is a pin and then here is the one I always use you can see. The one on the right has a larger tip than the one on the left, and that's probably why? Because this one this one right here this earlier, is a lot thicker. Then this one right there. So I went ahead and thread one needle, because all you're gon na need for this. So you guys will see that I have these left hanging down and thanks because this part will be over my ear and I'm gon na just go ahead and cut that when I'm done and I'm pretty sure that y'all have heard plenty of time this right here. Okay is me just grabbing the top part of the cap, like that you're going through the whole thing, I'm gon na pull that needle through. So now, I'm at the end pain, your eyes can see the little knot. I'M gon na go ahead and stick my needle through that through it like so and pull, can I do the loop and pull with it, so I'm just gon na make sure that my thread is always in front of me. All right excuse my voice. I'M getting over a cold, so I'm just going to continue to do the loop in pull method all across the back of my front. So if you want a more in-depth tutorial, I will link to two that I already have on my channel down below and I will also put them in the eye, so you guys can check that out. If you need more detail, these two runs and I'm showing you guys are also elastic bands, and you do not want to sew on those or your cap will not stretch. This hair is co-wash. I previously showed you guys a clip of the hair from before. I call wash it so. This is what the hair looks like and this is their Peruvian, deep cave. It'S a really really pretty. This will be soft, so there's a test piece. I put a little bit of bleach on here. I only left it on for ten minutes, so that goes to show you guys how fast their times - and it still has a curl pattern. So if you guys do want to color the hair, you know that you can sew these pins that you guys see. I folded my cap down a little bit because there's a little bit too big for you, okay, so I on my mini hot glue, gun and some extra sticks on deck. You guys can get this from Walmart for like three to five dollars, so I'm gon na do is place the glue in a line, and you want to do this in sections and then you want to just place the track in now. I'M gon na be showing you guys how to do the photo over method. I'M cuz. I know a lot of people do not like to cut their works. We have to cut them at the top, but the majority of the wig will be the fold-over, so you're, just gon na keep gluing in a line and pressing the track hand. I was using my nails and I also did use a rat tail comb to make sure that the track is secure. So for the photo over method, you are going to place a little bit of glue on top of the track that you previously glued down and then gon na fold that track over the opposite way and really press it down like pressing, really really good. And it's flat as you can possibly get it so will not be lumpy and bumpy, because that is nothing look we're going for. We want it to be nice flat and seamless and then after you do that, you're just going to put some more glue in a line and and press that track in he's very repetitive, that's all I'm doing you guys, so you guys will see me do the Photo romantic plenty of times you just want to fold it down and press it in really good, so that it's nice and flat. It'S really really simple! So if you do not want to cut a lot of your tracks, this is what you can do and I'm not placing my tracks too close together, because you don't want them to be too stacked and don't have any room in between. If you get glue in the hair, just wait for it to dry, and then you can just put it right off, and I know somebody's probably asked him wash your wigs with this method. And yes, you can just try not to get a bunch of water at the base of the tracks, because eventually you will have to repair a few tracks. But besides that this might they be durable. So you shouldn't have to worry about any tracks falling out. So you're just gon na keep going back and forth back and forth back and forth until you create a u-shape, so you guys can pretty much see that you shape that I was talking about. So this is gon na be the last try. Do the photo over method two and we're gon na cut the end of this track, so we're not going to continue going in that you shape we're going straight across until we reach the back of the front school. Close the wig off you're, just gon na glue that last track right to the back of the frontal and to cover up that glue residue. We are gon na, be using a sharpie marker. I know they do have black blue six I'll be using those the next time, but in the meantime, girl just grab you a sharpie marker and color over the glue, I'm showing you guys, the inside of the wig. There is no tape or anything on the wig. So y'all use tape, not a plastic bag and get your whole life. So we're just gon na flip that cap from up under the frontal area and we're just gon na cut, and you can use that access piece as an elastic band instead of using the ones that you can buy from the fabric store it's much safer for your Hair and won't put your hair out or anything, so you can just use that alright y'all so stay tuned for part. Two and three on how I got the wig to look like scalp and how I cut this curly bob hey came to the judges came to choo-choo-choo, comes on my birthday trip and ice


Comments
Clare I: OMFG GIRL THANK YOU! Honestly I’ve watched hundreds of frontal tutorials and even paid someone to teach me how to make a frontal wig and even after all of that I still didn’t know how to make it. Then I came across your video and WOW after one try while watching this video I made a perfectly fitted frontal wig! Thank u so much, I wish I would of came across this video sooner! ❤️❤️❤️❤️
qtbeddecor: I appreciate that tip on measuring the frontal. This is a great detailed video, and very helpful. Your wig came out perfectly. xoxoxoxoxo
Kathryn Bedell: I definitely have to try this! I hate sewing so much lol
Pitts Twins: Yeeessss girl I just did this method earlier lol so much quicker for me !
Slay’d By Tanaka: Omg thank u soooo much!!! I been looking for a video to show me how to protect my dome head from hot glue! Ur the only one who showed me!
caty mare: thank you! i made my first wig! except i didnt use hot glue i used black hir bonding super glue
Adoreazh: Does the hot glue start to melt after wearing the wig in heat? Like how long does the hot glue method on the wig last?
Dimez: Do u have to sew the lace or can I use a glue gun?
Fantasia Murphy: Have you washed a wig using the glue gun method? How does it hold up?
Deonne Mills-Louis: Thanks for the numerous insights
STAR: How do you double weft???
Lisa Dupree: How many glue sticks were used
Kasy Pertab: You look so beautiful
Kersha Beaver: I'm going to make me a lace closure glue gun wig. I have tired before but not very successful. I always had an issue with track placement and closing the wigs
princessky: Yasss !❤
Cultured Company: Notification Gang!