Beginner Wig Install | Ft.Sunberhair ( A Fall Look!)
- Posted on 20 August, 2022
- Closure Wig
- By Anonymous
Thank you for watching!
All wigs can be paid in 4 installments interest free, buy now pay later(must be 18 or older)
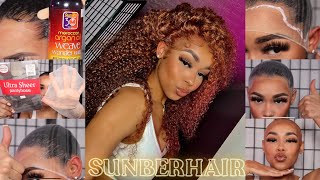
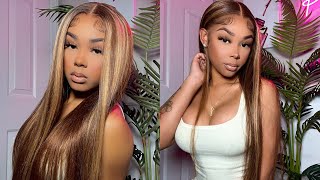
Im wearing a ginger brown #30 curly wig ➡️ https://www.sunberhair.com/products (Sunberhair)
Hair details: 22in, 150% density, 13*4
Use Code: SH17 for extra 17% off (valid for the next week)
CURRENT DEALS: https://www.sunberhair.com
Free wig with purchase of $365 (code: BD20)
Extra 20% off sale (code: BD20)
#beginnerinstall #sunberhair #gingerbrown #vpart
CONECT WITH ME⬇️
Instagram: _amourrshy
TikTok: _amourrshy
♡Time Stamps ♡
Intro: 0:00
Bald cap: 1:12
Edges: 7:04
Final look 1: 9:48
Final look 2: 10:12
Business Inquiries: [email protected]
Products & Tools used:
Wig caps: https://www.amazon.com/dp/B016E12WTU?r...
Hot comb: Pink Hot Comb Electric Hot Comb... https://www.amazon.com/dp/B0936PQ88M?r...
Curling iron: iGutech 9mm Curling Iron Hair... https://www.amazon.com/dp/B07G33L99J?r...
Moose: Coconut Oil and Shea Wrap Me... https://www.amazon.com/dp/B000TG63EW?r...
Razors: Coconut Oil and Shea Wrap Me... https://www.amazon.com/dp/B000TG63EW?r...
G2b gel: Got2b Ultra Glued Invincible Styling Hair Gel, 6 Ounce https://a.co/d/3FLStXp
G2b freeze spray: https://www.riteaid.com/shop/got2b-glu...
Jumping right into this install guys i'm using sombre hair details down below this hair came disinfected. It also came with a couple goodies. I do not have bleach, so this is how i tip my lace without it, and this wig was already given scalp. So there was not much that i had to do to this lace and i might pluck it later. I'M not sure i do like a plucked lace um. This hairline was already looking natural, so yeah, and here in the next clip, i'm going to be showing you guys how the lace looks and guys. I'M gon na have a black cap on in this clip. But as you can tell it's already giving it's giving scalp get into it, okay, and now i'm just showing you guys what the wig looks like on the wig stand. I actually only ended up plucking the middle of the wig because it was more dense than the other parts, but this is not a plucking tutorial y'all. I just pluck wherever okay, but this wig already came pre-plucked, so it was already giving right here, i'm just showing you guys these nylon, wig caps and guys these are holy ground, so link in the bio. Now i'm taking my black got to be glue and i'm using it to mold my edges back after spreading some all over my edges, i use my toothbrush to brush the edges back and then, after that i take the hair dryer and blow dry, all the gel. So that it starts to mold - and i just repeat that on the other side now i'm just going to grab that cap and put it on my head - it took me so long to get this cap on y'all, but eventually it went where i placed it. You know you just want to put it on as tight as you can get it: okay and yeah. Let'S get into the next step, making this a ball cap, i already took a little bit of my god to be spray which y'all are going to see in the next clip, and i went ahead and cut my ears out. Okay, but right here, y'all can see that i'm taking the got to be spray and every time i spray it on. I grab the blow dryer and i blow dry directly in that spot and i'm blow drying on a cool setting. You don't really want to use hot, it's hot. It'S just gon na make it tacky. When you walk out that door in the summer, you should get tacky when it gets hot right. Okay, so make sure you do it on cool and i went ahead and cut my cap off the camera right here. I'M showing you guys how i go through and i clean up the cap. You know i couldn't do it on camera. It was too hard. I'M sorry uh, if you guys ever want to see that i'll figure out a way to do that, but right now yeah. This is what we working with y'all be careful. I ended up cutting myself as you can see in the next clip. It'S not hard to cut yourself doing this and now y'all, i'm taking my got to be glue, and now we just go and try to you know snatch that cat. So i use one to two generous layers when i'm doing this and i use my finger, i don't use a comb or anything i like to use my finger so that i can feel the thickness of how much glue that i'm putting on it's just all up To preference guys, but now i'm just taking that and i'm blow drying the first layer on the second layer of gluing, the cap down melting that cap, i'm using the um comb to assist me because i want that cap to be melted as much as i possibly Can into that skin i know you all see that blood down there. It speaks for itself. So again you all need to be careful. Now i'm just taking my got to be free spray and my blow dryer to seal everything after that, i'm just taking my rubbing alcohol just to clean up all the glue. You don't want too much gunk around there. Okay y'all! So just you know clean it as best as you can, i'm really trying to work that bloody spot off for real. Now you guys are gon na see me attempt to use this brush to put this foundation powder on the cap, and it really wasn't working for me. Okay, it just was not just was not giving, so we just switched the beauty blender, and you know i don't know why. I do this extra step, but i like to use a light foundation as the base and then i'll go over it in a foundation. That is my exact color. Y'All cannot tell me that this cap is not giving little bill okay get into it into the next step. I use my alcohol to clean up any extra gunk. Then i take my black got to be glue and i use two generous layers to apply the wig, i'm using my finger again and guys using your finger. Okay, don't be afraid ever because you literally feel how thick the glue is. Okay right here, i'm just blow drying that first layer down okay and then i'm going to take a quick snack break charleston shoes are so good y'all and you can literally make s'mores out of them, but going into that second layer, i'm just smoothing everything out. I'M just going to take that second layer and then i'm going to blow dry it again make sure that your setting is on cool. You don't want it to be too hot, i'm going to blow dry it until it's tacky. Now i'm just going to take the wig and i'm going to place it on not fully placing it down, but starting to just place it on, so that i can find the correct placement. Now, i'm literally holding my cap down y'all both sides with one hand. Okay, you just need yourself in this life just know that y'all, but i'm just blow drying that down. I found the correct placement that i wanted for it so yeah now, i'm just taking my band and i'm going to go ahead and use it to lay down my lace going in with my blow dryer to make sure everything is dry. Now that that's done y'all it's time for me to cut the lace and i will not be cutting it on the camera same as the cap, it's too difficult for me to cut on camera. I don't know why but yeah we're just going to cut that lace and make sure you cut it in a zigzag pattern. Don'T cut it straight, i'm just taking my got to be spray, and i'm just spraying that in any spots that i need to and i'm going back in with my blow dryer just to make sure everything is dry. Yes, y'all. We are going to tie that down again. You all want this lace to be laid you're, going to be doing a lot of tying your lace down and blow drying it. Okay, y'all want this lace to be as late as possible, so just got ta. Take your time with it now, i'm just gon na go back in with my foundation powder and my brush. I'M just gon na lightly go over my hairline, then i'm just going to go back through and cut off any extra lace that i need to now. I'M just going in with a spray bottle with water and a comb i'm just going to smooth out that hairline the best i can you know it is time for the baby hairs. The moment we've been waiting for. Okay, the part that i feel like makes the wig you guys can follow how i'm doing my baby hairs or you can do them. However, you want to you know it took me, like a million tries to get this right. It'S so easy to do my own baby hairs when it comes to a wig. It takes practice, so don't be defeated. You know by the outcome of your edges. You know you just keep trying and trying until you get them how you want to okay and how you want to okay. Now that i have my edges ready, i'm going in with my mousse link in the description everything that i put in the description guys is going to be affordable. Even this wig, it's not too bad, okay right now, i'm just smoothing everything out. I'M making sure that my edges are the way i want them. I'M adding mousse i'm getting everything smooth out and ready to lay my edges down now, as i just said, i'm going in with that band and i'm just going to tie my edges down, go in with my blow dryer, but make sure that everything is dry now. I'M just going to go ahead and jump right in and cut my baby hairs. I just look at how long i want them and then i cut right at the end. That'S literally all i do and i just go in i cut like in the middle almost and then there's the two edges on the outside. I cut the top a little shorter than the bottom so that it has that good swoop effect, and then i'm just going in with my mini curling iron, and you can curl the edges out or in depending on how. I feel that day is how i would do the edges, but it's all up to how you feel now, i'm just gon na go in and lay my baby hairs the best way. I know how y'all and after that's done since this is a curly wig, i'm just going to go in and define my curls, i'm just going to use my spray bottle with water in it and a mousse so y'all. This is how the wig is looking. It'S looking so bomb and i was waiting on my hot comb to come in the mail, so i went ahead and did something to this hair the next day and stay tuned. If you want to watch so guys, this is it for this video. I hope you guys really learned something from it, because i did not make this for no reason and i hope you guys have a blessed day. Thank you for watching subscribe.
Comments
Ideas TV: Patricia invites me hereeee i love your videos ❤️❤️
Rose Corpuz: Love it!! Patricia sent me here
IMRAN FF: Nice content
Cer Tristan Cacatian: Done sub great channel!! Patricia sent me here
Kyle Vincent: Patricia invited me in your channel pretty lady
Matt James: Patricia invited me here in your channel.
Self-made flock: ♠️
Andrew Santos: Patricia sent me here. Nice video
Calvin Ramos: Patricia invites me in your channel
John Eric: Patricia invites me in your channel
Miguel Santos: Patricia invites me hereeeee
Patricia Arlene Lopez: ptrcc from tiktok
Christian Bell: Done subbb patricia invites me here
Matthew Kevin: Patricia sent me here
Imelda Beringuela: Patricia sent me here