*Beginner Friendly* Nadula 5X5 Closure Wig Install + Customize | Bleaching Knots | Half Up/Half Down
- Posted on 17 February, 2022
- Closure Wig
- By Anonymous
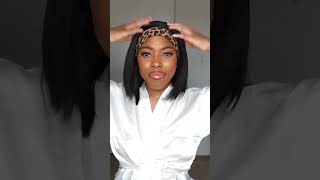
Hey babes welcome back to my channel. It'S your girl, deja ma, shade we're going to jump straight into it with a weird customization and install we're going to get into these products. We have some bleach developer, shimmer light shampoo, conditioner, a bow and a bleach brush. So, let's get into it, so we have a weird from the doulas here. No, this video is not sponsored. I bought this with my own money. It came with a few little gifts here and um. I'M not gon na go through them, but this is a 26 transparent, jerry curl wig. So it is a closure. The hair feels so good. It'S so soft um, like i said it's a closure. 26. I believe it's, the jerry curl wig, so i'm not mistaken um. It was pretty just a little bit. I will add this link in the description, so you guys can check it out if you guys are interested - and i think for the rest of this video we're just gon na get straight into it. I'M not gon na talk too long, i'm just gon na. Let the video uh play out and let you guys watch so we are gon na start by bleaching. The knots i mentioned mixed a one scoop of bleach - and i i bought the um developer and we're gon na apply it to the lace, make sure you apply it very, very, very lightly. You do not want this bleach to sink through the lace and get onto the knots because then well, not the knots get onto the hair because they'll never bleach the roots of your hair. So i'm just going to lightly tap this on, but i am making sure i'm pressing it into the knots because we do want those knots to bleach and we're gon na um, smooth it out equally and just make sure it's all in there. I did not use the brush. I know i showed you guys the brush, because that's the proper thing to use, but i like to use a butter knife because it's like, i feel like it, applies it better and it's a flatter surface and it just smooths. You right on there like, i feel like i have so much more control with this butter knife, so we're just gon na keep smoothing it on there until it is completely covered, since this lace is completely covered in a bleach we are going to let this sit For 28 minutes exact, i didn't think my timer did go off and i did forget to get up and ripped it off. So it went like about 30 minutes, but you don't know when it's ready or you'll. Just look at your lace and look at your knots and you'll you'll see that it's bleached you'll see that they have turned so yeah from here on out we're just gon na. Let this wait. We'Re gon na set our timer, and once this is done, we're gon na come back and rinse it out. So once it's time to rest it out babe, so we are going to start by well, i start by just slightly uh, rubbing off and rinsing off that bleach, just to make sure we get it out of the knot and out of the hair, you want to Make sure that that is really really really really rinsed off, because you don't want your knee uh not to continue bleaching or for your hair to be bleached at the root. So after i pretty much get it rinsed out a little bit i just go in and with my shimmer light shampoo, you do not have to use the shampoo. This is optional. It just tones the brassiness out of the lace, so your lace doesn't look like super super orange, so i just started by working it into the lace. I really like to get it on the lace. That'S the main part i care about because, like i said, i want to get rid of that brassiness and then i work it through the rest of here. Just a tad bit, like i said, my main focus is that lace make sure all that shamp um bleaches out and then i'll rinse it out and go in with some conditioner. So, like i said now that it's all rinsed out we're going to go in to go in with some conditioner for the wig i like to use so much conditioner like a heavy amount. You'Ll see me, keep adding it, brushing it brushing it and then picking some about the sink and it brushing it. I like to really suck my own wigs and conditioner. I want my hair to be very soft and moisturized and once you shampoo on hair, if you didn't know now you do it strips out the moisture in here, so you have to go in with conditioner and put the moisture back. So that's what we're doing here. The wig felt so soft y'all, like i couldn't get over it. I love rubbing my fingers through it and i love how nerd make hair feel. So i'm just going to continue doing that and normally i'll let it sit. But i have a client come to get the hair done after this, so i'm kind of in rush, so i'm going to rinse it right out this time. Instead after i brush it and let it sit for a second. So this is the hair, all dried out, guys no product, so big omg. I don't really ever wear my hair, really big. Look at that lace! Oh my god! So nice, the lace was like very transparent. It wasn't the thinnest. I'Ve had dinner, but it was good enough. So now you just see me playing with the hair trying to see how i'm going to style it. I normally just do middle parts, but let's try something different today i was feeling very different. So, let's see what we come up with, so i did go ahead and decide. I'M thinking about doing a half up, half down i've, never done it with a closure. This is a 5x5 closure, but i was like hey: let's try it! Why not? If push comes to shove, i don't like it, i can take it out here. You see me pulling up my v8 cap. I don't glue my wig caps down with my closure, wigs because i just don't. I just feel like why like, and i'm probably going to take this wig off in a few days. So i started by pulling my wig cap up, i'm going to apply some makeup on it and i'm going to wipe my forehead off and make sure it's clear of residue. We don't want no oil or anything no makeup on my skin, just so that glue really sticks. And yes, i am going to use blue because i am getting ready for a vacation, so we're going to use some glue and some spray and see how it goes. So here you just see me adding some makeup on the lace and making sure it's makeup on my cap and then i am going to get ready to start to apply the glue ready. I put the lace down just trying to make sure everything looks good yeah. I really really really really love this lace and i'm loving this wig like please don't please, don't mind my mess in the back like i was packing for a vacation, don't judge me: it was 11 o'clock at night and my flight was at 6 00 a.m. Now you just see me um about to apply the glue. I am using. The erica j hold me down and i am going to use two to three layers very thin layers at that. So next i'm going to just lightly apply the layers i will be using. Like little dotting motions and then using a wooden bachelor and just pulling it down, uh spreading it out evenly on my forehead, where the lace will be, i apologize. You really can't see me that well um. I was trying to look in my vanity and make sure i was doing this correctly because i am blind - and i have to give me some concepts, but that's here, nor there i'm gon na speed this video up. So you guys could just see me applying the glue and uh pressing my lace into the glue and then cutting it off um. So now that the hair is all lay this way, i'm going to go in with my even wonder: lace, bone spray and we're just going to lightly spray that across place them on my finger, tap it in and then put on our band just to lay this Flatter and make sure it is really melted: okay, babes, now that we have that all tied down we're going to go into style and, like i said, i'm going to try a higher self half down. I never tried it before with the closure, but let's give it a try all right, i'm also going to be using my hot comb. I broke my cord once so i am using my actual little hot stove and my comb and we're just about to flatten this bad baby out and style and get to going so. Let'S get this started: okay, babe! So now it's time to remove the scarf. It'S been a few minutes and baby. Look at that lace. Oh my god. It is noted to the gods - and we are just now about to cut off that extra lace, pull out some baby hairs and then do our baby hairs and put this in a pony. So let's go um um, um, okay! So now it's time to do the baby hairs. We got the ponytail sleek and tight we're gon na pull this messy hair out the way cut the baby hairs. I like to cut my skin and short: i'm not the best baby here, guru or whatever you want to call it so yeah. If you guys want to see um a more in detail install next time. Let me know i feel like this. One is just a beginner's friendly, but i will make a better one if you guys need me too, but yeah, so we're going to cut them off, and i like to mix mousse and got the glue gel and go ahead and flip my big ears um. Now that my baby hairs are out the way and tied out, i am going to now detangle and mist the curls um. I don't want it to be. Super super wet like dripping, but i do want them tame just a little bit. So i'm going to go in with some water and then a curling cream and i'm not sure if i mixed conditioner with it or what and some moves and we're gon na see our finished product. Oh um, um, um and we are finished. This is the final outcome. I love love it. I love it so much. It'S so cute. So simple, really quick, very versatile! The hair is so pretty and it is perfect for any of any occasion. So with that being said, i hope you guys, like this. Video subscribe and stay tuned, if you guys would like to see anything else. Please comment below. Please comment if you like it and if you try to style, please tag me or let me know, bye, see you later


Comments
Tapanga: This came out so pretty more hair videos for sure please !!
miracle angel: i love curly hair! I ordered from nadula awhile ago and the hair is still holding up well. I love this install girl
Victoria Jackson: Wow you made this look so easy, thank you for sharing I’m definitely going to at least try to bleach a wig now.
Queen Bougie: Love it!!! ❤️❤️
TherealKarmia: So pretty ! ❤️
Life With Anna: I love this hair!
Queen Bougie: Curly hair is my number 1 go to!!!
Life With Anna: Hey!!!! ❤️