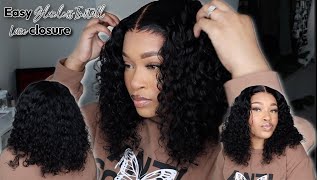
Invisible Part Fake Closure Wig | Coily Curly Hair By Queen Weave Beauty
- Posted on 29 April, 2019
- Closure Wig
- By Anonymous
I'm so glad that Queen Weave beauty asked to sponsor my video because a lot of people ask about this method and I want to do it with multiple textures.
PRODUCTS USED:
1. Queen Weave Beauty LTD ( QWB) Website: https://www.queen-weave.com/
Aliexpress Store Link: https://queenweavebeauty.aliexpress.co...
3 bundle Coily Curly Hair link: https://www.queen-weave.com/brazilian-...
Coily Curly Lace Closure Link: https://www.queen-weave.com/brazilian-...
Queen Weave Beauty Lace Wig Link: https://www.queen-weave.com/lace-wig/l...
IG: queenweavebeauty910088
FB: https://www.facebook.com/queenweavebea...
Email: [email protected] What’s app: +86-180 2459 0170
2. Wig Cap: https://amzn.to/2PEGbhk
3. High Strength weave thread.
4. Curved needle.
5. Scissors.
6. Hair sectioning clips.
7. Pearlized pins.
Let's hang out on IG: @PUREestrogen
OTHER VIDEOS LIKE THIS ONE:
1. Same method on straight hair with a crochet hook: https://www.youtube.com/watch?v=Lnv4Gk...
2. Kinky half wig 2 parts: https://www.youtube.com/watch?v=eqetjn...
3. 3 part full wig: https://www.youtube.com/watch?v=iwELCN...
PREVIOUS VIDEO: The best natural looking wig: https://www.youtube.com/watch?v=gE9pTu...
Let's finish this conversation in the comments! xo
(FAQ)FREQUENTLY ASKED QUESTIONS:
1. Where are you from?
a. Zambia.
2. How tall are you?
a. 5'9.
3. Do you model?
a. Nope.
4. Where is your bookshelf from?
a. Amazon: http://amzn.to/2hsKAqf
It's the Coaster Home Furnishings 800157 Casual Bookcase in White. I bought two.
5. What's your hair type?
4c in the back and 4b in the front...I think.
CONTACT EMAIL : [email protected]
FTC: This is a paid sponsorship with Queen Weave Beauty.
Hi guys welcome back today we are going to do my fake closure, invisible part method, so our wigs won't look too Wiggy and I am using kinky hair this time. I will do straight hair in the future, and this hair is by Queen weed beauty. Is the coyly curly hair? I have two bundles in 20 inches one in 18 inches and this video is sponsored by Queen weave beauty. So let's get into this and make this wig. This is the wig cap that I'm using it is from Amazon, I'm always on Amazon and eBay, buying cheap stuff. I think it was maybe 7 or 8 dollars, but I'll have links for everything in this video down in the description box, for you guys, so that there's no confusion and, of course, if you can find one of these in the store, definitely go there and buy It from your local beauty supply store, it is safer anyway, I am using some gel eyeliner and, of course I messed up. This is like my thing, always messing up, but I'm making the outline for my parting, the fake parting. It seems like I do. A lot of fake stuff on my channel anyway, this is what the hair looks like up close. You can see the weft, they look pretty decent and the hair so on the outside. I am going to place my whiffed and it's going toward the middle part. The middle line that I had in there was like a no-go zone because that's where the actual part is going to be so nothing goes there. But I start on the outside and I put the weft so that the hair falls going toward the part because it's gon na flip over once I anchor it with the last track that I laid down. So there are three parts to this. This is the first part and I'm coming over to the other side and sewing down. This is very important to me. I like to cut the middle so that I can have some space to make it really light flat. What I found is, if I sew and I go in a complete you deep you. It makes it kind of buckle a little bit right there, but if I cut it and then continue sewing, the tracks lay nicely, and I have more room so definitely cut in the middle and continue sewing so that your hair can lie down and once you're done On the other side, cut the left and do it again on the outside right next to that whipped, put another one right there and go all the way around and make sure you cut in the middle again and keep sewing. That is step 2, okay. So the first thing you're gon na do is lay down that first one of course after you draw that you with a line down the middle and then the second thing you're gon na do is sew around again. Now we are going to go the other way and what I'm doing here is I'm placing my third track and it's going to have the hair falling in the opposite direction. But it's also going to go beyond the two that I put down so make sure you check in there to see. Well, you can't really see but make sure that not a single track is under the third track and I'm pinning my hair clipped down so that all the air is out of the way and I'm going to continue sewing. So this is going to sew directly on the wheat cap. The only thing under that track is hair from the last two that I put down and when you flip it over. This is what it looks like. I hope that was clear, but don't worry if it's not clear I'll figure out how to explain it better in the and I will upload another video with a different hair texture. If you want straight hair, let me know if you want curly hair. Let me know whatever you want me to do, just let me know and I'll accommodate you guys, because I do have hair that I bought and it's just kind of sitting there, so I'm gon na do it on the other side as well, and this last one I actually cut it, I don't go in and you like, with the other tube and I'm sewing it down, not on top of the tracks, but right before the last two that I put down so now. We are gon na go down the middle and check off progress, see how everything is definitely take your time and make small stitches. So you don't find that you have thread in the wrong places and I am going to complete the wig starting right at the perimeter. I'M gon na pin my weight down and start sewing using a blanket stitch, which is pretty much the only stitch that I use when I am sewing and you can use whatever stitch you want. I don't think is very important. I just feel like the blanket stitch is very secure, but again you can use whatever stitch. You want. Do not focus on the stitch focus on your technique and your path. The path is important, also focus on pinning your hair down, because if you don't pin your hair down properly in all the right places, you will run into problems and you might not have the right density or the right look. So that's very important and I'm still on the first bundle, which I started with a 20 inch, which was silly. I should have started with an 18 inch in the back, but I don't think it really matters because it's kinky hair, so it's not gon na show too much. I mean. I know it's not going to matter because I know what the end result is, but technically with kinkier and curlier hair, I like to put the shorter lengths in the back so that I can have like more volume over time and I'm joining the second weft now. So I've covered quite a bit of yardage on this wig cap yeah. This is good. This is really good. I also like that this wig cap is breathable. I wish more caps were made out of this material, not the black ones that I'm used to, but just this one I might start buying this cap and just cutting out that lace. When I make my frontals or whatever I don't know we'll see, but I'm sewing now with the third bundle right up top. I have a circle, and now I'm gon na go in zigzags and close the week. It'S very simple, just basically fill in the gaps. Do not complicate your life, trying to figure out how to sew a wig just so and go I'm using some sample shampoo and conditioner. I found that I have a lot of these from Ulta makeup purchases or a tube, so I'm trying to use them all up, and this one is really good. It lathers really well excellent for wigs and yeah, I'm making sure I go in there and scrub-a-dub-dub and make sure that any liner on that wig comes out, because I was drawing on that lace and also what I like to do is add conditioner before I rinse, Because you know the conditioner helps bring the sun's down. So when I rinse out everything there, isn't all this excess soap in the sink making it hard. For me to finish rinsing see all the foam is gone. It is gone so I'm gon na go ahead and rinse out now. That'S just like my lazy trick that I do. I do a lot of lazy things on my channel haha because I'm a lazy person so moving right along. We are going to let this dry and this is my hair. I did the ball cap method maybe a week ago, and this is what we're looking like now. I still didn't take it out and I need to wash my hair, but first the wig. I am going to go ahead and pin it out of the way it's always good to clip your hair up before you start working and I'm just sitting in the park. Their overtime is gon na look better. I didn't brush my hair out because I wanted that. Kinky kinky look brushing it out, sometimes gets rid of that definition, and I didn't want that just yet feel like I can brush it later on down the line as I get to enjoy the wig more and as I do styles, but right now. I just want this kinky look, so when I washed it, I didn't brush it out too much and I'm using the funk, bye, uncle Funky's daughter to wet it a little bit and then stretch it out a little bit, but also maintain that kink definition. So I'm calming and I'm not really trying to do anything special here, just picking at it. I saw a couple. People pick their hair and I was like I'm gon na try that on extensions first before I ever try to pick my afro, my real afro, because I'm not good at these things, but this turned out really nice, it's very nice. So I'm going to continue picking at it a little bit attempting to pick at it, so that I can have this extra volume and you can see the afro is growing and if I did separate the hair, it would have grown some more. So this is what we're looking like right now for those of you who struggle with closures, don't want to pay for them or just simply can't find them in your area for the texture that you want to rock that's, not all hair comes with the closure. Definitely attempt this method and thank you so much for watching. As always, I really hope this helped, but I promise to from time to time you know, put out more videos on this method and other things that I've done so that there is no confusion over time. I can probably explain it better, but that's all I'm done talking. I'Ve talked enough. I will talk to you in my next video but until then take care.


Comments
Heather C: The skill that it takes to do this is really impressive!
MizizBundy: I love how you comb it, good hair care practices.
Joan Chileshe: Oh girl u r so talented ❤❤❤❤
Harriet: Very nice :-)
linhlezee S: Hi, can you please do straight hair...I love what you do
Dante Velasquez: I love it
Martha Banda: Nice. Please do that with straight hair. And with synthetic hair f
Dyana's BD Original Channel: We both love Ebay and Amazon
Rebecca Asaase: ✌✌✌