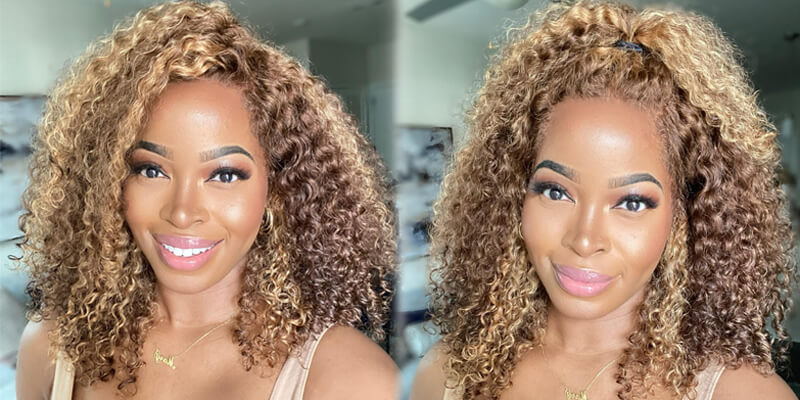
How To Create A Wig With Closure And Bleach Knots! No Plucking! Very Detailed!!! | Bria Andrea
- Posted on 20 December, 2018
- Closure Wig
- By Anonymous
Hey Guys!! I created my FIRST WIG!! I literally have watched soooo many other Youtubers create wigs and combined what I learned to create this wig. Let me know what you guys think! What are some of your favorite wig making hacks??
@ISEEBEAUTYHAIR Review - https://bit.ly/2Eyjsjk
Hair Details - 16 in Closure 20,22,24
Items used
Brush - https://amzn.to/2BtIWeB
Spray Bottle - https://amzn.to/2Lq331V
Powder Bleach - https://amzn.to/2BtJ8KR
40 Vol - https://amzn.to/2CpAH4U
Shampoo - https://amzn.to/2SbXkzd
Conditioner - https://amzn.to/2SbXE0T
Wig T Pins - https://amzn.to/2R45tIM
Sewing Pins I used - https://amzn.to/2CoHHyN
Needle & Thread - https://amzn.to/2BvZJgV
Keep up with me on IG @BriaAndrea :)
**DISCLOSURE: SOME OF THE LINKS ABOVE ARE AFFILIATE LINKS; MEANING AT NO ADDITIONAL COST TO YOU, I WILL EARN A COMMISSION IF YOU CLICK THROUGH AND MAKE A PURCHASE**
Hey guys welcome back to my channel so today I'm going to show you guys how I created this wig. So I got this hair from. I see Beauty here yeah. It came in like this pink that I got three bundles, I think of 20, 22 and 24. I'M not like 100 % sure, but I have stacks down below and I also got a closure. It also can, with some care instructions and some lashes. The lashes were okay, I probably won't be using them, but yeah the care instructions were nice. Oh, this is the closure that I got in 16 inches when I looked at it like the plucking it or anything like it was plucked a little bit. So I just kind of wet it a little bit and then just brushless baby. Here it's back and now I'm bout to bleach them up, and this was my first time ever bleaching, not guys like. I was so terrified, but I think I did a pretty okay job, so I'm using a 40 volume developer and hair bleach and I'm just mixing a little bit of each at a time. So you want this consistency to be thick tooth paste, so you want it to be thick and just a little bit at a time and honestly forewarning. This is going to smell so strong, like if you have windows in your room or bathroom, or I actually kind of recommend doing this in your kitchen and not in your bathroom just so, you can have like a little more breathability. I was doing this in my bathroom and it's attached to my bedroom, so there wasn't a ton of breathability in the situation, but you see how I've coming off thick like that, like that's how you want it to be thick just like toothpaste, so I left this Part in real time, so you guys can see exactly how I'm applying this and how long it took me to apply the one of the bleach to my closure and ya, see I'm just kind of like patting it down like I'm, not like it's not like coloring. Here what you just kind of throw the color on there kind of like tapping it in there, it may be like sliding it a little bit, but for the most part I'm just happy, then cuz. We don't want to bleach our here. We just want to bleach the nuts on the lows so after that I'm going to rinse the bleach off and I'm letting the bleach just kind of fall off, I'm not like rubbing it into the hair or anything. So you see I kind of just let the bleach off off and then now I'm gon na wash it with the ship purple shimmering like shampoo, but y'all look up on that book. Okay, it looks really good, so we're gon na watch it with the shimmer and like shampoo and just kind of wash all that bleach on. This is gon na take away brassiness from the bleach, and if you watched my previous video on my review on this hair, you'll know that I talked about like I put the clutch shots in my hand, I thought, oh, my god, this looks so good it'll. Look! So bomb and then you'll basically watch my review and you'll understand what I'm talking about well yeah and then I'm gon na go ahead and wash it with regular Tresemme shampoo for curly hair. You know it's for curly hair. This is a body wave type there. So I'm something use that and I'll use the matching conditioner as well, so here's a better shot of what the front soul like looks like after I bleached it, and it looked really really good like up on my hand. So now I'm gon na apply the frontal to my weight cap. When I say apply, I mean just kind of pin it down, I'm not selling at this point yet, but the way I'm pinning it down - and I want you guys see - I left a little a little bit of hair off of the line where the wig cap Starts if that makes sense, so I didn't line it up exactly to my wig cap. It'S gon na be like a little bit above where the wig cap starts. So now, I'm just gon na wash those bundles and I'm using the same shampoo and conditioner. It'S the Tresemme one, if you don't know which one it is I'll link it down below, so you guys can see it. So now I'm gon na get started where I want to start sewing, but because I believe that this wig foam we cap is like a look on like at this one-week stand head. Whatever is a little bit smaller than my natural head, I'm pinning back some of the loose loose wig cap so that it's taut to the head, and I'm only doing this during the part where I'm sewing down the closure, because I don't want this wig cap to Gather and at any point as I'm sewing, sewing down the closure. So as I saw the closure down, I'm starting behind where the weight cap starts. So I'm not start starting to sew right on the wig cap line, I'm starting behind it and then I'm gon na go forward and go back over that same stitch. So that way, when I tie the knot, as you just saw, the knot isn't on the border of the weight capsules, not like sticking out or anything. Also, when you're sewing, where this elastic band part is you want to make sure you're sewing through the first layer of the wig cap. So at this point on the wig cap there are three layers: there's the bottom layer, there's the elastic band and there's the top layer, and you only want to sew through the top layer of the head. Once you get past that band, you can sew all the way through, because it's only one layer you so to ensure that this closure is laid tight and down and it won't buckle up. I'M going to sew down one side, leave the back part open and then sew down the next side sew. The back of the closure is the last part that you're so down and let's make sure that closure is super taught to this. We cap, like it's, not going to buckle, it's not going to move, so you want to do one. Stick it to your right side. Then your left side or your left side. Then your right side just make sure that the back is last so now you'll see that I'm sewing the back part of it. Last and I'll just sew this part down and then I'll take out my wig pins, or these are actually like stitching pins for some actual clothes, but whatever you use is fine. I just wipe these coping that little balls and that don't see them clearly all right. So once we got that closure down, I'm gon na go ahead and take out all those T. Pins depends those sewing pins and then I'm also gon na take down the pins from when we pulled the wig. The wig cap really tight and talked to the wig head, because now that the closure is down this way, cap won't buckle at all from the closure being sewn down so yeah. We made it so finally throwing down our first track y'all. This took me so long to get this to this point like I could not even believe I made it this far so with sewing down the first track. You'Re not gon na go all the way up on the side and you're, also not gon na go to the base of the weekend. You want to so your first track below, I mean sorry not below above that elastic band line, so you're gon na. So the first track - and I'm doubling my tracks at this point, even so - the first track above the wig weight, cap elastic band line and what that does that gives you some flexibility with putting on the wig cap on and off you. So right here is a much better look when I say so above that elastic band. So after that, I'm going to start selling where I would believe the ear to be, and again, I'm only gon na sew through that top layer of where the wig cap is so, as you can see like I'm only pulling on the top layer and I'm not Going through the elastic part, and so from here on out, I'm going to just sew my wig all the way until I get to like I'm, not the crown of my hair, but I guess the top of my head, but but behind the closure and guys I Use these pins a lot like when you're, making a wig these pins will be your best friend. I use them a lot just to make sure I'm keeping my tracks straight and making sure they're, even and in line together. So at this point, you'll see that I got to that top part, and this is where you'll see like I'm, also using my pens to keep my weave straight and I'm going to start also after this point selling my tracks straight across. So this is where you'll see me start sewing the tracks straight across and also what I'm gon na do is I'm going to line up the weave with pins, so you'll see me, keep seeing how many tracks I have to sew, left and I'll leave these pins In and I'll just kind of flip the hair over and start sewing the hair down track by track so I'll push the pin down here out the way, if that makes sense and I'll start sewing the first track so you'll see like I want to start sewing That track, but this just keeps me in line so I know exactly where each track is going and the hair has pushed out the way, so it doesn't get in the way of you actually sewing you you you so now I'm on my last track. Thank you. Jesus, so we are gon na, so this track talked to the closure, but not in line with the closure, if that makes sense. So you're not gon na sell on to your closure, you're still selling on to your wakeup, but you want to make sure that it's very taut and very tight to the same line that your closure is on. So you just want to make sure they line right up together. So here you can see what I'm talking about my closure and my track are not sewn together, but they're sewn right under with each other, and now I'm just gon na cut out that excess wig cap make sure you don't cut your closure, because all your hard Work would have gone to waste so now I'm just taking my spray bottle to wet my closure down, and so I can part it how I want it and then you're, basically all done so now that I got my cloture pretty much how I want it. You'Re all done, I really hope you guys found this video helpful. Let me know what else you guys want to see for me and I can't wait to see you guys on my next video love. You guys bye,


Comments
Nikki O: Yes consistency!!! loved this. I wish i had the courage to make my own wig. I suck in the hair department, but this definitely gave me hope. You made it look super easy and natural (from afar ) I dnt know if any closures look completely natural up close
Rachel Luciano: This was so relaxing to watch. Thanks!