How To Pluck Tf Out Your Lace + ✨Giveaway✨ | Hd Lace | Laurasia Andrea | Wigencounters
- Posted on 07 August, 2020
- Closure Wig
- By Anonymous
This is a Laurasia Andrea video of: How to Pluck TF out your Lace + ✨GIVEAWAY✨ | HD lace
Subscribe to my channel to watch more: https://bit.ly/2TWnSr6
♡ Social Media ♡
IG: Redfairyy
Click the link to follow ⤵️
♥♥♥♥♥♥♥♥♥♥ WIGENCOUNTERS HAIR INFORMATION ♥♥♥♥♥♥♥♥♥♥
USE CODE Laurasia TO GET A 15% OFF DISCOUNT (Limited Time One Month)
The wig I'm wearing in this video is from WIGENCOUNTERS:
Direct Item Link : https://www.wigencounters.com/798-brow...
Hair code:CL002
Hair Type : Indian remy hair
Hair Color : Same as the picture
Hair Length : 16 inches
Hair Density : 180% density
Cap Construction : 4‘ Parting Space Lace Front Glueless Cap
Bleached knots on the front lace
Cap Size :Average
Follow WIGENCOUNTERS Social Medias
https://www.instagram.com/wigencounter...
https://www.facebook.com/wigencounters...
EMAIL :[email protected]
♥♥♥♥♥♥♥♥♥♥ WIGENCOUNTERS HAIR INFORMATION ♥♥♥♥♥♥♥♥♥♥
Hey Fairies,
So i decided to make a webinar on #laceplucking and i have to say, if i was a beginner i would watch it lol Im using a #hdlace wig from wigencounters and i LOVE their wigs. I told you before i wanted to get another one because my last one i had from them was bomb. This one didnt disappoint either!! Hope you enter into the #giveaway Enjoy.
xoxo
Mama Fairyy
Kiss all mighty bond lace glue & remover
GIVEAWAY RULES:
1. Subscribe to my channel https://bit.ly/2TWnSr6
2. Follow me on ig: redfairyy https://bit.ly/3gIDnMZ
3. Follow kiss all mighty bond on ig: https://bit.ly/3fNaTkk
*Giveaway will run for 1 week. Ends 8/13 11:59 pm est. There will be 5 winners. Winners will be announced in next weeks video on 8/14 @ 6:30 pm est.
*Some links are affiliate links. Meaning, i get some $$$ from them. I recommend what i like, i never will put anything here that sucks butt =)
♡ Products in video ♡
eyelash tweezer 1https://amzn.to/3kq8jU4
eyelash tweezer 2 https://amzn.to/30Dbwbm
eyelash tweezer 3 piece kit https://amzn.to/3kjq9s9
flat iron https://go.magik.ly/ml/zf2n/
kiss aloe makeup remover wipes https://amzn.to/3igzXRN
Got2be high insta hold spray https://amzn.to/30ALGVa
♡ Watch my original Nicki Minaj Video https://bit.ly/3hYlGKh ♡
♡ Check out my recent uploads https://bit.ly/3eGLN5Y ♡
♡ Check out my most popular vids https://bit.ly/2XOgfnT ♡
♡ Check out my Celebrity Hairstylist Secrets vids https://bit.ly/382f3SD ♡
♡ Check out my Slayed Hair Videos https://bit.ly/2YxpTwt ♡
♡ Check out my brand "Fairyystylish" videos using all my hair and lashes https://bit.ly/3dwuzY0 ♡
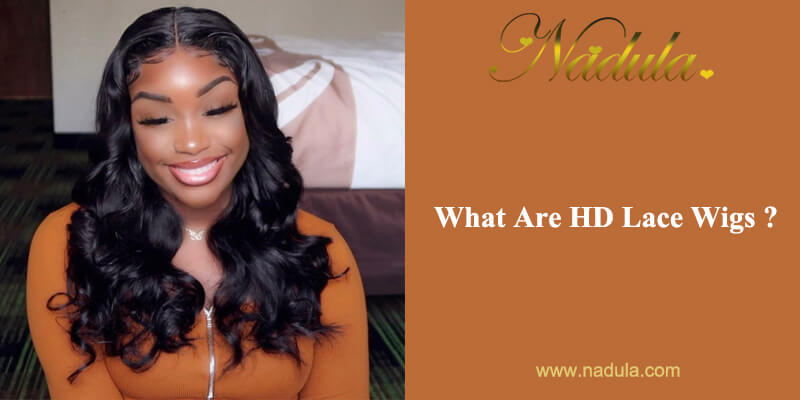
Hi fairies welcome back to my channel, it's theresia, so i know things looks a little bit different. That'S because i'm going to be doing a talk through of how i like to pluck my frontals and my wigs. So the first thing you're going to need is obviously a wig. This wig is from wig encounters and i'm actually using an hd lace. You guys literally cannot see the lace where's, the lace, let me know i have not used an hd lace in forever. So i'm very excited um to finally be able to use it. This is in transparent, hd, meaning it's no tint to it. It'S just a solid kind of clear translucent color and you can tint it to whatever skin tone. You are, and it's way more versatile for anyone that is of different complexions, so this is definitely going to be a beginner friendly type of tutorial. So if you guys already know about plucking and all that stuff, you can either mute this video and just fast forward through to get a little bit of the tips and techniques i'm going to be sharing or, if not, you guys can just watch the entire video. So yeah you're going to need three or well technically four things: you're going to need a wig you're, also going to need a comb you're, also going to need an eyelash applicator. This is one that i got from the beauty supply store, um. The reason i like this so much is because it has a flat tip to it a lot of times when you use like a regular tweezer or anything like that, they usually always always always rip the lace. I noticed that when i use this tweezer i never have any problems. It literally never rips my lace, it doesn't have holes in it and all that stuff. So i advise you guys to literally go out and buy a tweezer that looks like this. I'M gon na try my best to try to plug it in from amazon. That'S where i got mine from, but i got it like over a year ago, so i'm gon na try to see if i can find this specific one. But if not, i will definitely link a couple of comparisons for you guys to check out and then the last thing you're going to need is clips. I just got these from janet. They sent me these npr, so let's move closer and start to plucking. So i usually like to do my plucking in sections. This wig already comes pre-plucked, but we're gon na do a little bit more plucking to it, because i know it may look like perfect now, but trust me when you put the wig on you're, definitely going to see a difference. We'Re going to take our tweezers and i like to pretty much start at the top of the wig and work my way down. I'M going to be doing a middle part, so whether you want to do a middle part, a side part or whatever make sure that your hair is parted in the way that you want to wear your wigs and then pluck from there. So i'm going to do something called a pinching technique and that, basically, is every single time. I pluck. I want to make sure that i'm pinching the hair and pulling it back, because that just shows the true hairline of the wig, because when you wear your wigs, you usually don't wear it like super messy, like this usually go in with a hot comb. Go in with some spray, whether it's got to be sebastian, shape or anything like that, and you usually spray it and then hot comb, your hair backwards. So, every single time you pluck, you want to make sure you're either pulling the hair back or pinching it so that you see like what the real true hairline looks like, and i pluck in three different stages. So the first stage is plucking to where i'm getting the front of the hairline, not as uniform. You can mainly see it more so on the side of the wig, and you guys can see that down here. The hair is way more uniform. So it looks like it's actually like going in a straight line. We don't want that. So i first i'm gon na go in with just plucking, very gently just to make sure that the front of the hairline doesn't look as uniform. There'S really no specific way of doing this, just make sure that you're doing light plucks slowly doing your tweezers like so that's literally all i'm doing every single time i take away, i'm not a hair, i'm just lightly moving my tweezer up and down like so so Do a little bit here a little bit here a little bit in these areas and here take the clip away and comb it back. It should only be a light plucking. So the next thing i'm gon na do is do a slight parting, so i'm only gon na part about a millimeter of hair and i'm gon na go all the way to the other side of that middle part. And now we're going to do the same thing and clip the hair back and with this i only go back about four rows, because i want the hairline to look as natural as possible, so we're going to do the same type of movement, i'm just going to Take my tweezers do small little plucking motions and do the same thing of like we did in the front, i'm going to take the tweezers and do a little bit of light plucking all throughout the hairline, and now that i do my plucking this way, especially using This tweezer, the reason i like it so much is because i feel like it gets a lot of hair out all at once, rather with the other tweezer number one, it always ripped my lace, that's for starters and number two. I felt like it made the plucking process so much longer, while with this tool i feel like it gets so much hair out at the same time, and you literally can just get an entire hairline done in a matter of like 10 minutes. So that's all the plucking imma do for that section, oh and then i'm just gon na comb it back see, we've barely done anything and we're already seeing improvements. I'M gon na take another milliliter worth of hair and do the same thing now we're on row two. So the same thing light plucking just a little bit and make sure that your hand is always moving. You never want to stay in one spot. That was always my problem before is the fact that i was always stay like in one spot. When i was plucking. That'S how you create bald spots so when you're plucking just make sure that you're doing it all in, like one motion and your hand, is always moving and i'm going to part the hair one more time, and this is going to be it and then we're going To go in for our second phase of plucking, and this is what the hairline looks like right now and now we're going to go on to our second phase of how i like to pluck my frontal. So now we are in our second phase of plucking, and this is what the hairline looks like from the first stage. You guys can see that it looks. Okay, like it doesn't look bad at all, but we're just going to go in a little bit more and with this face is how it looks the most natural. So i'm just going to pull back the hair like so, and i'm actually going to use my hand for this part, i'm going to take the tweezer and notice how, in the front it kind of looks like the hair is like bunched up in clusters, i'm going To lay it flat and i'm just going to start to lightly pluck you do not need a lot of pressure at all and, as you guys can see, it's only look more and more and more natural. So now i'm going to move on to this side. This side is done. We don't need to do anything else to that. Moving on to this side, i'm just going to do a little bit going diagonal. What this portion of the plucking is more so just doing it in a diagonal doing it in diagonal format, because, like i said every single time, you move the frontal um. You naturally would just move your frontal back and forth like this anyway, even if you haven't hot combed it or anything, so we're going to do the same thing when it comes to plucking. So i'm going to take this section and i'm going to go diagonal. You can see that i have to do a little bit of plucking right in this area the front not so much, i'm more so just going to go in a diagonal more so right in here. So i'm just going to pluck back here just a little bit here, plug a little bit in the front like i said the lightest pressure ever because with this tool it takes away so much hair at once. You don't need a lot of pressure. I'M gon na comb it back just to see what it's looking like and just from that light plucking you can see that it's really starting to look like a hairline. That'S all we needed look how natural this hairline is. Looking, it's all about the natural honey. The natural is the way you guys can see that i have to go a little bit more in here in the back here on the side and also in the front of this area. So i'm just going to pull the hair and pluck away. Can you guys see how natural the hairline looks now if i go either way this way that way, which way it looks so natural, that's all the plucking we're going to need. We don't need to do any more plucking because we don't want to have any balding going on. So i'm literally showing you guys all of the plucking that we did and that's how natural looks so just wait until i install this and you guys will really be able to see how it looks when i do it you'll see that the way i do my Plucky now just looks so good, like look at that. That'S how it's going to look when i do my hot comb, so i'm just going to go ahead and do the other side off camera, and this video is mostly going to be broken up into three parts. Obviously me teaching you guys how to do the plucking, i'm also going to style it on camera and then the last part is going to be me installing. So i'm just going to go ahead and finish off the other side of this plucking and i will come back to do the styling side of the wig so now we're moving on to removing the excess lace glue from our lace. This is just another eyelash tweezer. I will try to link it down below. I got this one from amazon as well, but the trick is just using eyelash tweezers for everything, literally that comes to lace because it never rips your lace like ever. All i'm doing is just i went ahead and removed. My wig and i immediately always take off my lace glue right after i take off my wig the longer you let the lace glue sit on your lace, the harder it will be for it to be removed with the eyelash tweezer. So i recommend for you to do it directly after you take off your wigs because you have a better result of plucking it off. It literally comes right off, no worries, no problems. Now i'm going to be removing the excess lace glue from my forehead, i'm using something as simple as make a ruler wipes from kiss they are their aloe makeup, remover wipes for some reason something in this product. Something in these wipes just makes it so that the lace glue just comes right up from my forehead. I never have any problems. I never really use any of the removers from any of these companies. I always just use a makeup remover white from kiss, because it literally comes right up whether it's a kiss product, whether it's another product, any lace glue i have in my forehead. I use these wipes. It literally removes now i'm just going to go ahead to do the portion of me installing my wig. I will be talking through this part on camera, so that is pretty much it you guys. I will see you in 2.5 seconds. Okay, you guys. So i just went ahead and marked the front of my hairline to know where i'm gon na be putting the lace frontal. So i'm going to be using lace glue to apply my wig today and i'm going to be using the original kiss. All mighty bond lace. Glue now i know um from the last waterproof video you guys are kind of like struggling um finding this actual glue. I got this from my nearest beauty, supply store and then, of course, when i went to kids headquarters, they gave me a ton of um, newer products, samples and things like that. So i have a ton of these just laying around my house and what i think i'm going to do is i'm going to do a giveaway i'm going to be giving away about five of these it's the glue as well as the remover. I don't know where the actual package is to show you guys what i mean, but it's just literally the lace glue and the remover, and i'm thinking that i want to give away five of these, because you guys again were kind of struggling trying to find it. Some of you had any blue supply store. Some of you didn't so just to make all matters better. I'M just going to be doing a giveaway. The giveaway is going to be very simple. All i ask you guys to do is just subscribe to me on youtube. As well as follow me on instagram redferry, as well as follow kiss almighty bond almighty bond on instagram as well, and when you guys have done all three just go ahead and comment down below done so that i know, and it will be five winners. So since today's thursday, i'm gon na have the giveaway go for about a week, so obviously, next week, thursday i'll be dropping another video and i will announce the five winners, that's going to be winning in that video. So, like i said, i already went ahead and marked the front of my forehead where i'm going to be placing the glue, but i know in my waterproof video i showed you guys the newer version of this. It'S just a different applicator, but it's the same formula. So just going to go ahead and use this. I'Ve learned with this product to just use a little bit and i like to put it in dots. So i'm only going to focus on the front and i'm thinking that i'm going to do two layers. So i'm going to go ahead and fast forward through that part. So now i'm just going to work on one side than the other side and you guys have seen me do installs so many times on my channel. So it's the same thing. I just go ahead and use the kiss almighty bond lace glue, apply that down and when i feel like i've put enough lace glue, i always go in and do a few sprays of the got to be spray. Then i'll just go ahead and just wrap it down with an elastic band, and then i will come back when everything is beneath, though so chef up, club truck gg, so so trivial, so, okay, so that pretty much concludes the entire tutorial. I hope you guys really enjoyed if you guys want to enter into the giveaway subscribe to my channel on youtube. Follow me as well as almighty, barn, kiss glue on instagram. My instagram is redferry and just comment down below done and again it will be five winners and we'll be having the giveaway go on for a week until next week, thursday. So if you guys enjoyed this tutorial, you learned something new. You guys know i'm always trying to come up with different things: different techniques and all that stuff when it comes to glue or glue yeah, even that when it comes to finding the best lace glue when it comes to plucking your front, toes perfecting your wigs and Things of that nature, let me know if you guys, really enjoyed this video and it was really informative to you by thumbs up this video as well as make sure you guys subscribe to my channel, and i can't wait to see you guys in my next one. Bye guys, you

Comments
Aurianna Mi'Chele: DONE DONE HUUUN! You're the reason I even considered wearing wigs, frontals, and closures! I'm definitely a novice at this, so this would be awesome to WIN!♀️
Krafty Kay Slimes: Done everything ✅ I love the highlights on this hair, so cute
Barefoot Contessa: Your content is always the install came out beautiful.
Maiden Maddox: I swear your videos are always long but something about your vibe literally makes me watch everything. I usually skip through but idk. You are amazing and I love your growth.
Chill. naay: Done everything ✅ this might just be my favorite color way those highlights give the unit so much definition and volume ❤️
Latrele B: I really needed this. My plucking sucks lol so glad you went into detail!
Sha'Nequa Hull: Done. You are freaking amazing. I started watching you when I had cut my hair off. I needed inspiration and you gave it to me
Emeth: Done and must I say I love that wig. Beautifully done my child. Yes, I can say my child cause I am 65 years old. I love the idea about the eyelash tweezers.
Dee2deeLuv: Done✅ I ordered those tweezers too because I’m always putting a hole some where in my lace. Thanks for the tip.
Aqilah Bruen: Definitely need a tutorial on how you colored this wig sis I just love it!!
OHEMAA: I needed this because I always end up with bald spots
Kyndra Settle: Everything done! Fingers crossed. That wig is gorgeous
Shelli Hanserd: Wow. Girl you are amazing! Thank you for the detail. You are the master. I’m just like I can’t say enough about how talented you are. I appreciate you.
Liz bth: Thank you for showing the actual movement I was plucking and it kept sliding the hair through my tweezers. Thee most detailed video I've seen so far
Lela K West: Done! ❤️ ♀️ Love your nails and the installation turned out beautifully
Janisha Black: Done, boo!! Love watching your channel. Always informative and always slayed
Hawaiin Flower: (ALL DONE ✅ ) Hey girl I love your energy and keep being you. You are just beautiful to me. Love your thickness lol no homo I’ve never entered in a giveaway before so I thought why not. Because of you I have confidence to wear lace front wigs.
Crowned QueenKayy: this video is exactly what I needed, wig just came in too!!! & just followed you & Kiss on IG as well!
Ashley R. Williams: Omg so beautiful, love the install
Stephany Casanova: wow I never knew about going diagonal I def needed this tutorial!! and done for giveaway xo
Candiblue: Gurl this is just what I need I cannot puck a wig if my life depends on it!!
Autumn: Done ❤️. Can’t wait to try your plucking technique on my next wig
X.Shayoncé: Done ✅ ✅✅ this is one of my favorite colors from you ❣️I’ve been a fairy ♀️ for yearssss now and you always blow my mind with your creativity . Such an inspiration.
esther xavier: love this wig and you always teach step by step love that about you
TheCRYSTALLURE: Definitely entered! I’ve never been into glues before but knowing how my last install literally lifted when I woke up & my hair was done for my dance show at schoolI need a do-over!! @ohsofancy_leksei good luck to everyone!
SeamlessB: Exactly what i needed. Thank you!
Nicole Johns: Done!! the hair... and those nails. So inspiring...Love your work ❤️❤️
Highjuju: Done!!! Been wanting to try the lace glue ❤️
Nene So Crazy: Can't wait to start doing Hair tutorials so I can become just as inspiring as you...#LoyalFairy
Barbara Ms Barbell Barbie Lee: New sub and new to wigs!! Thanks for doing this! I entered the giveaway!
Michelle Matthias: I'm following all of you my IG is @shellysexotichair I love how you simplified the plucking in this video
Ladii Tii 👸🏾: Love your work! Everything is done.
Shannette Matthews: Wow!! Thank you for all the tips hunni
Tiy Peterkin: This looks amazing on you!!!
Beautifulheart82: #Done I love this look in you, it's so simple a chic! I've been following for years @kaycierock
Naturally Nikki_x: You are legit my favorite YouTuber to watch, you are so talented and make wigs the most realistic Iv ever seen ❤️ I completed all of the steps and would be so grateful to win IG:naturallynikki_x
Kool Klawz TaShyra: Done! Thanks for the chance and the great plucking and tweezer tips!
Armani P: Loved how detailed this video was. Done
Gina: It’s at my local beauty supply thank goodness I can’t wait to try it!!!
Eli Joyner: Done! Thank you for this tutorial. It was very helpful.
Jazzy Jazz 1: I love this hair and the pop of color in the front.
tenice0526: Done sis this install is flawless you giving scalp realness yassss
Mrs. T marie Foskey: Hands down thee best youtuber ever you have taught me so much thanks for always sharing everything. I appreciate you
Niya: Done also I love your videos; I’m a beginner so you help me out so much❤️ (IG: Glamorousnailsbyniyah)
Kenisha Hanley: Done. Plucking is so hard for me so thank you for this video. I just need to pratice and take my time.
Mariah Tolbert: Done! This wig is gorgeous
China Norman: Really love your videos❤️ always so informative
Jalin W: Done everything! I love your hair !!!
TIFFANY: Yesss Queen that natural highlight is beautiful. Much Love.
Karin W: Hairline plucked to perfection.
Ana: Done ✅ I love watching your videos you always slay ♀️
BlessedIsShe 2: Done! Love how you apply you wigs! my ig is Extremelyblessed_k
DT GANG: Completed everything
Niko's Diary: I swear I’ve been watching u for mad long and can’t wait to use my skills that you taught me from looking at your channel on a wig you are bomb I love you
Arianne Decou: All done my girl!!! Good luck you guys!!
SP: Done. Definitely going back to this video when my wig comes in
MzMishaLa: Done ✅✅✅ I love this install ❤️
SimplyMyLife: I already had 2/3 done for years but done ❤️
Meggans POETICAL Breeze: Done... Loving the color on the unit... Would love to know how you achieved that color or was it sent to you already colored...
NIKKI NIKKI NIKKI: This is right on time working on a wig now
TheeMillennial Diva: yesssss for the master class because i'm still so lost on how to do this!
Jerquita Jackson: Completed everything also I think that u are so bomb and I really look up to u
Arame Iman: You’re a blessing thank you for this
LaTonya Clark: Completed. Done. I’m so glad you’re using this glue again. Because I surely want to try it.
La'Joia Creary: Yasssss girl you slayedddd this hairrrr as always Done all the steps ig~ @joiaaa21
Highjuju: You went from popping blue to laid wig.. POPPIN TO POPPIN ... I love it
P Michelle: Done! Thank you for this tutorial!!
Chaquila Townsend: I already follow you on Instagram and I have been subscribed to your channel for a while now, I also purchased kiss almighty bond because of your video!! Your super awesome and I love your videos!
Jordan Evans: Done love the hair and color on you...soo pretty
Sierra Griffith: I think my prayers have just been answered thank you Queen
Turnns: Girl you’re just absolutely gorgeous you better get it
shakira brailsford: Done ♀️, thanks for always having amazing videos
Myra Edwards: This is so sweet of you. I gave ro mention, I love this hair color.
sis2koul: Done, pretty easy since I already follow you ❤️❤️
Syria Norman: Done ! ig: @_savavesyyyy You slayyed this look !
Mone Simon: Just looked on my ig I been following u and kiss all mighty bond and of course I'm subscribed to your channel I BOUGHT ALL MIGHTY BOND GLUE BECAUSE OF YOUR VIDEO ITS AN AMAZING LACE FRONT GLUE THAT DRYS SUPER FAST WITH A AMAZING HOLD U CAN'T BEST THAT
Robbie Hilt: Done And I love that unit it’s beautiful hair
TOMMBWOYTy: Doneeeee!!!!!! I learned from you how to pluck my lace because, mines use to be tf bald okay!
voxlo: Done! Tutorial was spot on
Denisha McBride: Done! I love your video’s, your such a inspiration to me, keep up the great work MY IG denisha.mcbride.7
Mia Wilson: Done , I love this video.... super helpful!!!
UnapologeticDee: Done! completed everything you said
cheryl brown: Done love the wig colors look great on you
Kea: When you go this method to lay down your wig how long does it last ?
Mrs. NitaJ: Beautifully Done !!!
Nannii: Done I love how natural n flat it looked my wigs sometimes like a lil lumpy cuz I braid fat braids underneath n my hair is thick maybe I should cut my hair
Ali B: Im lovinggg this hair!
dhakidslayTV: loveeee your videos & work! i completed the giveaway rules! cant wait❤️ IG @eyeofthe_kenz
Cayla Gabrielle: Done KEEP SHINNING QUEEN ✨
Lijanel: Completed everything I live in Europe & before the product comes to us it will take years so I hope that I will win
Yeye Aundrea: Everything is done ❤️
Tete Williams: I did everything ❤️.
Alexandria Oscar: Done! I love your tutorials!
Touched By Woo: That glue sounds great. Thanks for the video.
The Do N Do-Little: Done. My mom hooked me on you. Love it.
Tamari Lloyd: I did everything. Love you
Kyyyng J: Beautiful and those lashes are
Eldrine Jackson: Done!! Love your videos and techniques
Baby Gurl: Done..... love the color of the hair ❤️❤️❤️
Tawana Boyd: Done sis im kinda new to the lace glue life I watched the video with you using the easy applicator and i tried looking for it in like all the beauty supply store's in my town drove me nuts looking for it and it's nowhere sis i need help