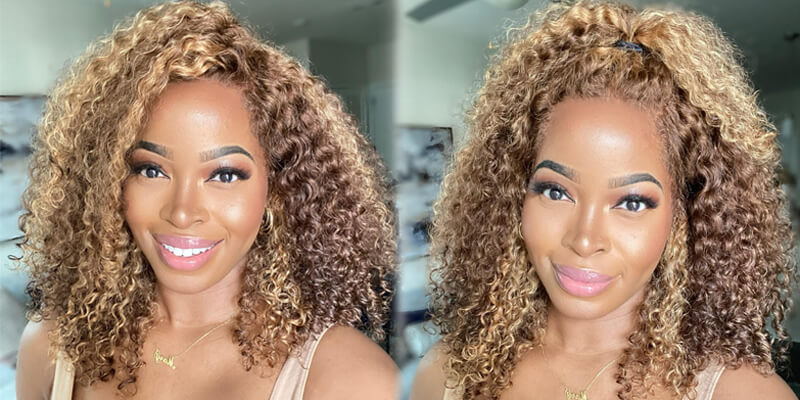
Beginner Friendly Wig | No Plucking Needed Ft. Unice Hair
- Posted on 01 May, 2022
- Closure Wig
- By Anonymous
***Watch in HD/1080p ***
Hey Friendss
Using Special Code To Get 10% OFF:myunice
hair in the video: https://bit.ly/38LNCki
Length: 20 inches
Color: Natural Brown
Construction: 13x4 HD Lace Frontal
Density: 150%
HOT #UNice 50% OFF: https://bit.ly/3MOvYLl
Best Invisible HD lace Wigs : https://bit.ly/3sybGhN
Affordable V Part wig: https://bit.ly/3KCJG2p
Wear and Go Head band wig: https://bit.ly/3vGs9Cc
#unicehair #unicehdlace #unice
I wanted to provide an install video where I did not pluck anything on the hairline so you all could see what a wig looks like before I do amy work to it. This wig in particular is a great beginner wig. It comes pre-plucked and can be installed after bleaching with no additional work. The lace on this wig is very good hd lace. Very undetectable. They do have a closure version of this wig, which I do prefer, that comes plucked as well. Check out the video I did for that.
Clean HD Lace Closure Wig Install No Baby Hairs | AMAZON UNICE Hair
Hair Details:
Link to wig in the video: https://www.unice.com/unice-straight-h...
Length: 20 inches
Color: Natural Brown
Construction: 13x4 HD Lace Frontal
Density: 150%
Make sure to subscribe and like this video! Also add me on social media and my follow my Amazon storefront ✨
Shop my wig collection SHOPALESHAB
Website link : https://shopaleshab.com
Make sure to sign up for my email list to be the first to know about new arrivals and when I restock.
Instagram/TikTok : @shopaleshab
https://www.amazon.com/shop/influencer...
DISCLAIMER:
Some links may be affiliate links where I receive a small commission from you clicking on the link and purchasing anything I have listed. No purchase is necessary.
Email: [email protected] for sponsorships, collaborations, and business opportunities.
Connect With Me!
Instagram @lesshhab
TikTok @lesshhab
About Me:
From: Virginia
Age: 23
Camera: Canon g7x
Sign: Gemini
What'S up y'all welcome back to my channel if you're new, here girl uh, if you're not then welcome back today's video is going to be on this hair from you, nice hair and i wanted to give y'all a beginner wig install. So that's what we're going to do today, holding off on this wig for a while, because i'm just so backed up, but i want to go ahead and get into this beginner wig install this wig has not been plucked by me. The only thing that i did to this wig is i bleached it. It came straight out the box like this. It comes pre-plucked. This is hd lace. If y'all don't remember the video i did with the closure. Hd lace unit clean install from you, nice hair, definitely go check that out not right now but later on in the video, because this is basically the full frontal version of that unit. All the information about this hair will be in the description box down below we're. Not going to be doing the ball cap method because, like i said i want this to be very beginner friendly um, i feel like a ball cap is kind of like it's a lot of steps. It'S something that you have to learn how to do plus. Add the wig on and all this that third, let's go ahead and just do the ball cap, so i went ahead and slipped my edges back and i put the wig on and i just pushed my wig cap slightly a little bit right behind my edges with This method you're not going to be protecting the edges all the way, but i mean it's really just up to you and what you want to do this little bit of hair is not going to cause no damage if you take it off the correct way. This is what we have. I want to show you on the inside of the way, because i had someone ask me like how do you cut the ear tabs out on these amazon wigs because they are not actually full frontals they're shaped a little bit differently. This video will be on the longer side, but this is the inside of the wig. You see it's not actually a full frontal. It comes up on the sides here, but it goes down in the middle. This is a 13x4. This wig, i really. I really mess with you. Nice hair. Their hair quality is good. They really been rebranded. I'Ve been talking about that um. I don't get on here and just talk y'all like what i say is what i mean. I really hate when, like people come in my comments and they say like oh well, are you an influencer? Did you get paid to promote this hair? Did they send it to you? It does not make a difference over here because at the end of the day, whether i bought it or, if i didn't buy it, i'm going to tell y'all 100 truth if the hair is trash is trash. I'Ve said that before we're going to pull the wig down in front of the cap, you do not want the cap showing considering that this is hd lace. The only time i actually say to use a cap - that's not a ball cap that is, okay is if the hairline is fairly dense. If you have one of those super super plucked hair lines, you're going to see the cap through, but i don't recommend that, but my hairline starts right in front of the cap because we did push the cap back. So remember that this is the hairline. It looks very natural um, you know i normally would pluck a little bit more, but this is great for a beginner. I think that it still looks really good, and this is this side, i'm just going to prep the hair. So what i'm going to do is i'm going to comb all the hair back. You want the hair to be out of your face as much as possible. I'M going to take my sebastian shaper hairspray. This hairspray doesn't get hard. It'S just like a flexible hairspray. That'S why i like to use it and then i'm going in with my hot comb just to comb the hairs back and out of the way. So when i'm installing it it's not in my face, so we have that stuff done. I usually like to cut my lace before i lay it down, so that's what i'm going to do, but i'm going to show y'all how to cut the ear tabs out before i do that with this wig. You can see here that the wig cap starts right here, the actual construction of the machine wefted unit. I pull my ear out of that and you want to cut this to fit and you want to part out the hair so you're not actually making a mess when you cut so just part around your ear for a guideline. So now that i have this, this is where i'm going to cut it right in this part, and i'm just going to cut straight up and cut all of the lace off you don't want to cut into the actual wig. So once you've done that you literally just pull your ear out and you have an ear tab and you'll, just repeat the same thing for the other side: okay, so now that we've done that we're going to go ahead and cut the lace to the actual wig, I prefer to cut my lace first, just because i can see how much lace i have a lot of times. You will have excess glue when you don't cut it. The reason for me cutting it is so i can see where i'm sitting it at in the glue - and i won't have so much extra and you want to cut as close to the hairline as possible, leave as much lace cut off as possible. This is what it looks like after you've cut the lace off. I would go in and cut out this middle part, because my hairline does not stop all the way down there. I have a lower hairline, so i usually do not leave all of this here, because it's sitting on my forehead, if you cut off the sides, to match this low hairline by just pulling your wig back, seem like it's too small and that's not the case. It'S because your hairline, it does not match the actual hairline on the wig. That'S just something to pay attention to. So i like to pull my wig down, and we do have clips in here too guys. Y'All can choose to use them. That'Ll help like hold your wig in place, so i'm gon na go ahead and clip them down just to hold my wig in place. As i'm doing this, and i'm sticking it underneath my wig cap here and at first glance, it has taken up all of my forehead space. So that's what i mean by me having a lower hairline. It doesn't match my hairline, so it is going to mess with the plucking because they don't pluck beyond this point now, i'm just matching up to see where my hairline starts at and i'm going to cut in that parting space. As you can see, the middle is a little bit denser because i cut beyond that pre-plugged area, but that's okay. I just wanted y'all to see that you know when you, you want to be matching your hairline when you're applying a frontal, you don't want to just apply it based off of the hairline that they give you, because it will not match yours and you would be Sitting on your forehead, okay - and we don't want that - we want it to match our hairline. I use the 99 alcohol i'm just going in and cleaning right where you want to apply your glue. You want to clean the skin of any oils. Then i go in with my bowl hold skin protect. This is not required. It'S just a stuff that i like this, helps to make your installs last a little longer when you're doing glue, because it blocks against sweat and oils and stuff. It kind of creates this barrier right where you clean the your skin at going in with my bow hold, and i'm going to be doing just one layer, because i don't wear my wigs that long. But if you are somebody who plans on wearing their wig for a while, you want to apply two to three layers depending on. If you are a heavy sweater or not well really, three to four layers. Excuse me, depending on, if you sweat a lot or not now just take this black stick and spread this. You can use the end of your comb, it doesn't really matter and you want to make sure to really get the sides good, because the sides are the first thing that lift we're going to let it air dry until it turns clear. So let's go ahead and pull the wig down and you want to sit it right where that glue ends. So my glue ends right there and i'm just going to take the back side of my comb and press that into the lace. So when you're sectioning out baby hairs, you want to section right in the front where the thinnest area is um, because this is not plucked as much as i usually do. I may go in and pluck some part out the thinnest area of that lace. I always part out the entire front and then whatever i don't use, i put back like i brush back when i'm done so after that we're going to go in with some the black, even lace, spray and we're going to spray right in between where the baby Hairs are in this space here, and this is just for some added security, so once i've done that, i go in and just tap it in a little bit and then we're going to take our elastic band and put our elastic band. You want to put it right on top of the lace right on top now that we got that down, i'm going to go in with the hair dryer on the warm setting first and then the cool setting, the warm heat warms up the glue and the spray And kind of makes it tacky and then the cool setting cools it down and helps it to stick better. So that's why i'm doing it with warm and then cold we're just going to take the curling iron and pop some loose curls in there. Nothing too fancy just enough to have some body going and i really don't have time but y'all know i like to cut my layers. I don't have time to do like some super great nice long layers, so i'm just going to cut like some quick layers. So now the curls are done. Like i said i just wanted to do some loose curls, i'm gon na go ahead and comb these out. I'M just gon na finger comb them, okay, because it's always the layers for me. One thing about this channel: we gon na do some layers over here, okay and this time i did long layers. Okay, so now that the baby hairs are done, i'm just gon na go in with my lace, tint and just spray a little bit. It'S really not necessary, it's totally up to you, it's up to you, you can use lacing or you can use makeup. So the last thing that i like to do is go in with my wax stick and we're going to just apply that directly to the hairline and i like to go in with my sebastian shaper. This is literally my favorite thing ever. I love that hairspray and just go in on the hairline and we're just going to be hot combing that back so it's super super defined i like for usually when i pluck a wig i like for the plucking to show so the hot comb kind of enhances That i definitely do recommend this wig you're not going to get that super pre-plucked hairline feel like that's something that you learn how to do over time, but for this to be an affordable unit, that's already pre-plugged, to an extent. I think it's pretty good for the money, so i just wanted to say the only cons that i really would say about this wig is that i mean if you have a hairline like me and your size a little bit lower um. You do have to be cautious of cutting out that pre-plug part. What i usually do is i go in behind the pre-plug part, especially in the middle, and i usually will pluck out extra hairs because they usually don't pluck that section out that far, but the size are totally fine. So i just would, like you know, keep in mind that the metal may be dense, how it is here. It could definitely use some plucking. I would go in and pluck it again other than that this wig is very nice for a beginner. If your hairline is like how the wig was made, you would totally have no issues with the plucking, because it'll be completely done for you. If you are looking for something like that, something a little bit easier, something that you don't have to do. A lot of work with, i feel like a lot of times, a lot of the reason why these wigs look so good is because the people who installing them really make them look good like if you know how to plug you're, not a bleach. You can really make any type of wig look bomb, so i think part of the issue with that a lot of people have is that influencers make the wigs look really good. But then, when you get it, it's not the same, because you don't have these skills or you don't have the skills or you know the things necessary to get your weight to look like that, all right, y'all, sorry for the shirt change, but i wanted to just Come back and show y'all: this is with like some additional plucking in the front. Now, if your hairline was like the wig that was sent in the box, it would look like this in the end, but because my hairline is not like that. It does not look like that, so um i just went in and did the additional plucking in the middle just so it would match the sides. I really did not do a whole lot of plucking just enough to match the rest of the wig. I just wanted to show y'all that this is the end result of what it would look like if your hairline matched the wig. So i had to go in and do an extra work, which i always do because of my crazy hairline, really not that many wigs on amazon. That complex, very well be honest with you. I have clients who will give me wigs from amazon and i have to pluck the living out of them because they are so full. The hairlines are so dense. Usually so, when you find a wig on amazon, that's plucked pretty good. You don't have to do a whole lot of work to it. It'S definitely a hidden gem. Thank you all so much for watching my video and i'll see you in my next one. You


Comments
Slaylicia Beauty: Alesha about to make us go spend money again