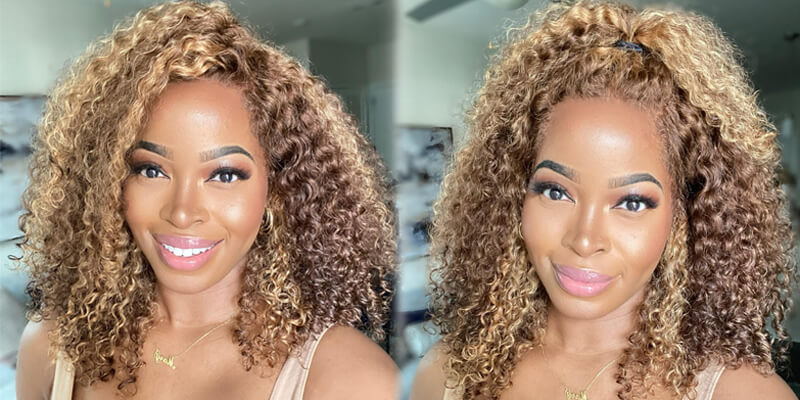
Cutting 13X5 Lace Closure | Bleaching Lace | Plucking | Hot Iron & Styling #Bnvshopcom
- Posted on 07 March, 2022
- Closure Wig
- By Anonymous
Hair Tutorial: see the process of revamping this lace wig.
13x5 frontal closure.
Body wave.
Bleaching the lace, plucking, hot iron and styling.
#BNVShopdotcom #HumanHairWig
Contact us: [email protected]
@PrudyFairyin : https://youtube.com/channel/UC3rDVcVd6...
Hey guys blessing here, how are you all doing so? I'M on my way to amsterdam to have my wig installed my new week and i can't wait to show you guys the end results that come along. So i ended up at this local ghanaian hair salon, and this ghanaian lady told me that the process would cost five euros. I was expecting it to be more expensive, so i was pleasantly surprised. Although the entire process took about a minute - and it went very fast - so i was like - oh madam - you should have actually charged me two euros anyway. If you want to cut your wig lace, make sure you start right from the center of or let me say, the middle of your forehead. You cut the lace from the front and then work your way down to your ear. Don'T rush don't rush, so i think she did a good job uh. She was quite careful and neat with it anyway, just in case you're wondering this is a 10 and 12 inch body wave wig, which has a 13 by 5 frontal lace, closure, and you probably already know that we have three kinds of closure. Well, i think we have four. In total, we have the full lace that goes over the entire circumference of your head. We also have the 4x4 and the 5x5, which is a little wider than the 4x4, but, like i said already, this is 13x4 and this is virgin hair, which means that it's the best quality head, that you can get it's her donated by one donor, and it Has 200 percent density, which signifies the fullness of the hair? Now, let's go over the lace, bleaching process, all right, so for this lace, bleaching process, we are going to be using products from shoreline and when you're mixing the powder with the peroxide, please make sure that you gradually pour the liquid peroxide into the powder, because you Don'T want your mixture to be too watery. Remember that we are bleaching only the lace, so we are only bleaching the roots like just the base of the hair. We are not bleaching the hair itself. We are bleaching the lace to tone down the color. Just a little bit and the reason i'm doing that is that the lace comes in, i believe, color number four, whereas lace number two would match my skin tone perfectly. So what we want to achieve here is a color that is as close to number two as possible, but before we continue, we should keep in mind that there is always the risk or the possibility of the bleach going through the lace right into your hair. So in case that happens, we need to be sure that our hair can resist the strength of the bleaching mixture, and that is why we need to do a test patch. So for that we cut off a very small lock of the hair and we apply the bleach directly on top of it and just wrap it up in aluminium foil, we'll leave it up for about 15 to 20 minutes and see what happens to it. If you have bad quality hair, the hair is going to be damaged after 15 minutes. It'S just going to melt away. It'S just going to discolor it's just like it's not going to be worth it. I think it's just going to get dry and really really shabby, but we have 100 good quality hair here. So i was very confident that the test patch would come out well, which it did so now it's time to bleach our lace as you can see here. I already said that before that, the consistency of the mixture has to be as thick as possible and you're also going to use a knife to spread the mixture over your lace. It'S just going to be like spreading butter over bread, which is quite satisfying to watch, but you really need to do this gently and carefully to avoid mistakes or to avoid the bleach going over into your hair. So don't apply pressure. Do it really really lightly and softly for the best results, so once you're done you're going to wrap the wig again in aluminium, foil and the reason for that is it's going to facilitate the speed at which the lace bleaches. So, after about 15 to 20 minutes, you wash off everything with a neutralizing shampoo. We are also using the shampoo from shoreline, and one very particular thing that i noticed about this week. Like i told you, it's high high quality wig is that this wig has minimal shedding. We have washed and brushed this week, and this is the only tiny little patch of hair that came off of this wig so again, 100 guaranteed human hair, top-notch quality, where your density is retained, no matter what you do with or to the hair. So now we are going to move on to the next stage of this hair styling, and that is to pluck the front of the hair, and the reason this stage is really really crucial in this entire process. Is that it gives you a wig that natural human look you know so many times people buy wigs and the whole front like the density is equal overall on top of your head, and that is not the case with your own head, your own real head, your Hair is not evenly distributed all over your head. If that makes sense, so you don't expect to wear a wig where the hair in front is as thick and as much as the hair behind or at the back. So what we are going to be doing now is to pluck the entire front before we go ahead to cut out the baby hair. Now this is the actual plucking stage of this hair, but it is very important for you not to dwell on one spot at a time. Try to spread out go from left to right, plucking, don't do it too much. Otherwise, you stand the risk of having bold spots across the top of your wig, and that is something you definitely don't want to have so once you're done plucking and the plucking is successful. The next thing you want to do is use a curling iron. To give your head, those awesome celebrity bangs. Unfortunately, i ran out of memory, so i couldn't record the part where the hair was fully styled and ready to be worn. However, i took a picture of the hair just held back, so you can't really see much, but i can assure you that this hair is amazing. It looks so so so natural super soft and it's just good hair. I'M not going to end this video without thanking my skillful stylist, who did an amazing job on this hair right from scratch. To finish, her name is pretty fairing and you can find her on instagram facebook and youtube for all things, hair and her tips and everything else in between. Lastly, i want to thank you for watching this video. I hope you enjoyed it if you did go ahead and give it a thumbs up like and follow this facebook page in case you're, watching right now on facebook. But if you stumbled upon this, video on youtube do not hesitate to subscribe to this channel and turn on the bell icon so that you get notified whenever we go live or whenever we upload a new video. And if you need more information about this week or how to purchase it or you just have other questions, you will find our contact details in the description box down below thanks again for watching, and i will catch you guys on my next one. Bye,


Comments
Prudy Fairyin: Waooo I enjoyed working with this hair,the quality is top notch. Pls stick with your supplier. ✌️
Cody C: p♥r♥o♥m♥o♥s♥m