‼️‼️Must Have 4X4 Amazon Closure Wig | Ft Midulla Hair | Amazon Prime Wig
- Posted on 16 March, 2022
- Closure Wig
- By Anonymous
Hey babes.
Watch this video to see how I install this affordable amazon closure.
Comment. Like. Subscribe. ❤️❤️
Link for wig:
https://www.amazon.com/gp/aw/d/B08XQJP...
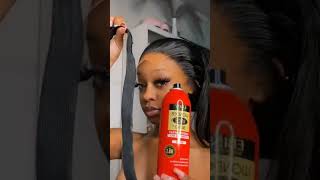
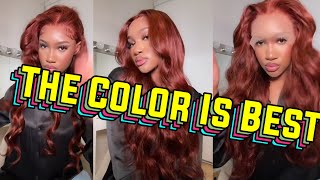
Hey babes welcome back and today i will be installing a 4x4 closure wig uh by the company medulla. It is a curly unit, 26 inches and i'm excited to put this on. I'M excited for some wavy hair, it's nice outside! So, let's, let's get it, i'm going to start. Of course, i'm just going to bleach that closure. You guys know i'm heavy-handed in the back, because those knots are a little bit harder and when you work your way up to the front, be as gentle as possible. I let my bleach sit on for about 25 minutes and i put the bag over top, so that makes everything speed up a little bit quicker and then, after the 25 minutes are over, i just go and rinse everything out and then i add my purple shampoo And once all the shampoo and bleach has been rinsed out, i just go ahead and begin my plugging process. I don't blow dry because this is a curly unit. It'S going to be curly anyways, so i just let it stay wet and that honestly makes it easier for when i begin plugging, as you can see, the right side is already plugged, because i already did it and i just thought for the sake of this video. I would just film the other side, but if you guys want a more in detail description of how i do everything i do have a previous video, where i um go into detail with my bleaching and my plugging process. So i had an original recording for this. Already from the previous day, but um i didn't like it, it was getting very much sloppy and i wasn't about to put that out there on the internet, so um, i'm just re-recording everything uh from beginning to end. So first i am marking my forehead with a brown just a lip liner, nothing too serious, and this is only so i when i put my glue on my head. I know how far down to go, but before i put anything down, i am going to go in with that alcohol and rub it all across that space. Where i'll be putting my glue, you actually want to do this step uh before you put your marks down. So don't be like me, wipe your wipe your head off first, so once everything is all clean and dry, i'm just going to go in with my ghost fun glue again, you can get this at any local hair store and i'm going to apply just a thin Layer across my forehead and i'm going to do this three times because i really like to you know lock my wig in there uh and i did go in and just wipe away those little um lip liner marks just with um some alcohol, nothing too serious and Once i am satisfied with how the glue looks, i'm just going to move my wig down and place that lace. Over top of where i apply the glue and then i'm just going to go in with my rat tail clone my right tail comb and just press everything into the skin and for that extra security, i'm just gon na go in with. I think it's called like eben, i believe, says even hair spray. Everybody is talking about this and i see why my hair, it don't move okay, so i'm just taking that spray and um spraying it along the hairline and pressing it in with my finger. I know you're not supposed to press it in with your finger because your fingers is dirty and it can add oil or whatever whatever, but it works for me. So i'm gon na keep you doing it and then i'm going to take my elastic band and tie that around my head. I leave it on there for about 15 minutes and while that band is on, i do like to go ahead and style. My hair um, just you, know any parts i want to do any oils or water that i have to add. Now is the time to do it. So that's just what i do while i let my melt melt so y'all know what time it is. I'M not gon na say it because y'all gon na get mad when i say it it's time to flatten the top. So once i hot comb, the top of my hair, i'm just going to take some mascara and use that to cover up any hairs or knots that got over bleached in my process and then i'm going to go in with some concealer. I believe i'm using the ruby kisses in the color 11. i'm trying a different color this time you guys um. I don't know why. I just wanted to try a different color, but i'm going in with that and just a little angle brush and i'm going to hit my middle part right there just to make it look a little bit more cleaner and a little bit more natural. Now i'm going in with my olive oil um hair polisher, and i'm just going to apply that all over my hair, just to give it a little bit more shine. So now, after some time has passed, i'm going to go ahead and release that elastic band and then i'm gon na go ahead and pull out baby hairs. I already have them cut because, like i said before, i recorded this a day ago and it was just sloppy and horrible, so i'm just pulling out the baby hairs that i laid down before and i'm just going to take those out and style them make sure. You'Re paying attention and never leave your hot comb next to your favorite brown lip liner, because yeah! So now i'm just taking some of that concealer i used before that ruby kisses and i'm just going to apply that to my hairline a little bit just to make it more natural um after i part my baby ears, i like to add a little bit of Concealer around the part area, and then i like to go in with some more hairspray melt that down and let that sit for a little bit once the band is off. I just take some loose and apply that to the top of the baby hairs. So we can begin to style them and um. I'M just going to repeat myself, because i'm not sure maybe some people here but um when doing your baby hairs, always use a comb or if you have that brush comb side always use the comb side. Comb side is going to get you your best results. Then you want to take that comb and just push it to where it's almost like a c-shaped and that's the shape that you're looking for, and this is going to take you a minute so don't think. Well, if you get it on like the first, try you that girl, but it is going to take you a minute to get it. You know exactly how you want it, and once i have my baby hair the way i want it, i'm just going to take baby scissors and just snip the bottom part of that baby hair off just so it's not that long tail flapping in the wind one Thing, i will say, is baby hairs are very, very easy to mess up, so don't try to force it too much, but if you get it to where it almost look, like looks like how you want it, i would just leave it because trust me. It can go zero to 100 real quick. So now i'm just going to go ahead and just brush the ends of those baby hairs out so they're not all stuck to my full head and then i'm going to undo my hair, add um any extra oils, because i'm an extra type of girl - and this Is the final look? I am so happy with this hair. It'S 26 inches curly from amazon um. It said it was 180 density, but they camping it's a little bit less than that, but nevertheless it is an amazing wig and in fact, that it came from amazon. Okay, it makes it 10 times better, so 10 out of 10 definitely recommend. Y'All have to get this about to be nice outside get some curly hair. I hope you guys enjoy, and i will see you in the next video


Comments
Nakia Nicholson: Great review! I finally decided to go ahead and try this one!
Melissa Loney: I just ordered this but I’m a bit skeptic on the density as well . Does it tangle/shed?
Sinfulli_ Ambitiousss: You did that ! Thank you for sharing, good luck on your YT journey…
N Oney: Loving it girl is this a new one that's right girl step it up you're doing a beautiful job we got to do the concord thing you did with the makeup I didn't catch all that all right talk to you soon
Aliceson Oney: Perfecttttt
Cherie Beauty Empire: Nice video girl. Was your money refunded after this review? I just got a collab on my channel too and don't know how to go about it
ExclusiveEnvy: Cute