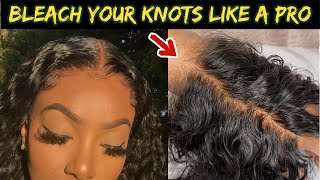
*New* How To Properly Bleach Your Knots + Tone | Beginner Friendly| Kennysweets
- Posted on 18 June, 2021
- Closure Wig
- By Anonymous
Hey Dolls!
This tutorial is how to bleach your knots perfectly everytime. This method can be used on a closure, frontal, closure wig, or frontal wig. Its very detailed and beginner friendly. I was trying to give yall the tea so you can do it at home. Comment below and let me know if this was helpful
PRODUCT DEETS IN THIS VIDEO
Prism Lites Blue Powder Lightener by Salon Care: https://amzn.to/3pv1CVn
Clairol Professional BW2 Hair Powder Lightener: https://amzn.to/3tGyLwp
Salon Care 100 Count Clear Vinyl Powdered Gloves Small: https://bit.ly/3uQ6XH2
Got2be Spray: https://amzn.to/3tJzooY
GVP Conditioning Shampoo: https://amzn.to/3sJmKJs
Black Light Blue Shampoo: https://amzn.to/32EQJri
Creme of Nature: https://amzn.to/33HHaoB
Isoplus Neutralizing Shampoo: https://amzn.to/3tFRbxe
Salon Care 40 Volume Creme Developer: https://amzn.to/3epqPKv
Pink tinting brush and bowl: https://amzn.to/2RUEMIl
Hair Wisk: https://amzn.to/3ohNbBL
Loinz Foil Sheets: https://amzn.to/3tMgX31
Rattail Comb: Local Beauty Supply Store
OR
CHECK OUR MY AMAZON STORE
KennySweets: www.amazon.com/shop/kennysweets
LET’S BE FRIENDS
Twitter: https://twitter.com/kennysweets
Instagram: https://www.instagram.com/kennysweetst...
Facebook: https://www.facebook.com/kennysweetsth...
Pintrest: https://www.pinterest.com/kennysweetst...
MY TECH
Camera: Canon T7i - https://amzn.to/3pEK8mW
Lighting: Newer - https://amzn.to/38TyihJ
WANNA SEND ME SOMETHING
KennySweets Dreamhouse
P.O. Box 292395
Lewisville, TX 75029
FOLLOW MY STORE
The Barb Life
Instagram https://www.instagram.com/thebarblife...
Facebook: https://www.facebook.com/thebarblife/
Youtube: http://www.youtube.com/c/TheBarbLife
SHOP MY STORE
CHECK OUT MORE OF MY TUTORIALS
VERY DETAILED *NEW* BALD CAP METHOD + Celebrity Secrets Revealed| KennySweets
THE ULTIMATE MELTED LACE Glueless Lace Closure Wig + SUPER EASY & BEGINNER FRIENDLY| KennySweets
**************************************************************************
For Business Inquires: [email protected]
**************************************************************************
DISCLAIMER: This description contains affiliate links, which means that if you click on one of the product links, I’ll receive a small commission. Also, yall the products sent to me for review will ALWAYS be my honest opinions and my own.
Category
How to bleach your knots on your closure best bleach knots tutorial how to make your knots look realistic lace wig how to bleach your knots like a celebrity stylist
#howtobleachknots #bleachingknotsonlacefrontal #howtoproperlybleachyourknots
Hey y'all, it's kenny here and i'm back with another video. If you are new here, make sure you hit that subscribe button. If you are returning hey and make sure you hit that notifications button, so you know when i'm dropping another video, so y'all i'm coming to y'all with this tutorial on how to basically achieve the perfect bleach knots. This is how i do it. I feel, like i'm kind of a pro at this point in doing it, and this just works for me so baby you can screenshot these products or you can click the links in the description box that i have to the products below but y'all. I swear by this method. Okay, i originally had it on my barbed life website for you to purchase, but i was like no, no, no. I want everybody to have this method so that you know how to bleach your knots perfectly feel confident in it and be able to do it at home. Do keep in mind y'all this tutorial works best for raw hair and what i mean by raw hair is like indian, hair or steam processed hair from one donor when you're working with virgin hair y'all. It'S like a totally different realm, because you're dealing with about three to five people, different hair in one closure. So you do want to be very careful because that one, you got ta monitor a lot better and it just doesn't bleach all at the same level. So this is best for raw hair, so y'all the closure i'll be using today is from my line, the barbed life, and the only reason why i use this closure is so i can show y'all exactly what you want. Your knots on your frontals and your closures to look like you want them to be small y'all, because if you get the large knots your parts are going to look white and you ain't going for that huh you're, going for scotbiana you're going for natural baby. So you want to make sure that you get small knots and then also you want the hairline to look really natural. So then, when you go to install it on yourself or your client, it's just looking good. It'S looking bomb af, okay y'all, so you want to start off by getting your foil sheet out. This actually kind of helps. Uh the bleaching process move a little bit quicker, so i'm using my got to be spray to kind of get those baby hairs out. The way last thing you want is over bleach, baby hair, so you're going to use the got to be spray to kind of pull those out the way so y'all. Now that we got our baby hairs, push all the way back, let's get into this formula, because this is key to achieving the perfectly bleached knots. Okay, so you're going to use one scoop of the clairol bw2 extra strength, then you're going to use 3 cup of the prism lights in the blue, y'all and then you're going to use one pump of this generic shimmer lights. Conditioning shampoo. I like this one because it works y'all and then you use one blue scoop the same one that you use from the clairol, with your 40 volume developer and then you gon na start mixing baby. Now, y'all people use a lot of different tools to mix their bleach. I particularly like the whisk because it makes it so much easier to stir on top of that, it makes your mixture, in my opinion, a lot more even and then on top of that y'all. I feel like you, can see how consistent and see the consistency of your mixture a lot sooner. You can see if it's too thick or you can see if it's too runny. So i really like this whisk so as y'all can see, the consistency is getting thicker and this is really what i'm going for and what i like to see. But what i noticed is that when bleach sits for about one or two minutes, sometimes it gets thicker and a little too thick. So i like to use the cream developer the remaining of it that's sitting in that cup and pour that in there just so that i can maintain the same smooth consistency, because when i put it onto my closure, i want it to glide on like butter like. I do not want it too thick to where it makes it very uneven and very hard to put on your closure y'all another one of my secrets is making these little peaks. I know it sound crazy, but it works y'all. So if you find that your peaks are falling, then you got way way way too much developer. But if you find that it's not gliding through smoothly - and you know - you can't make the peaks, then you got way too much bleach. So you just want to find that perfect balance between both of them, so it's nice and smooth. So now that we got our bleaching mixture together, i like to go ahead and apply the bleach immediately, because bleach is most active within its first 40 minutes. So i start at the back of the closure and i just gently put the bleach on. I do not press through the lace, because i do not want over bleach knots and then i got ta fix it and i'm not trying to do all that. So i go ahead and i use my rat tail comb to apply it. I don't use a tinting brush because it's a little bit too firm for me and the comb allows me to control the product a lot better and control how much product i would like to put on the lace. So i start with the black. The back of the closure, because the back of the closure, i feel like the knots, are a lot harder to bleach and they don't bleach as easy as the front of the closure. So i just take my time and put this on and y'all. This process can take about three to four minutes. It just depends on the size of your closure or, if you're, using a frontal, and for me this just allows more time for me to spread the bleach evenly and then just kind of refrain from pushing the bleach through the knots. So, as you all can see, i'm applying the bleach to the middle first and that just all depends on where you're going to put your part. So this particular closure i'm going to part down the middle. So if it's for yourself or for your clients, you're just going to put the bleach first, wherever you're going to put your part. So if it's on the left, you'll start on the left, if it's on the right, you'll start on the right, and so that just helps the bleach in that area start kind of processing first, so that you'll get that most realistic. Look, you know, give you scalpiana we're about done, spreading the bleach, y'all and, as y'all can see, i'm stopping at a particular point. We are not going to bleach the baby hairs right now. Anyone who has bleach baby hairs already know they bleach the fastest, and you don't want over bleach baby hers, honey. You don't want that at all, so i'm stopping at the baby hairs and we're gon na just do that separate and that's best for beginners. Now, if you find that you get a little bit of bleach on the hair, you can use conditioner or you can use water to just kind of get that bleach out so that it doesn't process or start bleaching as well. So i'm just showing y'all here pretty much where you want to stop with the bleach on your closure. After about 30 minutes y'all, this is pretty much what the closure is. Looking like, i like to lift to about a 27. I, like my knots on the brighter side, so when you go to tone it, they look clear baby you giving clear knots. Okay, so do keep in mind. Y'All, all closures are not created equal, so make sure that you're checking your closure like every five to ten minutes. Once you have a system down to where you know kind of how it's going to be, then you're able to kind of you know go from there, but for me i check about every 10 minutes. I'M sorry y'all that i'm talking so much. I just want to make sure i'm giving y'all off the tee on bleaching these knots correctly. Okay, so right now you want to make sure that you're rinsing your bleach out in a downward motion. Mine a little turn right now, because i'm trying to show y'all what it's looking like on the other side. But you want to always make sure that your closure is facing downward when you are bleeding or when you're rinsing out the bleach. So right now, i'm just going in and i'm checking to make sure all my knots are bleached. Now, of course, the baby hairs aren't bleached because we didn't put bleach on those, but i just want to make sure all the little knots baby is bleached and giving us the scalp action right before we go to tone it. So you want to go in with your neutralizing shampoo right now and wash it a few times, because you want to stop that bleach from processing, and so it doesn't pretty much over bleach now. The next part is strictly for beginners. If you are intermediate to expert, then you can skip this next part because you kind of already know how your closures are going to bleach. So you know about 15 - maybe 20 minutes into it, that you want to go ahead and apply the bleach to your baby. Hair knots and then they'll bleach right along with the rest of your closure, but if you are not familiar with it, then i strongly suggest you use this next part. So basically you want to use half of the measurements that you used before. So that means like half of the bleach half of the pump of the shimmer light shampoo and then half of the volume developer, so you'll use this mixture specifically on the baby hairs. So right here, i'm just showing you where you want to apply your bleach at this point, so i'm applying it strictly to the hairline, where we had our baby hairs and then also i saw there were a few spots that had a little bit of the black Spots where maybe the bleach didn't get on it and i'm just going to bleach those parts as well whenever i'm sending out a wig um to a client or something i just want to make sure everything is pretty much even i feel like every stylist has their Own thing, but for me i just like for the closure to be bleached everywhere. So just in case my client wants to change their part, but, as y'all can see, i'm just applying it to those areas, because you do not want to apply bleach to anywhere else, because you don't want to over bleach your closure. So after about five minutes y'all, this is what the knots are looking like. This is what it's giving baby. So it's pretty much lifted to the level i was going for, so we're ready to go ahead and just rinse that bleach out. So you want to make sure again that you're flipping your closure over and rinsing it out with your closure facing downwards, as y'all can see, i'm doing a little different, because i just want to show y'all what it's looking like on the opposite side, and now we Can go in with our neutralizing shampoo, so we can just stop that bleach from processing on the knots. So now we're about to move on to toning. The knots and these two shampoos are the secret to getting the perfect tone knots. Okay, so, as you all can see, the closure is looking a little yellow. It'S looking really yellow actually, and so you want to make sure that you tone that yellow all the way down so you're going to use one pump of the black light and you're going to use a half a pump of the shimmer lights and you're not going To apply it to the back of the closure, you're actually going to apply it on top of the closure, because you don't want to turn your knots brown. You just want to get the yellow out, so you're going to go ahead and you're going to scrubs girls. Girls go scrub for about two to three minutes, or maybe even three to five: let it sit for about 10 to 15 minutes again, it just depends on your closure and you should be ready to go after about 10 minutes y'all. This is pretty much what it's looking like. We don't see any yellow, it's all okay. So at this point we're going to go ahead and rinse out the shampoo just so we can make sure that our knots are nice and toned. As you all can see, the closure is toned. The knots are toned and you're gon na see a little bit of the brown but honey once it dries. It'S gon na give you all type of scalp action like it's gon na look clear so now that we're done toning. The knots i like to go in with the conditioning and detangling shampoo just to put some more moisture back into the closure and also condition it because i deep condition and shampoo my wigs after i finish constructing them. I don't actually apply conditioner now, but you can take this time to apply your conditioner and be good to go, but i just use that shampoo as a moisturizer and conditioner so y'all. This is pretty much what the closure is given once is shampooed y'all. It is ready to be hung up and dry, so we can make this wig baby, but i hope this tutorial was super helpful for you guys. I appreciate y'all so much for watching and staying to the end. Baby do not forget to like share and subscribe y'all make sure y'all hit that notifications button. So y'all know when i'm dropping another video and i will see y'all in my next video love. You guys. I'M a later girl living in my barbie world
Comments
Kenny Sweets The Barb: Hey Yall! If you want me to drop a video on how to fix overbleached knots, let me know below Thank you for watching
NolaDarling: Thank you for this video.. I’m currently attending “YouTube cosmetology school” and I needed this so badly.
Virgo's Corner: Awesome tutorial!! I've never bleached knots before to afraid I'll over bleach the knots. But watching this tutorial I will most definitely give it a try. Thanks for the tutorial
SLR Couture: This is extremely easy to do because of it being flat and such a small piece. I wonder why there’s not a lot of videos of people doing this on full lace wigs.
TeresaAlexis: I’m learning how to install wigs for the 1st time. Learned so much in one video! Thank you for sharing!!
Rho Shonda Powell: Great tutorial, thank you!!!
TheRealSlayShay: I feel like my knots were always still kinda yellow.. this helped a lot. thanks girl!
lneal2800: I'm definitely still learning haven't quite mastered it yet! Thanks you for sharing sis!this helps!
C Zingerella: Super helpful. Thank you for your patient instructions. You didn't talk too much!
Alexandria Nicole: I appreciate you so much you did that!! Subscribed period!
Alina Hudson: AMAZING! thank you
Tracey Michele: This is the best tutorial I've ever seen for bleaching knots. However, can you please clarify how much of the Prismlites blue we're supposed to use. That scoop doesn't look like a full cup and you say to use 1/3 of a cup. Should that be more like a 1/4 of a measuring cup or how many tablespoons? Thank you.
T Williams: Soo bomb!!! Love seeing your growth!,
Summer Rain: It gets thicker faster when mixing w metal. That’s why they tell u not to use it because it creates heat
yatta4788: You did that hunni !!!!
Princess Daberechi: Video definitely helped a TON!! Everyone else got some yellow lace and over bleached knots and think it blend what the link for the black lights?
Antoinette Villiers: The best video on bleaching knots thus far!
Dope Hair X Bee: Love it thanks babes
M Mahn: Can I use this method on AliExpress hair/ wigs???
SignedNichole: I’m super bryte and the knots don’t look natural unless they get passed a 27, which is SUPER difficult. Any suggestions?
Taylor Dixson: Love this video best I’ve seen
Kisha Wyrick Miller: Thank you
It's just Mia!: How much is in the clear scoop bc I don't own one of them
Bbarbie: OMG I DID NOT KNOW THAT YOU ARE BARB LIFE I LOVE YOUR EVERYTHING I HAVE SO MUCH OF YOUR PRODUCTS
LifeofAGirlBoss: What would be different if we are using virgin hair?
individualwoman84: Is that purple shampoo she added to the mixture ?
Kersha Beaver: I wish i had have seen this before i bleached the knots on two wigs