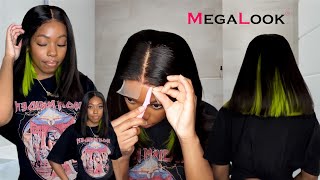
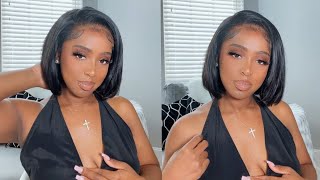
Blunt Bob Middle Part Closure Wig Easy Glueless Install
- Posted on 17 September, 2019
- Closure Wig
- By Anonymous
https://www.amazon.com/shop/shanequaol...#
Www.styleseat.com/shanequaoliver
For business inquires or channel sponsorships
Instagram @hairstylesbyshanequa
Facebook shanequa oliver
Hey you guys and welcome back to my channel today, I'm gon na be doing an easy little glued wig with a closure and I'm gon na. Do it in a middle part, blunt bop, I'm just using some old hair I got ta know I like to reuse hair. If I already had it versus going out and purchasing some new hair. If you got some old hair - and you just want to revamp it, you can do this really easy and quick, so yeah here, I'm just using a dome cap that I got from the store just a regular dome cap and then that's just the hair. I watched shampooed it and the closure is old and it's just a small closures, not a 5x5, but nothing like this spectacular. But it I mean it's fine. It'S old closure, but it'll still work. So I'm just placing it about a half inch in front of the dome cap and then I'm just using the t pins to pin it down and the next clip you'll see the dies just because it wasn't directly in the middle but yeah I'm just taking my Needle and thread I'm gon na start in the back, just like I would a sew-in or a quick weave by starting it back in the middle and then sew around to the front. So just take your needle and thread and just start it's a very middle back of the closure and just sew until you make it to the fun okay. So I'm just starting on the neck side. I'Ve just started directly in the middle in the back and I'm just gon na, so the closure down all the way. Until I get to the end of the dome cap and uh. If we even we're doing this glued wig, you still want to go, and so the closure down unless you're doing like a? U part or something, but with this particular blue wig. You still wan na slow down your closure because it's gon na be a lot of pulling and tucking to keep the wig on to adjust it and that's the last thing you wan na have have happened. You pulled it on in the week. Come support, so the best thing I would suggest is to go ahead and sew your closure on and I'm using glue this time and just like, I said, I'm using some old hair that I've just shampooed and bills for sewing, and I just shampooed it and I'm Gon na reinstall it okay, so I'm just taking a trick and I'm just gon na apply it at the nape port and glue it down and use the blow dryer to make sure that is completely dry. And then I'm just going in with the next one. And it's the first few tricks, I'm just gon na go in up around where the ear would be, and so you just want to lay them glue them down. Lay it in like a kind of a circular motion. I guess just wrap it around and then once you get to about the fourth track, you're gon na just throw it going over the ear. Once you install that fourth one you're just gon na go bringing the trick all the way around from closure from each side of the closure. So that's what I'm doing here, I'm just taking a blow dryer and dry. I think I've done already a quick weave video. So you probably know how I laid tricks already so and you just want to start going up to the closure. So you can get fullness around the face and I think I only use like a heck bag and a half from here and so. But if you want to use more, you can so yeah, I'm just going like now, I'm like a horseshoe shape and I'm just laying them in a horseshoe shape until that little space right there to link its smile. Then I'll just talk one straight as you can see, if what I was demonstrating right there. So I just thought going straight across then, and I just actually just took the glue and just put it on there and then laid the trick down and blows right at that point. You can glue track. If you want to have you want to do it, it doesn't really matter, then I'm at the last track now, so I'm just gluing it around the closure. I live just a tiny bit of space for the last track to go directly around the closure and you just keep going in with your blow dryer to make sure it's completely dry. You want to let that weeks it about 30 minutes to an hour before you start combing on it, because, even though the glue has dried can't semi, it's not completely dry, so you just want to let it cure really good or just throw it under a hair. Dryer or something for about 20 30 minutes so anyway, I'm just removing the week from the head and I'm just cutting directly down the center being careful not to cut the thread and then I'm just cutting the excess black cap off. So I just cut down the center of that black cap, and then you just want to be careful not to cut the thread and then just go ahead and on each side store cutting the excess cap. You should have a little bit of closure hanging in front of the wig and that's exactly how you want it to be. So I just put my wig back on the mannequin head and now I'm just kind of parting it out how I'm going to wear it and also leaving some hair in the back to cover the closure and those tricks. And then I'm just going in with some silk elements: styling foam and I'm gon na just lay the hair down and just let it sit okay. So once it's done drying, I'm just spread a little heat protected on their neck. He protected right now makes it look really shiny, but once it dries, it's not bad shine and plus it's right under this ring light. So it looks a lot more shinier than it is so yeah. You just want to take a little bit of heat protectant. I'M just going through the blow-dryer to make sure it's completely dry and combed out and that's how the part looks after I've said it. So now, I'm just gon na get ready to do a haircut. I don't know why everybody is walking in here in the room right now so but uh. You know my aunt in caches, you're, the regulars to me and my son and my nephew just came in so anyway. I must start in the back, but actually what you want to do is the second step that I'm gon na be so I'm just making a guideline for me in the back and I'm just cutting how short about how short cuz, I'm probably gon na, go back Over it and cut it some more so about how short I want to be in the back and then in the front, I'm just gon na take a portion of each piece in the front. Well, like the front piece is in the front and then cut them to my desired length, and - and you just want to do that, to make sure that both sides match. Because sometimes, if you try to just cut it started from the back going sort of Florent. One sides gon na be too long or - and you want all this stuff to be symmetrical. So yes, you look something like that so anyway, now I'm just going in in the back and finishing the clip, so I'm just cutting a straight line in the back. Just cutting it in a blunt, if you want to add a little bit more layer in the back, you can just go in and either pull the hair up and cut it or either use a razor like a razor comb, and then you can cut it. Some in like some little soft layers in the back, but I didn't want to do any of that this time, so I'm just cutting it in a straight blood bob and that's what you'll see me doing here? Okay, so I put it, you know in the black Bob, and so you just want to go through then just make sure that everything is even in like no hair sticking under the bottom, that's uneven and all that, and so once she's done with the cut. I just sprayed just a little bit more of I just sprayed just a little bit more of the heat protectant on there and I'm just gon na go in and start straightening it out. I'M gon na do it almost completely straight and I'm gon na use. My two inch look: I have to go back in and trim a little bit more, oh and I'm using a little bit of the generic hairs break from Sally's, and I'm just gon na go in with my two inch flat iron from Bay bliss and I'm just Gon na flat iron, it all the way around and the boiling layers and start from the bottom and just almost completely straighten it without putting a bump in it. Okay, so you just want to continue going around all the way around the Bob and just spraying your little generic hairspray, whatever kind of hair spray you like to use, I usually use generic because Sally's is good closer to you supply to it. So but you just want to go in with your a generic hairspray or any type of hairspray in your flat iron, and you also don't have to use those babies if you have another type of flat iron. You can use that also, that's just what I had on hand, and I know they're gon na get like straight straight so and I'm just going to continue one and and straightening the hair, and I just start from the bottom and go up and his hair was Really really black, because I think the last time I used it, it was got colored a black, so it was really really dark and I, like my hair black anyway, I don't really like brown hair. So that's another reason why it's kind of shiny too, because it is color black previously, so you just want to finish her flat iron and just flat iron. It like straight. She backed that getting that hair ready for that video with the blue hair yeah. We did. That'S what you see it caches him right there. So it's not that videos already! I don't watched it and then I'm just calming it out. You should look something spending today at once. You get done. Of course, I'm gon na have to go back in when I get ready to install it and just make sure that is straight again so yeah anyway. This is like the next day that I thought of it, and I had my hair into braids and I just put a cap over it and I put a little makeup on there there. The part on that I mean the clothes or the lace on that closure is really dark. So I had to go in and use some of my facility to try to bleed it in the front part of the closure still kind of dork, but I'm gon na fixated plus it's gon na be baby hair there, and also this um. I cut a little extra lace off because it was kind of too long on one side. I think so I had I put the put the light up the lace down and I don't know what the heck I'm talking about so anyway. I just laid the wig down a little bit of the guy to be free spray and I'm afraid of a few times, maybe three or four times, probably more, I'm just trying to give you speaking 50 enough to hold a lace dancers. I didn't want to glue so I'm just great a few times, I'm actually getting it on the hair, but that's okay, and then I'm just going in with my blows right now and laying it down. You can use your finger press it down or the Red Tails home, and I saw that lace is still a little dark, but that's fine because I'm avoiding feces once I get to and then also that closure it was not a lone closure. So, that's why? The part is only that one. It'S not that long. So I'm just coming out some day free spray and then also getting the baby hair out that I wanted to use. And then here I'm just using two duckbill clips and I'm just peeing the hair back. While I get the baby hair kind of ready and I'm just using a little bit doing a little bit of baby here, I could it be I'm still about a inch lit. I'M trying to get some day hair off my face. Something'S using I got to be Jail in the black package, just go in with my rat tail comb and then just carve out some baby hair. You can also not do any baby hair if you want to, or you can pull the set, the weak back just a little bit in front of your hairline and use your own baby here also, since this wig was not being glued on, you know, there was Totally option it's an option I probably should have be, but my hair was braided and those two braids I had to get up. I put that on Facebook also leads to power, my hair into two rows, so it was still like. Then I just use a beige stocking cap and put it on top of it, so I just sprayed a little bit more a free spray, so I can sit the baby hair and I'm just going in with my honey err, infinity pearl blow dryer and then also Sprayed a little bit of all shame the mazzani finished out on there, so that this, the wraps, won't stick so anyway, I'm using the black, the black wraps and I'm just gon na. Let them sit on there about ten minutes and I'm just going in with a little bit more heat protected, because I'm going in and Flatiron it again, because I had took the man, the hair off the mannequin here, and so it wasn't completely straight like I had It originally so I'm just gon na go back in and bump it again, just get it straight, and now now I'm just trying to adjust the we cuz. I think I had it kind of crooked on doing it all her is the struggle - oh, my god, yeah and I'm kind of off a little bit. My good good friend passed away, dizzy in and so I'm kind of off. That'S probably why so yeah we just dealing with it right now, so anyway, I'm just going back in with those two imps babe, let's play turns and I'm just gon na get it straight like I had it before. Okay, guys - and I also want to let you guys know that recently I became an Amazon influencer, so I have a page on Amazon and if you want to shop my store or my influencer page, I have all the things that I use on a regular basis. On there - and you can find me at amazon.com - backset slash shop, black back, slash, Shaniqua oliver, and i have the link listed right here and I also have it listed in my description box so that you can go there and you can find all the things that I normally use to do the hair. If you have a problem or issues find anything locally, you can get it from Amazon and you can shop right through my influence and storefront okay. So this right here, I've already done it before I show child where I was flat iron and the hair before but like I said, I took it off the mannequin here, so it wasn't completely straight, like I had it before. So I'm just running back through and just straightening out. It'S not! It doesn't have to be perfect. If you don't take yours off your mannequin head until you're ready to use it, you probably won't have to redo this step, but I went back and just straighten it out more, so it can be straight for the video and I'm just doing it on both sides. Just give me some pletely straight and I'm just adjusting the wig getting it straight. Like words should be on my head, I didn't use any combs or anything I just put the the wig on it fit pretty snugly. So all I have to do was just slide. It on and then it's being held in place with the that got to be gel and it's pretty tight, pretty snug not tight too tight, where I came a word, but it's like pretty snug like where I don't have to worry about it coming out. So anyway, I've just removed the black wrapping strips and I'm just combing out. Some of it got to be free spray, and then I just put a little bit more heat protectant on there cuz I'm using a lot of heat this time yeah. But anyway, I'm going in with my pressing comb - and you know it's hot, so I'm just going in with the present come and just straightening out those areas right there in the front where I laid the in front of where I laid that I burned myself right There, where I laid the baby here today, I'm just straightening out those areas and loosen it up. So it's not hard and I'm just doing using the pressing comb to do that. And then here I'm just going in and straightening out the apart and, like I told y'all, this lace. Closure was very short. This is the old closure, I'm just going in with a little bit of makeup to try to blend that dark lace, because the lace was kind of dark for my skin. So I'm just blending in with a little bit of a concealer with my ELF steepling brush, and then I sprayed a little bit of spray on there blow dried it, and here I'm just going in with a little bit of concealer down the part. Of course, I can't see that good, so the line is not perfect, but I'm gon na fix that right on up. So I'm using black spray that I got from Sally's and I'm just gon na spray. It use my middle rat tail comb and I'm just gon na spray before it, so I can get the part straight. So that's all you got. It is simple easy. As 1-2-3, I just went back in with a little bit more generic with me, I'm so crazy and so yeah I was liking it. Her girl was really cute. Yes, ma'am honey. Look at that! It'S really simple easy to manage Bob. This is some old hair, but most events were really good. Hair is pretty soft and it was really manageable so and if you have to do anything, all you have to do is just really straightening. Okay, guys. I hope you liked the video don't forget to Like comment and subscribe click that notification bill so you'll be notified whenever I upload a new video. Follow me on all of my social media and thank you guys for watching
Comments
Renee Upson: Nice ...will be using this technique to make a wig this weekend
Life With Renae: Loving this ❤️
Rocky: Yes ma'am to cute you're very talented congrats on the store and my condolences on your friend you rock
Nerdy Punkin: I love it I thought you did a regular middle part with leave out
Sequoia Jackson: What are you spraying on the hair ?
Sheila Terrell: Really nice...sorry about your good friend,my prayers to your family and the bereaved family. Love your videos.
Missy Grando: I'm sending my condolences regarding your friend. Congratulations on your Amazon store . I want a deep dark wine colored Bob like this.
Nicole Francis: Yessss I luv gurl you did that more videos luv
Lakietha Kelly: Come on wig!! I love a good throw on!!
SAVAGE 50: where is ur salon?
ALEXUS ROSCOE: That is cuteee
SAVAGE 50: can i book a appointment u