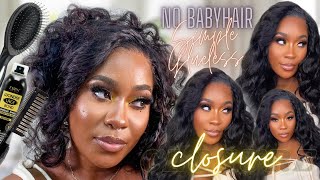
Watch Me Slay This Brazilian 5X5 Straight Lace Closure Install With Light Layers | Yiroo Hair
- Posted on 28 February, 2020
- Closure Wig
- By Anonymous
●▬▬▬▬▬ ♛ YIROO HAIR ♛▬▬▬▬▬●
Same hair in the video➤ http://bit.ly/392CeM4
Get $$ OFF With Coupon code: “YIROO2020”
Hair type: Brazilian Straight 28 28 28 with 18 5*5 lace closure
Yiroo Hair Official Website➤ http://bit.ly/2wd2ZPf
❀Women’s day Sale up to 26% OFF❀(3rd Mar-30th Mar)
Hair weave 24% off
Closure with frontal 24%off
wigs 26% off
Contact Yiroo hair for Wholesale/Aftersale:
Email: [email protected]
Phone/Whatsapp: +1(562)415-8634
#Yiroohair #Brazilianhair #transparentlace
Follow Yiroo hair to WIN Monthly give away!!
YouTube @Yiroo hair➤ http://bit.ly/2lxJg7U
Instagram@Yiroo_hair➤ http://bit.ly/2lyJrQe
Facebook @Yiroo hair➤ http://bit.ly/2m2d9NR
❤▬▬▬▬▬▬▬▬▬▬▬▬▬▬▬▬▬❤
Welcome to IAmBeautifulHustler Channel
Be sure to SUBSCRIBE & TURN ON YOUR ALERTS
CONNECT WITH ME✨
Personal IG: Iambeautifulhustler
Business Instagram:_Beautifulhustler & @thebeautifulhustlerbrand
Twitter:_Beautifulhustl
YouTube: IAmBeautifulHustlerTV
✨SLAY WITH BEAUTIFULHUSTLER✨
TO PURCHASE MY PRODUCTS :
WWW.iBhSlays.com✨
Lace Melt Adhesive,
Melts Belts,
GLAMWAX
and more ❤️
Have YOU Purchased your LACE MELT ADHESIVE YET?
To Purchase : www.ibhslays.com
✨✨✨✨✨✨✨✨✨✨✨✨
Spanish Mami Proof✨
Puerto Rican Mami Proof✨
Out the scalp proof
Swimming proof
Sex pulling proof
Waterproof✨
Sweat resistant
Adhesive : Lace Melt Adhesive
@thebeautifulhustlerbrand
YouTube :IambeautifulhustlerTV ❤️
To purchase: www.ibhslays.com
Hey guys welcome back to I'm beautiful hosta TV today i'll be doing a lace, closure, quick, lead installation, and today's here is provided by our hair. First of all guys, this hair is absolutely gorgeous super long and super soft. I literally have no complaint about this help. Us so ever like, I absolutely love this hair. This hair has became like this. Vendor is now like one of my top faith companies. The way the closure came was pre plucked. I really I barely had to do any plucking whatsoever and, as I said, this hair is gorgeous and so soft and I was super excited to bring you guys. This lace closure quickly, installation now I don't have the unboxing in the bottom left of this video. So you guys can tune into that as well, but I'm jumping straight in this tutorial - and I know you guys - are probably making like what the heck am i doing putting glue on top of this cap, but I actually got one of this idea from one of My buyers, who purchased my glue, she did a review on my glue. You know on her Channel and her name is Khadijah L or won something like that, but I will actually put her her review on my glue in the description, so go check that out and I've seen her use a layer of my lace school to do her Ball cap method and all she also sprayed holding spray on top to secure her, like capping everything, and I absolutely loved that idea. So shadow Jude's khadija girl, like you, did that so now, that's gon na be my new little thing. I really like the idea. She came up with so now. I'M gon na start doing that. For my ball caps, one I use way less product. I don't have to keep spying into the captain's molded, because after just adding that one layer of blue over here doing a closure or a front to you just like just apply that one layer imma didn't use that holding spray one time and blow-dry it. And your cat literally is going to be secured and stuck of course, so yes, shut I'll. Tell you once again and like I love the idea, that's gon na be my new method and my new way of doing my ball cap. So, thank you, girl and after I finished that ball cap and I don't blow dried everything. I'M just gon na go ahead and cut off the extra cap. Now, when I'm doing a lace closure with me, I don't mode the whole cast in your own emote. The section that the cap is going to lay um that way, she's not using you, know unnecessary product, as I mentioned before, and now I'm just taking. There will be kisses Foundation, level 11 and I just use the darker shade and I'm applying that all on the cap and I'm also going to apply that in the inside of the lace closure as well, and I did spray holding spray inside of that closure. After using that foundation, so the makeup will not transfer over and to her skin and now I'll just have her holding that lace, closure and right now I only have one stocking cap one, because what I like to do is just do the whole ball. Cap method applied the lace, closure and sew it down all around and then when it's time for me to actually bond in the tracks. I would take that second cap, because I do use two traps to do. My quick leaves I'll take that second cap and pull it all the way. On top of that closure. Just kind of wrap that closure up and pin it out the way and apply that second closure and then begin to glue my tracks onto the caps, which you will see. Actually, when I get to that portion of this video. But right now I'm just have her hold that lace, closure and I'm just gon na show all around just to get that closure, nice and secure, and it's very important that you have them hold is down, so it does not move in the closure lays exactly where You want it to lay and it lays flat like it means to lay that way. You can get a perfect lace, closure installation. So now that I do have that all tacked down, I'm just giving myself an idea of where it's going to stretch to and I'm just going to go ahead and ball, that out the way ball it up and pin it right out the way. And now, as I mentioned before, I'm going to take that second hour stocking cap and pull it right from the bottom over on top of that closure and down down down that way, I can still bring the tracks with two caps instead of one, which is, you Know more secure, but before I begin to actually you know, do my tracks or - and I just went ahead and sold around that cap around the size and edges. So the cap does not lift up, and once I do that, I will go ahead and take some pump. It up. Spritz and spray all around the cap do not spray on top of the closure. Just on there section around that closure and I'm showing you there, I'm using the gold pump it up. I don't really like the one in the white bottle, because it's a regular string I'd rather just use what works best and keep it moving. And as I mentioned, this is three bundles of twenty-eight minutes, so I'm just going to go ahead and begin to measure cut and glue the tracks on and the glue that I am using is the salon Pro 32nd glue. It pretty much dries much faster than the regular bonding glue, but the burger barn in blue. It takes a little bit longer, but honestly the products works. You know just it's the same know just the same, just as good, so really no big deal. If you do not use the 32nd Pro it's just as long as you have your bonding glue, your tracks are going to stick. So what I'm doing is just you know, taking those tracks and I am double-wedding. I have a full tutorial on my channel already on how to double weft and the benefits of double wefted is that you can get more hair and see your installation versus sewing or doing it single. But honestly, where I'm starting to know. It is depending on how much hair the client may have you have to make a decision on if you will double wept or if they're gon na sing well, but as far as my quick weaves, I do double with all of it. That way, as I mention you could get more hair in and for some reason it just makes the installation look fuller to me. I don't know if it's just like a mind trick with me, but I just really prefer to double weft all of my tracks and I'm just gon na go ahead and glue all three of those bundles in all the way up to where the closure is laying. But before I glue my last few tracks, I will cut that extra cap off where that lace closure is underneath just to make sure that you do not. You know like get the closure stuck under there, so I am getting closer and closer to the top. But after I believe I glued this truck here, I will go ahead and cut off the extra cap from around there closures. So I can begin to lay my last few tracks and just be very careful. You do not want to cut the hair on the closure. Just make sure you are pulling and stretching that cap upward and just cutting off the extra like you see them through here and now. I'M just taking my last few tracks and blowing it right up to the closure. Do not glue the track on top of the closures simply because you might want to do a closure replace my later one if need be, or if the person wants to just get a new closure, like you never know, but always flew up to it, but not On top of this same thing, with sewing, don't start on top of it so up to it, but nevertheless, now that everything is all blue and I'm going to begin to glue down my lace, closure and, of course guys, I will be using my lace mode adhesive That is the only glue I use from now on, I'm using only my products, so you don't have to worry about what I'm using. It will always be from my brand and before I begin to apply my placement adhesive, I did cut the dick size of that closure off and, as I mentioned many many times before, that's to ensure that your closure installation will be seamless and you can do your Baby hair on the edges of the closure. What I happen to worry about that take a little area on the side and for today I did apply five layers of just um placement adhesive, and you just want to apply it and just spread it out nice and evenly. Let it dry clear and then add your next layer. You know until how many you know layers you want, but, as I mentioned, do not exceed seven layers. It just really not necessary, and the reason why I say seven is because some people may you know really want to go swimming swimming swimming, is some people who just get wet, but it's some people who really want to dive in. So I would say, just use you know, seven layers for things like that, but if you're just a regular smuggler, not getting into water anything like that three to five layers should be fine, but regardless the glue is waterproof. But it's like I mentioned before. If you do want to do like some swimming and diving and getting wet, I will prefer you to use five to seven layers for that. But, however, the glue will be better stuck next week. I am so that right now I know everybody's going crazy on all my social media platform as when I would have it, but everything will be here next week. The whole site will be updated so guys. Thank you so much for your continuous support and it's only gon na go up through here. It'S only gon na get bigger and everything is gon na gon na get better. So just a quick shout out to all my youtubers - and you know my other supporters on my social sighs, because without you guys this glue, but not be scribing striving for the greatness that it is and it was really a great product. If you have not tried it make sure that when I restock you get you something you don't want to be left out like it's popping and selling fast, it's hot so get you some, but I do have the bigger bottles and all the other products that you Will see on my site that I will post so, as I mentioned just stay tuned, but, however, right now, I'm just blow-drying that lace after pulling it into that lace. Clue and people always ask me what temperature do I use yes guys. I always use heat heat heat heat. I'M using heat helps me up they're nice and really really good. You get that glue nice and dry, so I like well not even like to, but I always use the heat setting and um. I will tack down the remaining of this lace that is lifted up after finished after I finished framing all of the extra lace, and once I do that, as I mentioned, I will take everything down and the easiest way to do this is just take some little Pins and just pull it back, anything that's lit, then just put it on back and I do actually have some spreading tours coming as well. That would be new and edit on my channel. That way, you guys don't have to use your combs to UM. Do this section here like I was believing okay, I've been grinding off-camera. I know I can slow down on tutorials, but I am getting back to it um. I know you guys miss me. You need the videos, I'm posting, but I just really have been grinding off-camera. Trying to get everything I wanted my business up and popping, but I'm just going to continue to apply that glue underneath those piece, those places I still licked it, and I think I still did about three - maybe four layers in those areas as well before actually tacking. It down so don't use just one or two later tries to use your three to five layers under these little places. Here, that's still lifting to ensure you would get your maximum strength hold that you need to have your least secured laid and slate honey. So after I plowed of that, I will go ahead and push that lace down into that glue and begin the styling process and then go ahead and tie down that lace with that milk belt and so forth and so forth. So stay tuned. So that I everything is tapped down, I'm just gon na go ahead and pull up the section that I will be using for my baby hair later one an exit or use. So I'm just gon na pull out this thin layer and just go ahead and plant. All of the hair together and then I will go ahead and part. My wig or not. The wig is put this lace closure down the center and using my wax stick. I will go ahead and begin to Hopkins, just kind of like pre prepping the styling process. Before I get into the actual styling process. Just you know make the process a little bit easier. I guess so. I went ahead and parted her hair down the center already and I'm going to my West. They can apply it all around their parting area and begin to hot comb and everything like that, but also guys with the new West's that's coming. I do have new packaging, so don't think it's a whole nother product or anything like that. I'M just changing all of my packaging, so everything just matches and just goes with my pink black and gold branding colors. So the wax sticks will have a no packaging look and I will be updating my website as well. So it will be no confusion when you receive your orders on same product. Just you know different work. It is also very important, then, when you are doing the lace closure, you also part off a section in the back to make sure you are covering your tracks in the back. So I'm parting off the area in the back like a hot comb. That area going straight back and that way all the tracks are covered. So when you climb put your hair down, everything is still laid and in place the way it should be so make sure you do not skip the step. You do part there and that's for anything. Ladies close, your lace, front or lace wig, like you always want to cut off that section to have. You know it going towards the back. So everything is, you know the way it should be and everything so I'm just gon na finish hot combing. All of that, and once I'm done with that, I will just go ahead and take some bedderhead holding spray and just spread across the hairline and tie it down with that beautiful hustla melt belt. I know I haven't been doing this method like this recently, but I just thought I want to check back into it. Um you know just you know. I just do things differently every time, just really whatever I feel like it, but either way it goes that results are always bomb calm. Now I did go ahead and press this hair off camera, while that milk bill was doing his job, and I do use this flat on your spray by a garden here. I was just trying it out it's by Garnier Fructis, whatever it's called you guys, but it's the flat ironing spray, and I guess it's supposed to get rid of like frizzes, and everything like that when you flat iron in I'm, not gon na share how I feel About it, yet it looks good, but I still see a few freezes here and there, but I think if you just use like an oil or something it is just like not that problem right now. So I do use that flat. Ironing spray - and my next tutorial was straight ahead. I will show you guys on camera, what it looks like, but um I did go ahead and straighten that you know straighten that out and now I'm actually getting into in styling the baby hair. So first things: first, I took my razor comb and I chopped those baby hairs down inch and today I'll be doing my baby hair method a little bit different, but I also decided to add some layers, I'm in the front of her hair. I always just do like that basic part down the middle. You know whatever. So I said you know what let me add just a few layers to frame the face, so I'm going with that razor comb and just angling the front area of her hair, I'm pretty much like more than likely. I was just probably angling, like the closure, not so much of the bundles, and you know of that way. If she wanted to get a whole new closure, she could and would be fine with a 28 inch bundles or whatever the case is, or should we just read about this without closure, if you want do a leave out, but all I did was just pull their Hair comb, their hair straight down and just razor ring the front of their closure piece down in an angle, and that is how you create your soft layers, nothing too sharp or too harsh like it would be if you did it with scissors. So that's why I just use the razor comb for that section there and now I'm getting into the baby hair and the styling first things. First, I love this mousse. I'Ve been using this mousse more recently, and this is the motions mousse. Oh, my god, like it smells so freakin good y'all like not only does it work good, it smells super super good. I love the smell and I just applied that um mousse all on the baby hair and once I get the baby hair in place where I want it, you know I'm gon na go in with my holding spray, of course spray it and blow-dry it. On that heat setting just to get those baby hair, it's nice and molded, but I actually like doing this method better like this um, I know something would just like these mousse only or gel only or if you follow my channel, you may start have to wing Holding spray only, but I actually like the combination of applying the mousse first swooping it and then add in the holding sprays needed, because it still give you that soft look. But it's molded. So it's like soft and pretty, but it's going to last versus just doing mousse by itself and then you go to sleep and wake up and your baby expert crazy. So I really love this new method that I am doing. I hope you guys try it out and you love it as well. If the Moose does dry before you get to it just feel free to add a little bit more. You are the guys know that my glue is waterproof, so you should not have any issues with adding the most to your lace so long as you apply the layers correctly and you use a good amount and everything like that. As far as the width of the glue, you should have no lifting issues when you are adding the mousse after you don't tie down your lace and let everything dry and mold one end. So after I get this baby hair swooped and everything like that - and I comb everything it's a place which I am so in love with dismissed all y'all, I'm just going to take the black spray. You know and clean up the part and conceal it well. Yeah cos that concealer, but you know I'll, use the Ruby kisses Foundation in the same palette that I'm using for that person that I'm installing on and just clean up that part. So I will go in, as I mentioned, with that black spray and the proper way to define your part is once you get everything I'm like this should be like your final final step. First of all, so once you get everything style, do not spray the black spray and then try to do your baby hair, because you would turn your lace black with the moisture dripping and everything like that. So make sure this is like your final final step to your finishing touches, but you want to take the end of your rat tail comb and place it in the part and gently spring and, as you can see it just made that part so perfect. But the icing on top of it is when you go in with that foundation and really line that part up just easy, smooth like. Ah it's just so perfect, and I am so in love with it. But before I go, I'm just gon na take my flat iron and just bump these layers just a little bit, so you guys can see it and of course I would drop the finishing look videos at the end of this tutorial. I absolutely loved his hair submission. You guys take advantage of those coupon codes and those discounts in the description box below. I absolutely love this Yahoo hair. This hair has became one of my favorite company. So, thank you guys to sending me this gorgeous hair to install on a birthday girl tonight, and I hope you guys enjoyed this tutorial. You learn something new you like the little soft layers I added. I am dropping a full video for standing up and stay tuned for more videos. Y'All got more heat, come in


Comments
Finest Relaxation: I swear I’ve learned so much from you girl!! Bare inspiration
SheisME: You do the absolute BEST baby hairs I’ve ever seen.! They’re so smooth looking and neat
Jc Matou: You are my inspiration. I’ve been watching your videos. I finally can get my hair done by myself. Thank you so much for sharing all of this. You explain everything very well
Janee Irvin: Amazing! How long does the closure stay in place before having to get re-glued or touched up?
Og Azikiwe: Hair model is so beauty. Nice job. Her reaction at the end
Shell Shell Beyond Beauty: Can't wait to get your glue. Your so talented. Slayed and laid
Coco Mocha: Girl your work is so neat
By Kaelani: I love that cap method , it’s just hard as hell to take off
Malika Esdelle: GORGEOUS JOB!!
Grace Chakwana: Always following you,I love your work!
Ms Vë: Absolutely Gorgeous ❤
denea whisonant: You r so talented and bomb I like how u really care about what u do and helping us try to slay to
K D: Loved this video, helping so much with my business! ❤️ where do you purchase the black spray?
Fannie Stillwell- Burch: New sub!!! So neat and I’m gonna try the cap method like how could I not subscribe, waiting for restock I def wanna try!!
Baraka Jenkins: Haters pls...ALWAYS SLAYED N BOMB
O'shenique Colar: Do you get all shade of concealer for your clients to define the parts & to use on the lace ?
JadaInesse: Hi ! When will the adhesive be back in stock?
Jazmine Kamau: Ha smile is so prettyyyy! Perfect install
Jock Talks tv: My favorite teacher
Nia Pender: What concealer did you use for the part you said it was from ruby kisses palette
BrianaJTV: New subbie
Panchita Bell: Slayed.
Tamia: Are you restocking the adhesive soon ? ☹️
Shevineyk:
8 O:
MSFALICITY: Can u do a video like this but with a frontal?
ReNiqua: Cute hairstyle, i gotta get some of that glue
Blonde Rose: She is so cute lol
Whitney James: I’ve tried to purchase your adhesive And it’s out of stock
leona blount: You sold out of everything sis
Tameika Cooper: Are you going to have your own moose?
NoAverage Youtuber: girl stop playing that's leave out
BRII Nicole: Fur slides loves check out my insta fluffy steps
Shandell kute: Whats up girl..?? Mi seh yuh never disappoint me yet. My phone was broken for a while now but trust me a use my mom phone to watch your videos. #yourbiggestsupporter
Des zyaire: Booooooomb