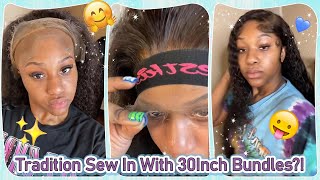
How To Make A Wig Without A Mannequin Head | Using Your Own Head! | South African Youtuber
- Posted on 03 October, 2019
- Color Lace Wig
- By Anonymous
Hey guys, Welcome to my channel. i hope you enjoy this video of how I make a wig without a use of a mannequin head, and if you do, please like a like and subscribe to my channel.
Hair details
Aliexpress hair company: Kiss love hair store
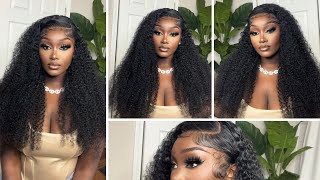
Deep wave curl in 18" 16" 14" and 12" closure
Follow me:
instagram : rhoda_mishumo
twitter: rhodamishumo
Welcome to today's video, I'm gon na be showing you how I make my wigs and I've been making all my weeks using this trusted method for the longest time, all the ways that I have a used it because I've never owned a mannequin head and whenever I Try to buy it, I always find stores that sells a mannequin and you want the canvas block and I've always wanted the campus block, because I feel like it's just I don't know it's less picky than the mannequin head, so yeah, I'm gon na be showing you How to do this? If you want to know the details about this head, I bought it from an Aliexpress company I'll leave the details on the description box. But I would not recommend you to buy from this company and not because of the hell whatever, because I ordered this hair and in a body wave tech, a patent. And then they send me this. And this is not a body wave and when I told them they're like, oh god, this is actually more expensive that their body weight. Yes, I understand that, but I wanted a body wave because I actually had a vision or the color that I want, because I'm gon na bleach and guide this hair and I wanted it in a body wave. I digress because I went in in mini rent anyways. Please don't forget to like this video and please subscribe to my channel, and the very first step is you're gon na have your hair in a flat twist a thick flat twist. This will allow an easy removal of the wig once we are done making the wings, and the second thing is: I'm gon na make an outline of your closure, so that you can see in the closure outside of the head makes it more easier. I just used like a tip X, because that was the only thing that I had. That could really, like you know, be visible, but I probably should never use it because it slipped through my hair and but I'm sure I'll be able to remove it with a quick wash. So this is how the week happily looks like after I've added even the closure, and I'm just gon na quickly put it back on my head so that I can start ending the bundles and what you want to make sure that should do. Is that you secure the hair on the closure so that with an elastic pen, so that it does not like you know, distract you, as you add the bundles and I'm gon na add the longest length at the back and then I'll go shorter. As I go up, so the 18 inch will be at the back, then the 16 and the 14 and obvious of the 12 inch closure is already in, and this is just like a normal way of how you would sue in a wig and I'm sure there's Like countless tutorials on how to do it, so I'm not gon na go into details on how I saw in the actual, like weft, of the bundle into the cap, because this video isn't about that and it's gon na be long. If I do that so yeah, this is how I just go about it. So at around this point I saw had one whole bundle there ahem use yet and this because the point of this week, making technique is just to get an outline or a framework of how your biggest command looks like. So you can go ahead and add the finishing touches after you've removed the week from your head, and this just makes it easier to see which face still needs more hair. Because at this point you can't see cuz it's in the back of your head, so anyways, I'm gon na show you how I remove the wig from the head - and this is just like you know, just to unravel the fletcher's that you made and as you unruffle This will release the wool that got caught in your hair, as you were making the week and one thing to note prior to making the wig, you need to make sure that you brush your hair very well. I didn't do that, so it took me so long to actually undo this because I had knots in my hair, so they woke up stuck in the north's and all of that. So please brush your hair buddy. You can make this process so easier for yourself. So yeah you just whisking to this, and you start at the sides as you go up and there in the middle. There is no here, that's attached to the wig, because we made the closure outside of the head, which is actually like helpful in this case. So yeah, this is how you do it. So this is the final look and yeah. I really like this a it looks really good and I'm actually feel said that I'm probably gon na be dyeing it, but yeah. It looks really good and I know I messed up on applying the glue. I think just probably this dish that I wrapped around my closure is the one that toted them the hair study it's higher on one side, but other than that it looks good. Thank you guys for watching bye.


Comments
Mercedes Key: This is so smart. I’m going to try this. Thank you girl !!
OurTruth: This curl and length is literally perfect for you
Neli Ndlovu: Yess so pretty Rhods❤️ Also the tip about flat twists is so helpful to release the hair that got caught up in there
Masego Kok: Thank you sis...love this
Celeste Coco: I laughed when you said you're sad that you're going to dye it :) :) great video girl!
Pinky Ndwalane: Hey love , please do a wig sewing video ❤️
Katlego Matshwane: I’m sorry about the hair love the curls though!
Victoria Emmanuel: You look just like Mindy Kaling ❤️
Thushey: Yaaaaas. Love this hair on you.