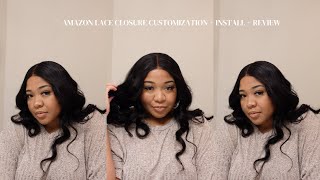
Copper Red Hair Loreal Hicolor Amazon Wig Review
- Posted on 12 June, 2022
- Color Lace Wig
- By Anonymous
♡ Open ME for more Info!♡
Hey Y'all!! Hope y'all having a blessed Sunday. In todays video I will be showing you how I colored this bomb wig from amazon. My first time coloring a wig and it campout pretty good if I say so my self lol. I used Loreal Hicolor sizzling copper and red fire NO BLEACH NEEDED!!.
I hope y'all enjoy the video!!!
Direct Link To The Wig!
HICOLOR SIZZLING COPPER
https://www.amazon.com/dp/B003YD7SZU?r...
HICOLOR RED FIRE
https://www.amazon.com/LOreal-Excellen...
BABY HAIR IRON
https://www.amazon.com/Kiss-Products-C...
♡THANKS FOR WATCHING ♡!
If you enjoyed, please hit that like button & make sure to subscribe & hit that bell so you can get notifications when I upload & don’t miss a thing!
♡ DISCOUT CODES ♡
lenses from @ttdeye
Use my code to save money: Criolas
Gawdess lashes, use 'CRIOLAS' TO GET SOME $$$ OFF
https://gawdessbeauty.com/?ref=ze1s-h...
Solotica contacts discount code *criolas
https://www.visionmarketplace.com/
UNICE HAIR CODE * MY UNICE
https://www.unice.com/unice-13x4-stra...
RIKI LOVES (VANITY MIRRO) *CRIOLAS*
https://rikilovesriki.com/collections...
*Some of the links above are affiliate. This means at NO CHARGE to you, if you purchase something through the link, I will receive a small commission.
________________________________________________________________________________________________
Check out some of my videos
Glowy & Sweat Proof Summer Makeup For Oily Skin
2 in 1 GRWM Make-Up & Outfit!! Summer Break, Going Viral, Positive Vibes Only
Affordable Slay For Baddies On A Budged Woc
#wiginstall #copperredhair #amazonwig #lorealhicolor
________________________________________________________________________________________________
• B U S I N E S S •
Email: [email protected]
☁ FIND ME
• INSTAGRAM: https://www.instagram.com/criolas/
• SNAPCHAT: criiolaa93
• FACEBOOK: https://www.facebook.com/criolass/
Disclaimer ‣ This video is NOT sponsored by any of the brands mentioned throughout this video. All opinions are my own and honest as always.
What'S up, you guys welcome back to my channel, as you guys can tell by the title today we're going to play a little bit more with some colors i'm trying to get out of my comfort zone. So this is pretty much my first time like actually coloring a wig, and when i say this thing came out cute, i love the color and um. We had a few issues but, as you guys can see, i made it work and i'm loving it. So if you guys want to see how i see if this look make sure you stay tuned, don't forget to like comment and subscribe to my channel and let's get right into it. Bye, okay, you guys hi a little detail about the hair um. It came with some goodies, as you guys can see. It is a 13 by 6 lace, front wig, it is transparent lace and it has is a 180 density. It'S supposed to be 22 inch, but, to be honest, i don't believe that it definitely don't. Look like a 22 inch wig. I said it is pre-plugged and all that stuff um but uh. Here i'm going to go ahead and bleach the knots and when i tell you guys the knots it was thick. When i tell you it was a big old knot. I had to go here. I went back with a developer and um went ahead and bleached it again, because the knots were so thick. This is the final result, which was okay um, but i'm just letting you know just in case. If you are interested in buying this wig here, i'm going to section the hair to get ready to um color the hair. Now i use the l'oreal high color. That'S the one that you don't need, no bleach, i mixed it in with 40 developer and i used the sizzling, copper and red fire, because i wanted to have a hint of red now mind you once i mix that in um i colored this hair three times And the hair was still amazing yeah, so i mixed that in all good and whatever, but for some reason the back of the hair didn't take the color as much as the lace front. Now i don't know if there's a thing, if you know what i did wrong yeah, let me know, but i went ahead and applied it on there and i i bleached it three times: well, not bleach it, but i colored it three times put some aluminium foil And i added a bag over it and i actually left it overnight, because i was like ain't no way that the front picks it up more. Now i wanted to the roots to be dark, so i left a little bit of the dark roots out, but this is what she's looking like and i'm not even mad about the part that it is a little bit darker in the back than it is in The front it actually looks super cute it doesn't it's not really obvious it is. You know, i know it, but anyway um she looks amazing. I blow dry, i let her dry overnight and then i went ahead and um did my little edges. Well, not i just here, i'm plucking it what i'm talking about, i'm just plugging uh the hair and, as you guys can see, maybe i see a little bit of the um the knots right there, but anyway i feel like i could have plucked a little bit More on this hair, but other than that it is an amazing wig, y'all super, affordable, y'all know i like to give y'all. You know something that is pocket friendly, i'm getting better with the plugging, but i definitely could have plucked more now i decided to curl this hair and cut it now um. I wanted it to be to give like a wave type of effect. I was going to cut some more, but i still am not comfortable enough with the scissors uh. I love watching. Uh reese's uh youtube channels. I think that's her uh her name on youtube and she gives amazing tips on how to cut the wig. Now here i'm going to go ahead and use the curling iron and just curl the hair. I actually went ahead and curled the hair and then uh just applied it and then combed it out, as you guys will see throughout the video. But i i loved the way this wig came out to be honest and this whole process. Now the only bad thing is that i had to bleach it three times or like color it. That'S the only part, but you see the curl that looks so cute and, as you guys can, if you've been on my channel, you know that i'm not really a pro at you know: styling, hair and whatever, but this year we're gon na. Do it a little different okay, so we're curling the hair today and it just came out super bomb imma. Let you watch the rest of it you. Let me all right, you guys, so the curls are popping they're looking cute, as you guys could tell um the darker part of the hair in the back. But it's really not that bad. Once you comb it out, i went ahead and tinted the lace front. With my lace tint by even even whatever, i use the shade in medium dark brown and that's literally the perfect shade. I also use the ruby kisses um foundation, the cream foundation, and i just use that to kind of blend the wig cap in because you guys know i usually don't do the bald cap method, but i don't know i i want to try it. I tried it before and that was like a total fail, but if you guys want me to like try it out on one of the videos, let me know this is what it looks like when i have her on and she looks cute already. I haven't even cut the lace front off, i'm using the black can by evan as well, and this one. Let me tell you this glue is literally everything that is really no other glue that keeps my wig down as long as this glue does so. Definitely my go-to. I also use the got to be spray. The one that's in a purple and um a blue can because that one doesn't leave no white residual, just like the the ebbin uh bottle. So those two are definitely you know my everything when it comes to applying wigs. I went ahead and used this a little. What you call it this band to lay down, let it sit for a little bit until it's dry and then i went ahead and cut the lace i cut them in. Like you know, four parts um. It is easier for me to just cut it off once i have those four parts, instead of just cutting it from ear to ear. It looks like i'm struggling with this little brow. Brow thing, but i'm really not i have to i have to say i did cut myself really bad, but um we're good. Okay, we we're good over here. Once i cut the lace off, i went ahead with um a washcloth tissue, whatever you want to use and i kind of got the residue off and then um. I usually when i do my lay my lace down. I uh don't do the ear tabs because i feel like that's the hardest part to lay down for me, so i just go back in and spray. It again lay it back down. I know it's a process, but here i'm just literally just combing out the curls and it looks amazing now here i had a little too much of that spray on it and i should have just combed it out before. It looks crazy right now, but i'm just gon na do my edges now. This is the first time actually using like one of those small um flat irons for the edges. I just went and got one. I will be linking the products down below and i don't know if i'm using it the right way or not or if i curled it the wrong way. Yeah, let me know, but i don't know how i feel about it. I will be trying it again because listen, i just bought this and we're gon na put it to use and that's that um. I use my lace spray again, just one more time to go over it and that's that's about it. You guys i went ahead and styled it. I wanted it to be um. A side part is, instead of a middle part and yeah you guys, if you like the video, if you like the way this came out, make sure you like comment and subscribe to my channel, and i hope to see you guys on my next video check out The description box for all the details, bye,


Comments
Carolyn Gamble: Gorgeous!!
Palette Therapy: We need the makeup tutorial as well!
Sammy Da Goat: First Comment This Hair Color Is Super Cuteee On You Lovely Makeup Eyebrows On Fleek
Palette Therapy: It’s giving
Palette Therapy: The two tone color is cute tho