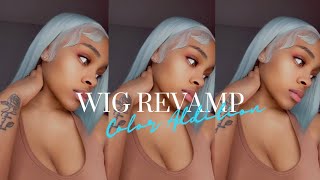
Mermaid Blue Wig Tutorial
- Posted on 26 March, 2020
- Color Lace Wig
- By Anonymous
Hi guys
I know it has been so long since i’ve posted a video lol
Will be posting more wigs and hair videos for you guys to see
I am located in columbus, OH
Ig: colordbyp
Personal IG: Iamparadiseeee
Twitter: imparadisee
Hi guys so today, I'm back with another video. I know it's been so so long. So sorry, but I'm back and I'm better so today will be a coloring and styling video and right now, I'm just showing some of the products that I'm gon na be using to achieve today's look, I used a total of six different colors and I will have Them listed in the description box below and yeah, and now I'm just getting ready to go side by side and portion of the sections into fives, so it can be colored. Two different blues that I wanted in here. I'M using these like white paper, dividers separator thingamajigs. Oh, they really help with like if you're doing like multi color, it is supposed to help you kind of keep the color separate from each other. I do think that it helped a lot keeping it separated would definitely recommend if you're going to do like one side. Colors to have some type of product that helps you with keeping the pieces separated, so they don't like mash into each other. So I got that from Sally's, I'm pretty sure you can get it from any beauty supply store in your area, though, and as you can see, I'm just going in with the first color and applying that pretty self-explanatory not going to do too much talking throughout this Process, I'm just going to let you guys watch just be as gentle as possible and that's really it and now here I am applying the paper, which again is to help the colors from not mashing into each other, because we want them to be as separate from Each other as possible and yeah, so I'm not gon na keep talking too much I'm gon na. Let you guys just watch the video getting self explainatory. What I'm doing, I'm literally about to do the same thing just with different colors, so yeah just keep watching guys, and you guys I did um go ahead and cut out the other clip of me coloring the other side, because it's the same steps on the process Over again in the video would have been too long and I didn't want like our video, so I did cut that out. So I'm sorry, you guys, I just didn't, want you guys to be sitting for so in the air for two hours watching me. Do the same thing, so I did go ahead and cut that clip up. Okay and now I am going to watercolor the back. I use three colors. I use the gunmetal gray. I believe it's what his car and then I use a Cayenne blue one, and I think the other one is called aquarium blue. I believe that's the three colors I use, I mix them all together. I don't really think it did much of a difference. I do like how he gave it like a pastel look being that I used that grey, but I don't really see that me mixing the colors gave it a different type of blue. I feel like it's the same blue as one of the Blues already made like. I don't know, and when I went to the hair store, they were all out of. Like light blue, like I wanted to do like a really really light like baby blue, but they were all out of like other blues, so I had to work with what I could find, but I do still love the end result. So yeah, that's just what I'm doing here, just watercolor in the back, so yeah, it's pretty self-explanatory with watercolor. I just take a pot boil water, and this is a pot that I strictly used for watercolor and coloring hair. I don't cook it in. I don't you. I bought this pot literally just to do that. So don't come for me because I'll come back! Thank you but yeah! So you just want it really high, because when it's really high it really helps the color see through and really stains that color into the hair. So yeah that's basically, okay and guys. This is how it looked once it dry like. Oh, my god, you guys, I am so in love like how the colors mashed together, like it literally, came out just how I envisioned it in my brain. Oh I'm like obsessed with this, like it's giving me like a aqua murder, mating type of vibe. I love it. I love you so much so now we're gon na get ready to style it. So right now, I'm just sectioning off, because I'm gon na do the two space buns and so I'm sectioning off from the frontal part to basically the back but always make sure when you're styling, that you take some hair to cover like the track or basically like The lace part because you don't want, like that part showing through your style so always do that. So that's just what I'm doing here and now I am taking my shears bond collection, wax, stick love her products and I use this to like mold the hair down and it helps like with fly aways too. So I use that over the hair that I'm laying over to cover it. Basically the laser track shown because I guess you can say so: that's just what I'm doing here and then I will proceed to go on with a hot comb to really melt it in so now we're gon na get into the styling. I decided to do like two space buns with cute bang strands in the front and then hair hanging in the back, and so I'm just getting ready to section that off. So I love how I did the overall look, but I completely forgot to plug the part in the middle so that it looked neater and I didn't realize it too after the fact. But I still love, it still think he came out super cute, but I'll have to remember to not get so on the zone that I forget steps, but now I'm just getting ready to mold those two buns. So I just took some Nairobi foam and then I'm gon na brush that and you know just start molding into ponytail. Ponytails are hard. I mean I'm getting more used to them, but they can be hard, especially because I'm such a perfectionist, especially when you're doing buns, because you want it to be like as neat as possible. But I definitely have gotten better. But it can be so hard trying to mold it into like that perfect ponytail that you want, but you just keep trying and trying, and you know you get it to how you want it and y'all. Just look at those colors like how they blend in like that is just so pretty to me so pretty and now I'm just going in and flat ironing and touching up the back so yeah you guys. This is the final looks. Super cute super fun definitely enjoy doing this. I will have more videos coming up wigs and coloring installs, all that good stuff so excited to share. You know that with you guys, thank you so much for watching. Please like subscribe comment, and I will have my Instagram and other social media linked in the description box below but again. Thank you so much guys for watching and yeah, I'm just so excited to be back on YouTube. Thank you. Guys. Bye,


Comments
Pretty & Prayed up: Loved this tutorial “Don’t come for me or I’ll come back, thank you ♀️”
Glam of Niyah: This is so bomb you’re so talented
Aliyah Moore: you’re so talented wtf you deserve a million subbies
Kimie Blanco: I seen this on Instagram love it
BigLexx TV: Bruh this is SOOO pretty wtf this needs more views
Brandi Uniquee: So bomb I’m going to try that today
Ashley Gray: Beautiful
Colette: @PARADISE FOREVER: THIS IS TOO CUTE.... CAN YOU PROVIDE THE NAMES OF THE EXACT (KISS) HAIR DYE U USED FOR THIS COLOR BLEND? IT WOULD BE GREATLY, APPRECIATED IF YOU COULD. I ALSO, WNTD TO KNW WHT BLONDE WIG TYPE DO I NEED TO GET? WHICH WILL TAKE THE HAIR DYE OF THIS COLOR? #LOVEIT.. #THATPART YES DIS ISFYE. I DNT REALLY CARE MUCH FOR COLOR HAIR ON MYSELF BUT ON OTHER PPL I DO..I'MA ROCK DIS. I WOULD HAD DID THE SAME STYLE FOR THIS BLEND:GOES GOOD WITH IT... DOES IT MATTER IF THE HAIR IS HUMAN OR SYNTHETIC WHN DYING IT?.?.?.
Chaquita Westbrook:
TOOTSIE 🤎: Did you just pour dye into bowl and apply, or is the dye mixed with something?
kierra williams: How much
Stasia Tiffany TV: Why are people using this picture in the thumbnail on the right tryna scam people . Whew Chile. Beautiful wig though