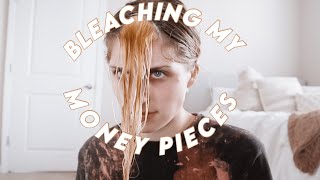
Money Piece Hair Tutorial + Teasylights [Natural Face Framing Highlights]
- Posted on 02 May, 2021
- Color Lace Wig
- By Anonymous
Learn how to create natural face-framing highlights using this money-piece hair technique with teasylights.
Full formula using @Kenra Professional
Beyond Bond Lightener 30vol
Glaze on Money Piece 7NA into Beige and VP Rapid Toner 9Vol
Glaze on the back 7N 9Vol
For more education visit http://mirellamanelli.com
Instagram: https://www.instagram.com/mirellamanel...
Facebook: https://www.facebook.com/MirellaManell...
TIKTOK: https://www.tiktok.com/@mirellamanelli...?
Pinterest: https://www.pinterest.com/mirellamanel...
HairB&B IG https://instagram.com/hairbnb_podcast
Hey it's marilla minnelli and welcome back to my channel. I'M super excited because today i'm going to be showing you how to do a customizable money piece as well as some tz lights to kind of brighten up the overall look all while still leaving it. Looking really really natural, so this is going to be a combination of keeping the hair looking really soft and natural, but then also making a statement with that money piece, bringing it all the way down. So i'm super excited, but before we continue make sure you hit that subscribe button and give this video a like and turn on all notifications. So you don't miss a tutorial now, let's go ahead and get started, so my model overall wanted a brighter look, but still wants to be brunette, she's really interested in creating a money piece. That'S not too bold and not too subtle, just something just right for her hair. As you can see, she has a fine hair texture, so i'm going to be using beyondbond lightener at a one to two mixing ratio with 30 volume developer. I chose this lightener because she does have some previously lightened pieces and also her hair is pretty fine and it lifts really easily. So i love this lightener because it has dual bond technology, and i know her hair is going to feel super silky soft, once we're done with her service to get started on her sectioning for her money piece. I'M just wanting to see where her hair naturally falls. This is why you see me combing through her hair and just grabbing and pinching the hair, so that i can see where the natural separation lies. Once you know where that natural separation lies a natural but bold statement, so this is just gon na definitely give us that it's gon na look really natural, but yet you're gon na be able to see it. And i'm telling you if you just grab and pinch it just almost separates that front fringe area. So you can see here. I have separated right down the middle and then all the way down to right on top of the ear. So it's about an inch to inch and a half wide right onto the sides. So now what you see here is i'm assessing how i'm going to put in those foils, so i've determined her head shape is a little bit rounded. So i have a little bit more working space to get in these foils, so i decided i'm going to split this right in half and go in slightly diagonal plus she has a slight widow's peak and this is going to be the best type of placement for Her hairline, so i'm just taking out those little baby hairs by brushing the hair all the way up and then bringing my weaved section towards me and now i've isolated those highlights so i can go in and quickly put in these highlights really easily. So, as you can see here, she has some previously lightened pieces, which is exactly why i chose this lightener because sometimes there is a little bit of overlap. So that's why i love beyondbond, but you do want to try your best to isolate out those blonde pieces and just going to push them aside and let them hang out of the foil. Once i get those two side foils in i'm, just going to go right horizontally behind them and start to marry those two sections together, so i'm still taking these baby lights right at the root they're back to back. There'S no hair in between these foils! So just keep that in mind when i say back to back. It means that there's no hair in between now you'll notice that i am pulling the lightener down on some pieces a little further down than others, and that's because i've just recognized that there's a little bit of orangey pigment left over from the previous color that she Had so another reason why i love beyondbond, because when it does overlap, i'm not worried about breakage or further damaging the hair. So now just to break down this entire section for you, i have two on each side of her hairline just to kind of get it started. I then married those sections together doing two back to back baby lights, taking the highlight all the way to the root and now on this third one here you can see i just stroked the product up, so not so much taking it all the way to the Root but just softening that line up just a little bit and then for this very, very last piece. So the reason why i do the tz light is to create a even more rooted effect versus the foil that was right behind it, where i stroked the product right on up. So it's just a nice transition. I love transitions for money pieces. I think they look really really natural. Now, once i get the top section completed, i'm going to move on to the sides, so this is a pretty small section, but again i'm going to do those back-to-back baby lights and by brushing the hair back and then weaving the hair towards me and taking the Liner, all the way to the root, i typically like turning my brush sideways and moving that lightener right on up, because it just gives me a softer line of demarcation and there's only going to be about two foils here on this side. So again, it's pretty thin, but if you wanted to create something extra, bold feel free to make this section even a little wider for yourself, once i'm done with the side sections i'm going to move on to the back now, keep in mind, she does have some Fine hair, so i decided to go in with a zigzag parting from the apex and just bring it down now. This is where i was discussing with her about whether or not to bring those tz lights all the way underneath. But i told her that if she wanted them to really stand out and create that depth underneath it would be essential to leave this hair out and you'll see when we're completely done. What that did to her final look, so i decided to just take a horizontal section right onto her parietal ridge, so basically where the hair starts to curve and then take a small micro zigzag section underneath that section and then tease it so i'm just kind of Lightly teasing it you do want to pack it in, but not overly for this hair type, but just enough, and that way it's out of your way when you get ready to paint on your product. So i'm just getting that foil, nice and snug in there and now i'm gon na apply my lightener just about four to five inches away from the diffused line that i want to create and then stroking the product up, and you just want to do a nice Flick of the wrist and for her ends because she does have some lightened pieces there, i'm just doing some surface hair painting onto the section of hair and then i'm going to flat, wrap this section, meaning laying another foil right on top. So i'm going to continue on with this application, just taking inch wide sections and continue to apply those tz lights now. One thing to note is that i'm only going to put in about seven eight foils total in this entire section and then you'll also see i put one in the back. I decided to add in one more later, and the reason for this is because the more of these highlights that you put in the overall blonding that you're going to get now. I want there to maintain that depth and dimension. So, in order for me to achieve that and make these highlights pop i'm leaving that brunette sectioning underneath, so it's really really important when you see her final result, you'll see what i'm talking about. So i let this process for about 45 minutes and just kept an eye on it and then now i'm going to get ready to do her final glaze. But first i'm going to take her to the bowl shampoo, her out and then also detangle. Her really really well before we get ready to do her final toner for the final formula, i decided to go in with demi permanent and i used three different formulas. So this is something i didn't film and i apologize. I don't didn't have my assistant this day. So i had to do everything myself and i'm totally bummed that i didn't get to film that portion, but for the formula i decided to use 7na at a one to two mixing ratio with nine volume developer for her root tap on the money piece. Only so this is what i put in first right onto her root area and then for the back section where i added in those teasy lights. We wanted something really natural looking, so i decided to go in with 7n at a one to two mixing ratio with nine volume developer, so keep in mind. She wanted this to still look natural. She wanted those soft highlights that were still slightly visible and also to blend in with her natural hair color, so just adding that nice dimension going on and then for the rest of the money piece. I blended that 7na into beige rapid, toner and vp rapid tone about 10 minutes. After her root shadow had been on and the back 7n section had been on so just keep in mind. Those rapid toners work really really quickly so you're going to want to work. Pretty fast, they literally work in about three to five minutes. So when you think that your toner is almost done or your root shadow is almost done, then you're going to want to go in with that rapid toner formula and here's the final result of my money piece with a little bit of tz lights for that natural. But bold statement super beautiful, i'm really happy and pleased with it and my client really likes it as well, and just to give you a little recap, i went in with a blue powder lightener at a one to two mixing ratio with 30 volume developer and then For her glaze, i used three different formulas. So did a little bit of a shadow root or root tap right onto the money piece with a in demi permanent and for the back section. I used all 7n to help blend in with her natural hair color and then for the rest of the money piece. I went in with beige rapid toner with a little bit of vp rapid toner one to two mixing ratio with nine volume developer and i processed her hair for about five minutes and i'm absolutely just love that money piece in the front. I'M just like seriously obsessed with it. I think it looks beautiful. I really hope you enjoyed this hair tutorial and if you did give this video a thumbs up and make sure to subscribe, you can also find me on my website at marillamanelli.com, and you can also find me on instagram at damn tik tok at mirella manali, and I hope to see you next time.

Comments
Micah Gallegos: In cosmetology school and trying to learn new techniques since they only teach the slightest few.. thank you for this!
Vida G: I’ve watch this video over and over, I can not tell you how many times!! . I just love love love it
Mori Johnson: Thank you! Snuck back to look for this, looks great
Nyle Lynn: Beautifully done!
Shantelle Fernandes: Hi Mirella, You explain everything so well and I've enjoyed watching your videos and the amazing transformations. I want to get this done since I need a fresh new look and have not done anything to my hair since 2019 (and thanks to the current worldwide situation). Can this be done if hair is thinning in the front area, and a side part (left side) with side swept bangs is maintained to cover up the thinning in the middle area of the head. The Money Piece would be in a burgundy colour against dark brown hair. The hair texture is fine and naturally straight.
elena mill: Love it ! Thank you!
nikhil kale: Effective and very easy way,,, thank you
Isabel Lopez: HOLA!! PRECIOSO LAS MECHAS QUE HAS REALIZADO,,,ME GUSTA MUCHO EL RESULTADO FINAL DEL COLOR DE LA MECHA. QUE MATIZ LE HAS PUESTO??!! MUCHAS GRACIAS ..
Chad Lourens: Beautiful
Moazzama Karim: Superb I just loved ❤️it. Thanks for sharing
start up: You're the best I learn a lot from you thank you
Angeline Biswas: Awesome love the videos on your clients as the hairlines on mannequins aren’t as realistic but either way live them both!
anah banana: So pretty
Angel Lopez_1984: Super. Thank you so much for sharing
82fineart: Great job u did
Ira White: Great job
Sherry Macoy: Best video out there that I’ve found so far
Fonny Irawati:
Tony Bhosle: You are amazing work mam love form india.
Ricarmelle jean: You’re amazing
Rachel Miller: What brand of toner do you use?
Vanessa Tobar: how much do you charge for something like this
Tully Soulliere: At 6:00 your friend was drying off her butt! lol ! isn`t life funny sometimes! btw you are an awseome stylist! thank you for the vid! and have a fun day.
Farrioneandonly Ali: Hei realy beautiful, which brand color & toner do you use?. I have Paul Mitchell in my salon. Can I use some of toners in Paul Mitchell to get that same result?
Lani salon: ❤️❤️❤️
Andi Arpan: nice
Lani salon:
Mark Brown: She looks a little on the brassy side. She was a pretty ashy brown color naturally. I think the 7N just pulled out more red. 7A might of given more of a neutral Tone versus the red or golden tone. But who know she might of asked for gold.
a. sandoval zuniga: Absolutely beautiful
M J: I’ve never heard anyone with the name manelli !! It’s my nickname since I was a baby lol
Lani salon:
流流汗: thank you
Sadie 8311: How would d you ask for this exact hairstyle in a salon?
Neha Atkari:
it's me_Shreyya: How to change this colour !! I did it it looks so bad on the front
Jenny JenJen: I guess the Rogue X Men hairstyle is in trend now.
ebarajas2314: What did the back look like?
Isabel Rodriguez: bello
Ziv Benigoyev: best money piece video.
Riasat Salon: I will also add money peice vid on my utube channel
Jess Luc-Fl. US: Where are you located??
Lucero: What hair color is it?
Mari P: did the assistant come out of the bathroom and wipe her butt in the mirror??
XxRubberDuckyGirlxX: Lady at 6:19