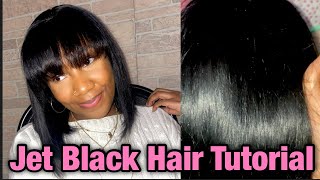
Slay 2 Of 30|Brown Roots 613 To Black-Blue Ombre|Flawless Straight Lace Wig|Install Eva Wigs
- Posted on 04 September, 2020
- Color Lace Wig
- By Anonymous
ENDLESS SUMMER
New Hair For New Season Look! Shop Now!!!
$10 Off Over $89, Code: SUMMER10.
$20 Off Over $199, Code: SUMMER20.
$35 Off Over $299, Code: SUMMER35.
$50 Off Over $399, Code: SUMMER50.
-- Vaild before 30th Sep.
The Official Wig Link:https://www.evawigs.com/ready-to-ship-...
The Only Official Website: https://www.evawigs.com
Hair Info In This Video:
SKU:SK12948
Hair Color: #6 T #22 (The Same as Picture)
Hair Type: 100% Virgin Human Hair
Hair Length: 24"
Hair Density: 150%
Hair Texture: Silky Straight
Lace Material: Korea lace
Lace Color: Medium Brown
Cap Construction: 4" Lace Front Cap with Bleached Knots
Hairline: Pre-plucked
Cap Size: Average
Follow Evawigs on Social Media:
Facebook: https://www.facebook.com/evawigs
Instagram: https://www.instagram.com/evawigs
Youtube: https://www.youtube.com/user/evawigs
Pinterest: https://www.pinterest.com/evawigs
Welcome to IAmBeautifulHustler TV
Be sure to SUBSCRIBE & Turn ON Your Bells✨
TO PURCHASE MY HAIR & PRODUCTS FROM MY BRAND: (TheBeautifulHustlerBrand )
Use Link Below ⤵️
WWW.iBhSlays.com✨
We Ship Internationally ✈️
TO CONNECT WITH ME ✨
Personal IG: Iambeautifulhustler
Business Instagram:_Beautifulhustler & @thebeautifulhustlerbrand
Twitter:_Beautifulhustl
YouTube: IAmBeautifulHustlerTV
CONTACT ME✨
☎️ 786-571-1313
Email : [email protected]
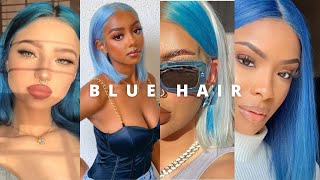
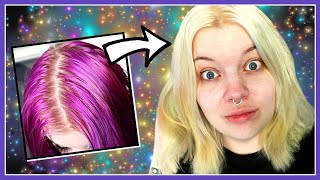
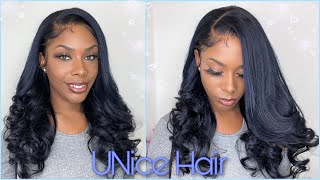
Hey beauties and welcome back to, i am beautiful. Hustler tv today is day two out of our 30 days of slay little series and today's hair will be provided by evil wigs now they did send me over this beautiful brown root, 613 wig and it was a 24 inch, but it looked way way longer than What, instead, it was, which is a really really good thing, and this 613 wig does have brown roots. It is medium brown, lace and the density is 150, so it was nice and full really really long and you know like the color was so bomb, but i wanted to turn this video up a notch and not just bring you an ordinary blonde wig. So i decided to go ahead and give this wig a beautiful uh color transformation from brown room 613 to a jet black um, like half wig with the ends blue. So i'm going to show you guys really quickly what i did and swan tips, and you know a few tips on how to get the same exact color that i achieved now. First things: first, i went ahead and did the watercolor method with the um, the blue and i used one uh bottle of ocean blue and uh, two bottles of that um sapphire blue and i just went ahead, and i did the sapphire blue first and put it In there and then once i finished dipping that i went in and added some of that ocean blue uh to the same water, and i dipped it again to get the color to be. You know darker um, like how i wanted it to be, and once i did that whole uh process. I did go ahead and you know uh shampoo out that blue dye and then i came back in and you will see the water will change because i'm going to um add the jet black um dye to the wig. Now i made this mistake and i'm telling you what to do correctly, so you don't make the same mistake. I did and spend more money on product and you know it's just really unnecessary. So um, once you begin to water dye that jet black, it's not going to take it's going to turn their hair um. It'S not the not the blue part, but that brown part of the wig. It is going to change that wig to be like greenish. On the roots, because the hair was already brown and it's not a permanent dye, so um once i actually got to doing the jet black part, and i realized it was just a waste of time, but i just still wanted to show you guys what i did So you don't make the same mistake so um. Like i uh mentioned, i did take the jet black and i tried to just let the wig sit in that jet black. As far as on the roots part and a little bit, you know a little more than um the roots but kind of like not really half of the wig, but just about you know less than half, but definitely more than just the roots. I tried to sit that wig in that jet black and it did not um turn black. How i wanted it to be so what i'm going to do is i actually um had to you know shampoo it out it just made the top part darker, but it wasn't that jet black that i wanted so right on the side. I did attach that permanent black dot that i use to um, you know get it to be jet black, like how it is with that nice little ombre melt into that blue. So you will really have to like shampoo out the wig and condition it and then go in with some permanent dye and developer and actually take your time and paint that jet black onto the hair. So you will have to do that, but with that permanent dye is definitely going to be jet black and it's definitely going to take really fast. So that is everything that i did to achieve that color, but now it's time to get into the actual installation process. So here we go um first things. First, you know, as you see you know, as you see, i have her braided down already and then i'm going to go ahead and just clean her hairline with my lace, prep and then i'm going to attach her um. You know her cap using my beautiful hustler um, my beautiful hustler wig cap, and then we will actually get into uh laying the wig. You know one and the styling and everything like that, but i just really wanted you guys to make sure um. You understood how i did that color and how i achieved it. So you don't make the mistakes. You know the same mistakes that i did, but now it's time to get into the sleigh, so stay tuned uh. So i pretty much just did my whole a wig process um you know and for her foundation color. I did use the caramel color from that ruby kisses palette. You know i showed you guys that new little blue palette that i use um, you can use this palette or you can use the ruby kisses, one that has the two different um shades in it or whatever. But, however, i did use that caramel color and i applied it on that stocking cap and that's the same color that you're gon na see me apply on the inside of her lace wig as well, and when i tell y'all, even though this is medium um brown Lace, the melt that i got okay do y'all, hear that emphasis in my voice, the melt that i got from this medium brown lace and you know in combination with technique and their foundation was unbelievable, like the lace is really undetectable and it was just like so Bomb because i know i could melt lace all day on my dark skins, but when it comes to the medium brown skins and them light skins, you got ta, really know what you're doing and the perfect colors to use you know, so it matches their skin tone Perfectly and that it's not too dark, because a common mistake, a lot of stylists make, is when they're doing lighter skin girls. The lace is always too dark for their skin because of the foundation that they're using. But you know like it was just perfect, perfect, perfect, like i had no complaints and the way this wig melted in was just like, oh god, yeah. I don't understand. I was just doing this install. It was just so in love. The whole time like that is the goal for me like every install i do. I just want to be in love and just slay and just feel good about it, and i love the color like that's. Why, when you guys recreate this color - and i probably would do it again, but in reverse with the blue at the top and a gel black at the bottom like i will make sure i show you guys exactly how to do it and i won't mess it Up because i learned from my mistake but like the melt that i got was just unbelievable and i did use four layers of my glue um when i laid the wig down and everything, and you know, of course, i blow dried on the heat setting and before I tie it down with that melt belt. I just apply some glam wax and i'm gon na go on my hot comb and just really hot comb, those roots out to the tea, and you know with that heat from that hot comb. It also helps with that melting uh process as far as getting that lace to really melt in with that glue, because the heat really pushes it in you know pushes it into your skin. So after i did that i'm going to go ahead, um, you know and tie it down with the melt belt and let that sit. While i sew down the back of the lace - okay, oh and as we went ahead and removed that melt belt. Y'All know like this is my favorite part. My favorite part is really cutting off the extra lace like as far as doing a baby here and the finishing touches. I just love to see myself cutting off the extra lace, because the melt be too real. It just be too raw and like that is literally my favorite part of the install like that's how you really know if you slayed it now like once you cut off that extra lace. If that thing is blended and you put enough glue - and you really melted that thing - and it is too too raw, like oh my god - y'all y'all got ta. Let me know what y'all think um down below on this sleigh right here, because i was just all for it. You know i'm saying, and you know this is only day two slay two. You know we got another video coming right after this, like i'm dropping them things back to back, so i hope y'all ready, but i went in and i started you know razoring off that extra lace, like i mentioned with that um eyebrow razor. That'S what i like to use and right here my razors was kind of dull so, but it still gave me like phenomenal results, but i did go ahead and purchase me some new razors, so it's easier to cut it off. You know what i'm saying you don't have to really put too much wrist work into it. It would just glide across that lace but um. I know i kind of blocked it a little bit with my elbow. Forgive me guys, but i just went ahead and erased that thing off and you know once you raise it off you tuck down any little piece. That'S still lifting which you can see was on that little piece right there. But this thing is the bomb y'all come on now. Let me know down below how y'all feeling about this series, but on this side right here i really got y'all. So i went ahead and got uh. You know you get a better look of what i pretty much did to the other side, so you just want to get as close to that hairline as possible uh, where you have it glued and just razor it all down. Oh, oh, oh so now that we have all of that lace, tacked down we're going to get into the styling portion of this video um at first i was going to do like a half of half down rollers that type of look, but with this lace wig, It'S not that full um parting space from ear to ear, like you know how you have a lace frontal like a lace front. Well, you know a lace frontal. It'S not that full parting space like the track like, and i really had - and i was really proud of myself at this point because especially for uh the baby here on the sideburns, i'm that you're gon na see you know later on in the video. I really have to finesse it because that track started like in the hairline area close by the ear. So i don't know if you guys will be able to see it. But if you really pay attention, i don't know if you probably could zoom in a little bit. You will see that on the ear sides on both sides that tracks start right there like it's, the track, don't start behind the ear. It starts before the ear like not even an inch behind a hairline, so at first i wasn't gon na do any baby hair uh by the ear, but i was just like no, i got ta find a way to finesse it and i end up finessing. You guys will see how, because i'm just gon na pull a really really thin area and, like i mentioned right here, i didn't pull it out yet because i wasn't sure how the hell i was gon na get it done. But later on, in the video you will see me go back and add baby hair to them. You know like that bottom um, sideburn area and i just had to finesse it and put a little piece and you know razor it down in a certain angle and swoop it, and it just came out so perfect, but um now that we're into the styling portion. I just went ahead and pulled everywhere. The baby hair is going to be, and you know, spread it with that tresemme and i'm going to tie that hairline down once again with that melt belt and let it sit and in the meantime, i'm just going to prep the top. I am going to do. Curls as you've seen from the thumbnail, so i'm just going to hot comb that top layer and as far as the part where the bang area side is, i did not flat iron. It i mean hot comb is super flat because i didn't want it to be. Like a flat um, you know curl, look. I wanted that side over there to have a little more height, so i did not like you know, hot comb it down super super flat, because i did want a little volume on that side there, but i did want the other side to be. You know like flat and neat and everything like that, so i'm not gon na you know press it down. I'M just gon na you know touch it a little bit on the edge to just get the part, nice and clean, but i'm gon na keep that volume. You know definitely on that other side, talking foreign now for the baby hair. Of course, i'm going to go ahead and use that eyebrow, razor and um. I use that tresemme holding spray and just swoop the baby hairs i'm right on in using the edge brush and um. You know just swoop it the best way you can um. You know everybody has their own baby hair technique me personally. I love this holding spread. Holding spray technique that i use because it's like once you spray that holding spray and you swoop it. The baby hair is firm. It'S there. It ain't moving, it ain't, you know getting on your nerves, it's you know. I just love that technique, but um. You know. If you want to use mousse, you can you know with the mousse a little more steps, because you got ta, you know swoop it and you got to tie it down. Let it dry, remove it, come back brush it out. You want it to be soft and everything, and you know i like to work smarter, not harder um, but you know, like i mentioned um. If you do want that soft look, baby hair, you know i would recommend the mousse, but if you do want your baby hairs to come out like mine or you know, have a more firm look to it, but still like soft looking at the same time, you Can use the uh tresemme or any holding spray that you prefer uh to do this technique and i loved it. You know i loved how baby hairs came out, but right here, it's finesse time, y'all see. I got a little closer because i wanted y'all to see how i did this, because that track is literally right there. You should be able to see it more now, so i pulled out a thin area in front of that track and i went in with my tweezers and you know, kind of plucked it out a little bit. So it's a little bit thinner and not too thick and i ran out of tresemme at this point. So now i'm just going in with that got to be spraying and i'm scooping it. But i cut that baby hair kind of like in a diagonal. So, as i'm swooping it down, it will fall. Diagonally um, like you know, in a diagonal um, and i thought that was really really cute. So i'm gon na do this to this side and then do the same exact thing to the other side and honey. When i tell y'all how these edges is laid, this lace is melted, like you really don't see no face at all, my god, i'm here for it, i'm sorry. If you don't like this video, you clearly got to be a hater at this point cause this video looks too good. Her hair looks too good. The makeup looks good. The melt is good. The color is good, like anywho into the curls we go um. I did use i'm trying out this olive oil kind of like spritz, so that's what i'm spraying on the hair, i'm just my first time using it, and i kind of you know. I know i liked it. You know it gave you a nice firm curl and i just pin curl each curl as i went along. So i'm right now, i'm using my golden hot curler. I just got this pretty new and i love it because it goes to 500 degrees. So you know it's like the big one, so it's for big curls and everything like that so um. I am using that golden hot curler um and i'm using the olive oil spritz and just spraying it on each piece before i curl it and then once i curl it, i'm just going to go ahead and pin it. So i'm curling everything on this side away from the face so because you know this side of the bang is going to be on and you want to curl the hair in that in the direction that you want it to fall. So, of course i want all of the hair to go away from the face, so i will curl it accordingly. So i'm just going to go ahead and you know just get everything all curled up and then we would do the whole combing out process. Oh, oh, oh uh, good, oh uh, kids! Oh! So now that i have everything curled up, i'm going to go ahead and apply, got to be spray all over it and then go on with the olive oil or sheen and her hair is just. I ain't. Never seen some curlers, like you know, have somebody have a little pin up yeah. I ain't never seen it. Look this good. I'M sorry y'all like i am really really loving. This install y'all do not understand honey, but i'm gon na go ahead and remove all of those clips uh. Once i remove those clips, i'm gon na go ahead and just take a wide tooth comb and i'm using my little blinged out a wide tooth comb um and i'm just gon na comb. Everything like i mentioned in the direction that i wanted to flow. Then i'm also gon na go in and i did not have a razor comb, so i had to be ghetto y'all and go on with my eyebrow razor and just cut a little and just a tad little a bit of layers towards the front. On the other side, just to give it that that look that i'm going for so you will see me grab a piece of that top there and you know, take my eyebrow razor and um. You know chop it down just a little bit and you know curl. It again just to really get that look that i was going for, so i'm just going to go ahead and do that. Okay, uh and let's talk about this sleigh honey. Yes, god get in silver honey. But before we can finish it, you know we got ta conceal that part, so i went right back in with that caramel foundation and cleaned that part up and baby. When i tell you, oh my god, i am so in love like y'all like i am so in love with this color, that's installed or baby hairs delays. Just everything like you would never know. This was a blonde brown roost wig and i'm just loving it. But let me know what you guys think down below. Thank you guys for coming in. I love you see you guys next time.
Comments
SlayedBy Jordan: Bae you did that sh*t
Jasmine Brooks: Love it, this is everything from the color the style everything i love it! Also its so good to see someone who loves wit they do wit a passion and girl it shows in everything u do! One day I keep telling myself u gonna bless my head foreal!! Girl I'm trying to come that way!! Real talk!!
Guapa Jas: LOVING the series
trinai02: Loving this series! Keep the slays coming!!
DeeVine Styles: You made everything look like a breeze thanks auntieeeee ✨
Elizabeth: I love this. You really make it look so easy. But I agree. Those two colors together is everything. Beautiful work as always.
Kaylan: Girlll! You did that!!!! I never seen a more beautiful blue!!
Crimson_Kiss: Everything about this video is . When ur client applied lip gloss to her already glossed lips I just said she know she is beautiful and slayyyed to the gawwds
tiffanyjackson521: 18:27 AT THIS POINT YESSSSSSSS HONEY YOU SLAYED PER USUAL thank you for showing the mistake you made some YouTubers edit their mistakes out I appreciate that
Kimberly Clark: Absolutely beautiful, beautiful models as well!
living with faith: I love the series this so pretty
Nikki Dean: Yess goodness this is the definition of SLAY I’m going to learn a lot from you
CiCi La’Beth: That Slay was real hunni!!!!
Dorothea Newton: I love it! Beautiful job❤❤❤
Mia Red: This is my favorite! Love it
Kat Nicholson: I absolutely love this!
tiffanyjackson521: Thank you so much for the slays you dropping some ish believe I have my pen and paper taking notes
Sakeena Nicole: Yasss! This is Everythinggg
Leah Anthony: Absolutely gorgeous
xoAngelicaF: Slayed tf outta that wig! I know she felt like that B when you got done lol
Tha1HoesLuv2Hate: Yesssss You Did That I Love This Look And Color
Shell Shell Beyond Beauty: Yesss been waiting on this slay. I'm here early. Your so talented. I would love for you to slay my head one day.
V_III: Pin Curl Foundation was ON POINT BLANK PERIOD!!!
Sherranda Patton: Omg!!!! You is doing that hair I just love those colors and how you're slaying that hair wow!!! Can't wait for more videos.
kathy strickland: I love it !!!!!❤
necaela penn: This style is the BOMB !
Lafyia PrayerWorks: Yaaasssss! Super cute! Nailed it to the T!! Period.
Christiann Morris: YASSSSS SIS IT IS LAID....THATS HOW I FEEL ABOUT THIS SERIES
Princess Toyia: Gorgeous as usual #Shaes30daysofslay #Shaedontplaywiththeslay This is one of my favorite installs!!!!!!!
Kersha Beaver: Love it
Keisha J: Loooove this
Babysister Cas: That is beautiful...Girl you got it going on wish you was in my city
Cree S: Love this
Stephanie Smith: DEFINITELY snapped
Jamilla Worsley: Babii that lace is melted melted.. can’t even tell it’s lace.. you did the hell out of this install... i looooovvveee it.. i love the techniques you do wen it comes to doing these installs and frontals
Ashley Griggs: Beautiful hustle girllll you got them hands this is beyond melted!!!!!
Alice Coleman: Gorgeous
Hurela Hair: beautiflul ,very unique
Sherranda Patton: I just love watching you and Jordan doing hair and wondering how much do ya'll charge to do it and if ya'll willing to open up a shop in fort Smith Ar.
posh princess: What tresemme spray do u use ? The firm hold ?
Kimberly Clark: OMG I would love to be a old lady model
Lacedby J: ❤️❤️❤️
Angelique Drake: Yass!! I’m here for it
Monique Starr: love
Shys Way: Where do you get the bands from ??? The one you use to mold the lace down I neeed
kkimberly2004: *GIRL, GIRL, GIIRRLLL, YOU DID THAT RIGHT THERE! LOL YOU ARE THE MVP OF INSTALLS! LOL*
Avianca G: Can you do some installs on low hair lines , smaller foreheads / flat foreheads .
Lovely: Beautiful! And excellent techniques. Where are you located???
modelchiic17: ❤️
Jaames Higgins: Yassssss mama come thru pooh, Period
Monique Wishom: You did that melt to the godds
Alcione Carvalho: l loved
Malijah Serenity:
QueenB: What did you do to make sure dye did not get on the lace?
Alicia Spell: ❤
Davina Dawson: ❣️❣️❣️
prestige P: A BITCH COULD NEVER
Aneisha Shaw:
Tameka Bryan: ♥️♥️
J Nevé: I love
Rhonda Blue: Ooohhh Chile...what lace..ok. U did that girl.
Johndell Sanders: yes u did that.
Nylahgirllikeyesssss:
Samone Jones, JD: Talent...for no reason... just woke up and was great.
Moodahh King: Yes fye
Quetia Ammons: Killer
Chosen ByGod TV: September marathon
Alcione Carvalho: You charge how much to put
M'Lani Smith: How do I book with you
Natasha Caroline: If you are ever in Florida, plz give me acall. You are soooo talented
Funmi Akintunde: am I tripping because I keep seeing Megan Thee Stallion
Alcione Carvalho: You also come here in Brazil
Cpk: Man where are you located....