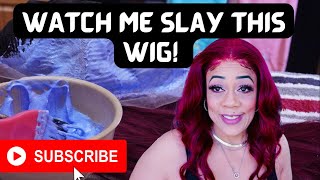
How To Bleach Knots + Wig Install | Very Detailed | Ft. Isee Hair ✨
- Posted on 25 May, 2020
- Color Lace Wig
- By Anonymous
I DO NOT OWN COPYRIGHTS TO THE MUSIC PLAYING IN THIS VIDEO
SONG ✨ : KingDolla- No Lie feat. (LeyLivin’ & N’yasia)
.........................................................................
ITEMS USED IN VIDEO ✨
CLAIROL BW 2 bleaching powder ✨ : https://www.walmart.com/ip/Clairol-BW2...
40 VOLUME Developer ✨ : https://www.amazon.com/Marianna-Super-...
SHIMMER LIGHTS SHAMPOO ✨ : https://www.amazon.com/Clairol-Shimmer...
GHOST BOND GLUE ✨ : https://www.amazon.com/Ghost-Bond-Hair...
STYLE FACTOR EDGE BOOSTER ✨ : https://www.amazon.com/Style-Factor-Bo...
GOT2B GLUED SPRAY ✨ : https://www.amazon.com/GOT-2B-Glued-Bl...
.........................................................................
HAIR DETAILS ✨ : https://m.iseehair.com/isee-hair-body-...
Length ✨: 20 inches
Density ✨: 130%
Frontal✨ : 13x6
Hair Type ✨ : Peruvian
.........................................................................
CONTACT ✨:
Instagram : Badsuh_20
Snapchat : Badsuh_20
Hey beautiful people is here and I'm back with another video. So, as you can see from my title today, I'm going to show you guys how I bleach the knots for this wig and how I installed it. It'S um, it's from I see here, it's 20 inches and it's a 13 by 6 frontal. Then I actually love how this turned out like. Do you see that, but don't worry, I'm gon na show you guys exactly how I did it. So if you want to see more, just continue watching, don't forget to subscribe down below and drum a little family and don't forget to Like comment and share okay, so the items are going to use. Are the claro b2 bleaching powder, the 40 volume developer, shimmering light shampoo, gloves a detangling brush or comb and something to put the bleach in okay guys? So now I'm just taking out the stuff that were in the bag that the wig came in, and I got a wig cap and I also got some 3d lashes okay. So the wig that I'm gon na be using in this video today is by icy hair. Calm and it is a 20 inch, 13 by 6 frontal and it's Peruvian, with 130 percent density. So, as you can see, it's really soft and bouncy, and I really love this hair because it doesn't really shed a lot and even though it's 130 density, only it's actually pretty thick. So this is the hair line before I bleach the knots it's kind of thick and it's a little bit darker than my skin, so I want to make it skin color go first, we're gon na need gloves, because the chemical is pretty strong and you don't want It to get on your skin, so now you just see me spraying the hairline with water, just to make sure that the baby hairs aren't in the way when we're bleaching it and then I'm gon na use a brush to brush it back. You could also use got to be glue spray, but I just used water because that's what I had nearby okay, so I had a little bit of leftover powder from a packet that I used last time. So I just poured that out and then I added more to it. I kind of made a lot because I was using enough for two weeks. You don't have to make this much. You could use about like half of what I already have. So I don't really have a set measurement, I kind of just eyeball it, but I would recommend maybe like two or three scoops of the bleach so also for the developer. I don't have like a set measurement like I said before, but I just pour in like little droplets at a time and I mix it and depending on the consistency, I'll know, if I should add more or not so you want to try your best not to Make it too watery because then it's gon na bleach, the hair, and we don't want that so as you can see, I'm just adding more and mixing it until I get the right consistency by the way y'all a little disclaimer. This thing smells terrible like it's. So strong, so if you think you need a mask, then maybe you should get one just in case. So usually, when I test to see if it's good enough, I put some on my brush and I make sure I hold it up and if it starts dripping off, then that means that it's too watery so once it like sticks to the brush, then that means That it's good okay, so the way you apply the bleach is very important. You want to make sure you're holding up the wig by its lace and you're pulling the brush away from the hair. I don't know if that makes a lot of sense, but you don't want to put too much pressure because then it'll seep through so now, you just see me brushing it in an upwards motion using very slight strokes and I'm gon na do that for the whole Front tool just to make sure everything gets an equal amount. I love the way you keep your buddy at the pro night. Okay, so now that I'm done applying, I usually turn it over very gently onto a piece of foil. So you want to make sure you keep checking on it because you don't want it to over bleach. Mine took only 30 minutes, but sometimes it could take 45 minutes. It just depends on the type of lace you have so like. I said you want to keep monitoring it and like 15 minute increments. Okay, so now I'm just using some cool water and then I'm just washing out the bleach just to make sure I stop the bleaching process. So, as you could see, the lace looks a lot better. It'S a lot more skin toned. So now I'm gon na go in with the shimmering light shampoo and I'm gon na make sure I focus it on the lace just to make sure I washed out any of the excess bleach. It'S also kind of helps tone down like that. Orangey color that sometimes the wigs might come out with it makes it a little bit more neutral, okay. So now I'm just rinsing it out with some warm water just to make sure I got everything out and I'm only gon na wash it once because I didn't really think it needed too much of the shimmering lights. Now you could see that it has like a nicer browner type of color on the lace, so you can use any conditioner that you like it doesn't really matter. You just want to make sure that your hair is going to be nice and soft when you're finish. Okay, so now that I look at the hairline, I could see that it doesn't really need too much plucking, but there's a little line where you could kind of see that it's a little thicker and that's what we're gon na mostly focus on. So the first thing I usually do is make sure my hair is wet and then I'm gon na use the soft part of my brush to brush it back. So now, I'm gon na use my tail comb to part away those baby hairs at the front. The thinner pieces and I'm gon na pluck the part at the back. So now you just seem using one hand to pull back the hair and then I'm going to use the other hand with my tweezer to just pluck as much as I think is necessary. So you want to try your best not to over, pluck it so keep checking it as you go along buddy. I see shooting my shock. I need you, I need you. You'Ll get undressed in the pic gon na text me the preview now that I've plucked enough. I'M just gon na comb, the hair back together and then I'm just gon na fix any parts that I think needs a little more okay, so for this video, I'm gon na be doing a middle part. So now you just see me parting it and then I'm gon na lightly pluck my part just to make sure it looks natural nope. Do it you keep it buddy, okay. So this is how it looks. I'M gon na wait for it to dry. While I go to put on my wig cap and then I'll be right back okay, so I already started to install my wig cap. If you want to see a detail, video of how i do my wig cap, just let me know in the comments down below okay. So now I'm just going in with my rubbing alcohol and the napkin and I'm wiping around the circumference before I put the glue on it now, I'm just trying on the wig to see if I cut off enough of the wig cap before I glue it down. Okay, so I find it a lot easier when I cut the lace into three sections before I glue it, it makes it a lot more seamless in my opinion, but if you want to just do the whole thing at once, you could do that. Okay, so the glue I'm gon na be using is the ghost bond glue. So when I'm doing my wing, I always start from the middle and then I make sure it's centered before I do the sides now, I'm just applying the glue by putting like little dots going across and then I'm gon na use my tail comb sort of mix. It in and then I'll blow dry it until it's clear. I see you shooting my shot, get in fast you to the best. I need you. I need you when you'll get undressed in this, keep okay, so to make sure that your hair is laying flat you're going to want to pull the lace up to where the hairline is and then lay it down right on top of the wig cap. Okay, so now I'm just taking my tail comb and I'm just gon na comb it backwards and make sure that the glue sets okay. So now I'm just blow drying it until the glue is dried and then I'm gon na repeat those same steps to the other. Two sides, so I'm not going to talk too. I see you shooting my shot confess you're the best I need you. I need you you'll get uh. Excuse me come get this work, get you my Rihanna. Keep me the buck, yeah, I'm being honest, yeah! No! Nobody! Okay, so now that I've glued it down, I'm just gon na tie it down with my headscarf and then I'm gon na wait about 15 minutes. It could wait for like less because it's already dry technically, I just wanted to set. So you could wait for like 10 to 15 minutes and then you could take it off okay. So it's been 15 minutes and I'm back now, I'm taking off my headscarf and as you can see, the lace is really melted. Oh, to cut the lace, I go in with a sharp scissors or eyebrow razor. I kind of just go back and forth depending on how I feel so. You want to just cut it as close as you can to where you glued, and also try your best to cut it in, like a zigzag motion. Don'T cut it straight because if you cut it straight across it's gon na look kind of weird so, like I said before, you're gon na see me going back and forth between my scissors and the razor. Oh, no! No! No, you already know. Excuse me come get this work kid you Mariana, keep me the bunny yeah, I'm being honest, yeah for the pieces that are lifting I'm just gon na. Take my tail comb and put a little bit of the glue on it and then put it in those areas. Your buddy okay, so now that everything is glued down, I'm just gon na take my alcohol and a napkin again and then I'm gon na wipe off all the glue residue. Okay. So now I'm just tying it down for a second time, just for like five minutes to make sure that all that glue that I just put on it, this set okay. So I'm back so now you just see me taking my Beauty Blender with the foundation and I'm just gon na put a little bit on the hairline so that it blends a little better okay. So now you just see me refix in my part, cuz. I got messed up in the process and then we're gon na do baby hairs. Okay! So now I'm just going in with my nairobi mousse and I'm gon na put it down on the top of my hair to make sure that is flat. So for the baby hairs, I don't really like mine too thick, so I usually just take out a little bit of the hair and then I'm gon na cut it with my eyebrow razor and then lay it down. Do we keep it buddy at the broad I'd? Okay, so now I'm just spraying my hair, with the gut to be glued, and I'm gon na use my hot comb to make sure that it's flat and laid nobody okay. So now I'm just using my eyebrow razor to cut the baby hair short and then I'm gon na use the style factor edge, boosts their edge control and an edge brush tool images. I see you shooting my shot, get it fast. You know the best. I need you, I need you when you'll get undressed in the keep okay. So now that I'm finished I'm just gon na go back in with the got to be glued and the hot comb just to make sure it's flat enough for my liking. And that's really, as you can see, the hair is really true. That'S lent because it's actually at the bottom of my back, so I really love the way this turned out like I'm so happy, and the hair is just so soft. It doesn't even shed a lot like honestly. This is really a good buy. Okay, thank you guys for watching make sure you comment down below and let me know if you like how it turned out and don't forget to like and share and subscribe, see you in the next video


Comments
Sherlise Anei: This was so helpful I’ll definitely be using this when I do my wigs!! New subbie
Shankewi: Loved the look of the baby hairs they look natural.. loved the overall look
Cindy Hydes: Girl you slayed this!!! Loved it! I’ve learned so much by watching this.
Braya Johnson: Great advice and video! I never knew how to do this for wigs! Thanks!
Ashanti 02: Love this, very detailed!!
Niara Reid: Girl, you slayed the heck out of thisssss!!
Gabie Mariee: I love how it came out! I been meaning to buy ghost bond
No, Style.: This is so cuteeee!!! Love this style!
Joy Blackood: Love wat you're doing Tiara my cuz. I'm proud of you❤❤
DEE_CHARM: This was slayed♥️♥️
Tamoy Boreland: I love it ❤❤
Shreya Aishani: thanks for sharing.... helpful video keep going
Celest Eccleston: Omgggggg so beautiful
Nathalee Ewan: Nice!!!
Tia Halloway: So nice
Tarila LifeStyle: Do you have to use that shampoo or I can use any?
Bernadine Lawrence: Good job
Tia Halloway:
Kay G.: how many inches were the bundles that came w the frontal?
Kick It Wit Courtney: ! .