How To Revamp An Old Wig | Reinstall Wig | #Iseehair
- Posted on 04 November, 2020
- Color Lace Wig
- By Anonymous
Welcome back to my channel! I know this video is LONG and filled with A LOT of information, but I hope you still enjoyed and learned new techniques
If you liked this video, please give it a thumbs up! Also, as always, if you have any questions or comments, comment them down below
BE SURE TO TURN ON MY POST NOTIFICATIONS SO YOU DO NOT MISS A VIDEO AND SUBSCRIBE TO MY CHANNEL
PRODUCTS IN VIDEO:
Eyebrow Razor
Got2B Freeze Spray
Ericka J Bold Hold
Scissors
Popsicle Stick
L.A. Colors Pressed Powder
Ebin New York Tinted Lace Spray
Cantu Curling Cream
LottaBody Foaming Mousse
HAIR IN VIDEO:
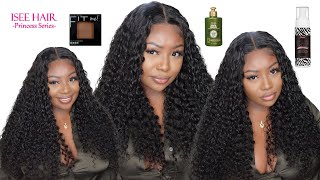
#ISEEHAIR
Hair Color: #1B
Hair Length: 22 IN.
Hair Type: Mongolian Hair
Price: $171.99
LINK TO WEBSITE: https://www.iseehair.com/
DIRECT LINK TO HAIR: https://www.iseehair.com/isee-hair-bra...
TITLE OF HAIR:
ISEE HAIR Water Wave Lace Frontal Wigs 100% Human Virgin Hair Wigs
DISCOUNT CODES #ISEEHAIRCOMPANY :
Save $10,Over $199 ,With Code Beauty10
Save $15,Over $299 , With Code Beauty15
Save $20,Over $399 ,With Code Beauty20
Save $25,Over $499 ,With Code Beauty25
CONNECT WITH ME ON SOCIAL MEDIA:
IG: sierraasaron
Twitter: sierraasaron
Tik Tok: sierraasaron
FOR ALL BUSINESS INQUIRES:
Email: [email protected]
THIS IS NOT A SPONSORED VIDEO! 100% HONEST REVIEW
So welcome back to my channel we're going to jump right into this video, so starting off, i'm just putting a cap on my head and depending on which cap you buy is how far down you want to pull it. Usually i pull it either to my eyes or my nose. So now what i like to do is just cut slits, not pieces out just slit, so i can get my ears through and then on. The eyes is when i cut actual holes, please be careful, because if you look don't do how i'm i'm doing it, please pull it as far far away from your face as you can. I don't know what it was with this cap, but it just wasn't going down as far as i wanted it to so i just had to sort of like cut this big hole and then put it around my nose. The whole point of this is one, so you can see and two so the cap stays down as you're gluing it. That'S all it's for all right so now taking free spray in the eyebrow razor, not the actual razor part, the back of it or the end of it. You just want to start to spray it and then use your eyebrow razor to sort of keep it in the spot that you want to add. This is why i recommend that, because without the eyebrow razor, it's going to start dripping everywhere and just become a big mess all right. So now i'm going to take the blow dryer on cool and just dry it until it's dry. But what i also do is i do 10 minutes on the dryer and then 10 minutes letting it air dry. So just keep that in mind if you want the maximum dryness for your cap, all right so now using erika j's glue, we're going to start applying our layers so also notice how i am taking the glue right above my ear as well. You want to do that because if you know caps start to lift very fast if it's not dry and the first area is going to lift that is right by your ears. So you want to put glue right there to secure it and make sure it doesn't lift at all. So once again, i'm using the eyebrow razor same as i did with the freeze spray, but this time the whole purpose of it is to just even out the layers, because if the layers are not even it will not dry clear alright. So i did the other side off camera and now i'm going back in again with my blow dryer on cool and once again, i'm doing the 10 minutes on 10 minutes off of air drying and using a blow dryer. So now, after i've done that, i'm going back in with the freeze spray, this again is to just ensure that my cap is glued down and it's not going nowhere. So once again, i'm doing the same thing with the eyebrow eraser using the end or the back of it, not the actual razor to spray in place to make sure it's not dripping anywhere else. I don't want it to go alright. So now my cap is completely dry and you want to make sure your cap is completely dry. Do not cut your cap if it is not dry and you can literally test that out by just lifting the cap a little bit if it lifts right away or you see any white residue, it is not dry yet so going back in with scissors, i'm just Cutting any excess cap off and then what my scissors cannot get, then i will go in with my eyebrow razor and cut according to my hairline all right. So all i'm going to say for this part is that more is better than less because if you cut too much off you're, basically going to have to glue your real hair and that's not good all right. So going back in with my erica j glue, i'm going to start working in sections, starting with the middle and i'm just doing what i did previously, except i'm just doing it in sections. Only and you see me using a popsicle stick, but you can use the eyebrow razor too so this time i actually don't do the whole air dry. I just work with the blow dryer on cool and then once i see it lightening up a little bit, then i start to glue the other sides of the cap down. So i know you're supposed to use lace tint on the lace. Obviously, but i still apply it to my cap just so, it can have that extra ball cap melt into the skin sort of look, but the two still don't match. So i still do say you do not have to buy these. You can just get um. You know a face powder in your shade and just go from there me i'm just extra. I still brought the lace tint to just sort of like save extra time and then i'm also going in with la colors pressed powder and my complexion. I don't really remember what shade it was, but it was la colors you can. They have a whole bunch of different shades. I'M pretty sure you can find your shade and i'm just using a pressed powder, mainly on the front of the cap, because i don't like spraying the tint on the front of the cap, just because it can get all over the place, so i'm mainly applying it. There, but i do still apply the powder all over my head, so it can seamlessly blend in all right. So now i'm just taking rubbing alcohol in a cotton ball and i'm just wiping off any excess powder that may be on my forehead. You do not want to skip this step because leaving any powder on your head will not lead to a flawless install okay. So this is the last time we're gon na be using the glue and then go and apply the wig, because now that i'm watching over this clip, i might have used the glue one too many times so anyway. Now i'm just applying it in the middle. I like working in sections before i go and apply my wig, because it's just much easier for me and i highly recommend, if you're a beginner, to apply the glue in sections once you go to apply the wig. So you already know my whole process of how i do the glue and now i'm just taking my blow dryer on cool. Once again, i skipped over the air drying part. So now i'm gon na go and apply the wig, and you know that whole little step. One two step of applying the wig and right now you just see me sort of putting the combs in the back. I don't put the cones in the front, obviously, and then i will now just go and take a comb, and what i like to do is sort of rub the comb back and forth. That'S just how it stays in place. That'S just how i like doing it and now we're going to start working on gluing the sides of the wig. So once again it's the same process. You just want to really watch. If you can watch closely how i'm sort of getting it on a wig, you do not want to do that. You want to push the lace and the hair back and just out the way it just makes the install much better and once again, i'm just evenly smoothing out the glue and then i'm gon na blow dry on cool and then i'm gon na just apply that And i'm only showing this side, because i like only showing one side of each video, because then the video gets really long if i keep showing the entire process. So now that i have glued the wig down, i'm gon na just take free spray to you know, make sure ain't going to wear so now taking the blow dryer on cool and my comb. I can't really explain the motion i'm doing, but it's just like a sort of like back and forth rubbing motion and it really does make a difference so now, taking whatever you have literally, you do not have to use that you can take a scarf. You can take, you know a headband whatever you just want to take something to tie your lace down, so it can have a minute to set into you know your skin and look all flawless. So now what i'm doing is sort of prepping, my hair. So i'm starting off with just completely wetting it and then i'm taking the cantu curl cream and just applying it now this step, it's not going to really make sense as to why i'm doing it right now, but it'll make sense later notice, how i am not Sort of wetting, the top of my hair and i'm not putting product near the top of my hair. That is because the lace, as you can see, is completely busted, and i need to go in with a hot comb. To sort of you know, detangle it and sort it all out. So if you're watching this video for the purposes of you know you messed your lace up, please do not apply all this product and all this water towards the top of your hair, because that's the part that we still need to apply heat on. So i pretty much left this scarf on for about 30 minutes and i feel like that's like a good enough time. So now, like i said, the lace is completely busted. So what i'm doing right now is separating the front tool from the rest of the hair, because i'm not applying heat to the rest of the hair, i'm just applying it to the frontal. So now i'm gon na just start detangling the hair a little bit with a comb before i go in with my hot comb and please like keep in mind, trust me. I have tried if your hair is matted and busted you combing it through will not take the knots out. You have to use some form of heat to sort of help, get the tangles out, because trust me i have tried. That is how i ended up with so many knots and holes in this wig is because i tried to sit there and comb it all out instead of using a hot comb so now to cover up my bald spots, i'm just using the black highlighter tint, i'm Gon na leave it down in the description box below - i don't know the exact name. So please pay attention to this part. I am not doing it all toward the front, i'm just doing it for the ball pieces in the back, because once you start spraying it a little bit too close to the front too close to your baby hairs and all of that you're going to start to Give that cheap, wig look, and you do not want that. You still want to give you know a nice scalp illusion all right. So now that i completely detangled my lace, i'ma just continue cutting off any excess lace. That'S just a little bit too much like it's a little bit too noticeable and it's just not needed because we're getting ready to do baby hairs anyway. So, as you can see, i've lost a lot of lace due to bald spots, and you know holes and all of that. So it's basically going to be like a free part sort of, but i still wanted to create some sort of part in my hair. Just so, i could see some sort of separation, so that's why you can see the part being so small is because i've had to cut a lot of lace off due to it just being no more hair left at all. So basically, for this part, i am not going to talk through this, because i am not an expert with baby hairs. This is something that i am still learning myself. So therefore, i'm not going to tell you how to do the baby hairs, because i'm quite certain not an expert in this myself, so you know just sort of watch the struggle do do so after that entire struggle. I did tie my edges down for about 10 to 20 minutes just to let it dry and now. This is basically me just touching up everything adding a little bit more spray cutting off any extra lace. I see adding more powder and then you know stay tuned because i'm gon na get into all of this hair right after so this is the finishing look and i'm just going to the hair the hair, as always, i'm going to leave in the description box below, But if you are really curious, this is the hair i reviewed months back months back and it still looks amazing. So this is like a little mini update, so i can talk about this hair a little bit. So the reason why the front tool piece looked that bad is because i was rushing to go somewhere one day, and this was still like a good like month and a half ago. This is back in the summer time. What am i talking about? This was all the way back in the summertime. I was rushing to go somewhere and i was trying to rinse the glue out really fast, but i did the process all wrong and i was like trying to it got all matted the hair. The frontal piece was just matted together, all of the hair was just clumped together and then, as i was trying to comb it out, i was being heavy-handed and like the hair, just started coming out in clumps, which resulted in the holes in the whole bunch of Missing pieces all over the hair, so that's what happened to the frontal piece and for a long, long, long long time i did not want to wear this hair whatsoever. I was getting ready to throw in the trash. I was like there's no way i can wear this hair out anymore, like it's done, it's damaged and then finally, i said like no because y'all see how good this hair look, i i couldn't. I couldn't just throw it out without giving it a try. Excuse my little bleach thing you're going to ignore that, but i couldn't just throw it out without giving it a good try. So i did my little installation and stuff and now look it look brand new. It look brand new, so this is like a little video to show you. You got wigs and you're nervous about oh, like if you messed it up a while ago, don't throw it out, don't throw it out. I promise you it's so much stuff out now for you to repair your wigs. You don't have to like throw it out. Like trust me, there are multiple videos beside mine that will show you how to repair a wig, whether you put a hole in it, whether you ripped a whole bunch of hair out whether you cut the lace too far. It'S always something that you can do to fix your wig. So with that being said, that's the end of this video and as always, if you have any questions or comments, please leave them down below. If you haven't subscribed to my channel you're missing out you're missing out - and you know, turn my post notifications on so you can see when i'll be dropping another video, and that is the end of this video. Thank you so much for watching you.

Comments
Little Bratt: Do yo recommend this hair still ?