Beginner Friendly Detailed Frontal Install From Start To Finish Ft Wiggins Hair
- Posted on 03 March, 2021
- Fake Scalp Wig
- By Anonymous
════════დ #WigginsHair დ═══════
Get $8 off with coupon code”Lex” !!
❤Direct Link➤https://bit.ly/3kJpqRp
Hair details: #loosedeepwave lace frontal wig 250% density 28 inches
More Invisible skin melt #hdlacewig ➤https://bit.ly/307cAmB
You may also like:
1.Hot selling #lacefrontalwig➤https://bit.ly/307cAmB
2.Premade colored wig➤https://bit.ly/3kC3FTG
3.Lazy girl approved #headbandwig➤https://bit.ly/3raUhZy
Follow @wigginshair on instagram:https://bit.ly/3rrJPMX
Tiktok@wigginshairbest
Facebook @wigginshair:https://bit.ly/3cMwvyL
Email: [email protected]
_______________________________________
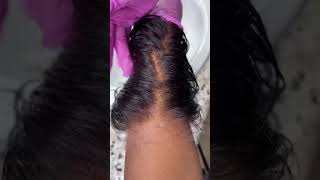
Hey lovelies and welcome back to my channel, so today's video is going to be all about me thoroughly, walking you through the process of installing and melting this gorgeous wig, to give the illusion that it is coming straight out of my scalp okay, so i've gotten so Much better with my installs over time, and i feel so much more comfortable now to share the process with you guys and in this video i'll, be showing you how i bleach my knots, i'm going to be showing you how i tip my lace to match my Skin tone perfectly i'm going to be showing a bit of me: plucking, the hairline and finally, installing this gorgeous unit. By the end of this video, you should feel a bit more confident with the install process. So let's go ahead and get started. This beautiful wig today is provided by wigan's, hair company and quick little side notes. I'Ve worked with their hair so many times before. I do my clients and i've been waiting for them to reach out to me. So, of course, i just had to say yes and i received the 13x4 loose deep wave, hair and 28 beautiful inches like just look at how look at the natural curls, like just this hair. Had me sold from the moment that i saw it on their site and i have absolutely no regrets with my decision. Their lace is said to be hd lace. However, i would personally classify this as swiss lace, but it is able to blend into my skin tone. Very well for me being a chocolate girl, so just imagine once you tint the lace and color match it very well to your skin color like girl. That melts is going to be so insane. I promise you, but the only major complaint that i do have is the limited parting space that comes on the sides of the frontal. I would have appreciated the sides being four inches as well. For all my side, part lovers like myself, but you know this is giving very much two inches and i'm not pleased with that and yeah with the hair inside of the box also came a bunch of cool things for anyone who is interested now, don't hate me Here but i did record the whole process of me bleaching the knots because i just thought it would have been rude for me to like not show the whole customization process and just plopped a perfectly done up wig on my head to install, but my camera died. While i was recording that bit and for whatever reason what i was recording at the time did not save on my sd card. So hopefully everyone is already a bit familiar with bleaching knots and i don't have to get into much detail about that. But i was able to record these parts to show you guys the technique that i use with bleaching already made wigs. So i would usually use a knife to apply the bleach on solo frontals, but because this frontal is already on the way the bleaching process is a bit different and it can get very tricky trying to put the bleach mix on with a knife. So i started using a brush, preferably a small one, and i applied the bleach from bottom to top. I'Ve struggled with this so many times trying to figure out the best way and honestly this has worked the easiest, so yeah we're going to go ahead and let that bleach sit in for some time and when the knots are ready. This is what i am left with. The knots are a lot less visible, which is perfect for the blend that we want, and it also allows the parting space to look a lot more seamless and very clean, which is definitely a lot better compared to what it was looking like in the beginning of This video so yeah now the wig is ready for the real customization. So i like to start by getting the lace to a much closer match to my skin tone, so i'm starting with turning my wig inside out to prep that lace and these right here you guys are my secret weapons to getting that perfect lace tint. These are just regular foundation, creams from the beauty supply and each one is no more than four dollars, and i like to use this with a dense brush and i'm mixing two colors that i've already tested on my skin for a good match to apply onto the Lace, i really like to make sure that that foundation is concentrated onto the lace and, as you will see later in this video, it allows me to get away with not having to do the bald cap method. You can definitely also use lace, tint sprays, a lot of instagram hairstylists provide them, but i'm super comfortable with this method that i use. So that's exactly what i do once i am done, placing all of that color on the inside of the wig, then i like to turn the wig back around to place more of that foundation on the outer part of the lace, especially around the hairline. It'S definitely. Okay, if you get some of that foundation onto the hair, it's going to come off easily, while you're styling your wig anyways um. But lastly, i like to seal all of that in with a layer of got to be freeze, blast spray and let that completely dry up before i'm doing anything else to the wig. This way you can avoid any chance of the foundation transferring to something else. You know what i mean so to pluck my wig. I always like, starting out with my hot comb, to just press the hair down. This allows me to be able to fully see what i am doing, while i'm plucking and although i do have a whole video talking about the entire plucking process, which you guys should definitely check out. I will go ahead and share some of the tips that i like so when i plan on plucking a lot of hair off. To give me a look like this, i like to spray some water onto the front of the hair, and this allows me to pluck out more hair at a time, and i won't spend too much time plugging. You know what i mean, but if you are a beginner i wouldn't advise that, because there just isn't much control. When you add water, you can accidentally pluck too much off very easily and very quickly and on the days that i just plan on plucking a little bit like this, i like to just keep it dry when i'm plugging to make sure that i'm not plugging too Much hair off, you know what i mean so yeah plucking is um to d. So it's very boring to me. So i'm just doing the same thing over and over and over again and i'm pretty sure y'all get the gist by now. So, let's go ahead and fast forward to what you guys actually came here for, and that is the install. This is how it all looks when the plugging is complete and also peep, how perfect the lace tint is like i'm telling y'all that method that i used is the absolute choose light. You can't go wrong with it. I promise so it was at this point that i knew this install was definitely going to be one for the books like the curls were giving vacation vibes. The hair itself was fitting perfectly like wigan's hair. Did such a good job with the construction of this wig and it's going to make installing this hair 10 times easier. So the first step i like to take for a perfect install is making sure that any extra air tap piece is taken off, and i like to do so with a small pair of scissors or shears for precision with this step. You'Ll be certain that once that piece is glued down that ear, tab is going to be perfectly in place and very flat. So i did this on one side and i repeated the exact same thing on the other side as well. So, like i told you guys earlier, i try to avoid that bald cap method as much as possible and honestly, my forehead already makes that decision a lot easier for me to just put that glue right on top without any risk of getting too much glue. On my hair and honestly, you guys having a big forehead, definitely has its pros with frontals, because one day i can choose to embrace my forehead and the very next day i can tap into what the small forehead babes have been enjoying. If you know what i mean, but as you guys can see, i'm prepping my skin by wiping off any makeup with makeup, wipes and then cleaning up the entire area with 50 alcohol and a cotton pad to make sure that there is absolutely nothing on the part Of my skin, where the glue is going to be going, then i like to go ahead and bring that frontal back over to exactly where i'm going to be gluing it down and yeah. Today, i'm enjoying the small forehead babe things um so yeah mind your business. Then back again with the foundation cream, i'm going to be mapping out where the frontal is going to lay. So i can have an outline of where i'm going to be putting down my glue. So i love using this foundation cream because it is very, very close to my skin color. So there's not going to be like a harsh contrast with the dots that i'm going to be making - and this is a very great tip for beginners to do the shade. I did use today is a bit lighter than the shade that i would usually go for, but that is only so. You guys can see exactly what i'm doing. Basically, you want to use a foundation color that is close to your skin color, but still bright enough for you to see so that you can know where to place that glue down onto so today, i'm using the erica j hold me down glue and i'm going To be applying three thin but very wide layers, and in between layers, i'm making sure that that layer of glue has turned completely clear before i proceed with another layer as a beginner, you can glue everything down in sections if you want to, but i personally prefer Doing everything all together, it just cuts down that install time by a lot, and i've done this enough to be very comfortable to just do it all at once. So yeah you're, basically just repeating that process over and over again until you have completed all three layers. Once that third layer has turned clear, then i am ready to place that frontal right into that glue and melt melt melt. I'M also taking my time with positioning everything so that i am not gluing down the wrong part on accident and once that is in the right place, i like to go in with my comb and really just seal in everything. I'M combing that lace in just to make sure that everything is intact and it's really secure, especially on the ear tabs. You all know how stubborn those things can be so yeah just taking a comb, and just really just like brushing that lace into my skin, then for about 10 minutes, i'm going to tie down this elastic band right on, and this allows that lace to fully dry And melt into your skin at the same time and allow absolutely no room for lifting while it is drying. So while i was waiting for that, i decided to just fix up the curls a bit with some foaming spray, or you can even go in with your hot comb and fix up the frontal. During the step you can watch tv you can lay on your bed. You can do whatever the heck you want to do, but after those 10 minutes or so you can go ahead and start cutting that excess lace off. So with this part, i know that everyone has heard never to cut in a straight line, because that is the worst way to cut your lace. So, to help me with cutting in a jagged form, i like to make sure that i'm using an eyebrow razor and just cutting straight down little by little those jagged lines that this method creates, helps that lace blend into your skin. A little bit more and look a lot less detectable. So once that is done, as you can see, there are some areas that aren't blending in as easily, and that is because those areas don't have any glue on them. Yet so i like to go in and just add a bit of glue on those areas that weren't glued down and i'm basically repeating that same process that i did at the very beginning all over again. But i'm doing this in smaller sections, of course, and smaller layers at a time and just letting it dry clear before i place another layer down and once that is done, then i'm just placing that lace down and again using my comb to really just tack it Into my skin, and also it is almost always a guarantee that one of the ear tabs does not glue down properly, and i hate this so much but but yeah. I basically just fixed that mistake up in this step as well. Once i have a good melts going for me next, what i like to do is bring some hairs forward that i will be using as baby hairs, and i like to use a rat tail comb and just take out a small section in the front. Then i like to seal in that lace, one last and final time with spraying some aura s, lace, spray onto the lace. You can also use, got to be spray honestly, they're, both basically the same thing to me and also don't spray too much like i did. I actually went a bit too crazy with it honestly and then again, i am going in with my elastic band around the perimeter for about another 10 minutes or so y'all already know the drill. Honestly, the longer you wait, the better the melts so just have something on the side that you're doing i've been waiting for this moment, the entire video it is finally time for the baby hairs like i'm honestly, so excited you guys, because these are the best. Like my favorite baby hairs that i've ever done so i'm starting off with cutting the baby hairs in the front, not too long but not too short, either. Okay, cutting this is literally just a rough draft and you may or may not be cutting a little bit more as you go and you'll see what i mean by that in a little bit. But i'm using my handy dandy style factor, edge control for this step, and i've honestly talked about my love for this edge control. A lot in my recent videos, because i'm just over the messy process of the foaming moves - and i hate the stiffness that got to be gel, gives me and honestly i hate the drying time for both um. So yeah. It just uses edge control and really just starts shaping up my baby hairs. So yeah i'm just shaping up everything to my desire and if you need to look at installs on pinterest, to give you a guide while you're doing your baby hairs, because these can actually be very tricky like baby hairs are not the easiest thing in the world, But as you can see any piece that is a bit too long, i just go ahead and snip away and honestly for a little bit, i'm just going to let you guys follow along and watch this bit so yeah the baby hairs are done and finally, so Is our install, so i hope you guys enjoyed this video in this transformation and that you're feeling this install in hair. Just as much as i am again. Thank you so much to wiggins hair for my new beautiful unit, and i hope you guys enjoyed your time here with me, and i cannot wait to see you guys in my next


Comments
lneal2800: Love this! This is Gorgeous PERIDOT!that Hairline is Melted!
JusTika: Hi there. How long is shipping and is what the actual wig looks like?