Lace Frontal Wig Install Using Boldhold Extreme Creme| Unice Hair| Start To Finish| Angel George.
- Posted on 17 January, 2020
- Fake Scalp Wig
- By Anonymous
Hey everyone!
I’m showing you how to achieve a lace frontal install using Bold Hold Lace Glue. I hope you guys find this helpful!
Let me know how you like this video and don’t forget to like, comment and subscribe!
PRODUCTS USED
91% Isopropyl Rubbing Alcohol
Bold Hold Extreme Creme
Got2b Glued Styling Spiking Hair Glue
Vigorol Olive Oil Mega Moisture Mousse
Got2b Glued Blasting Freeze Hairspray
Isoplus Oil Sheen Hair Spray
BOOK
Angel Wigs & Extensions
Instagram: https://www.instagram.com/angelwigs_/
HAIR
UNICE HAIR AliExpress
SOCIAL MEDIA
Instagram: https://www.instagram.com/a.ngelxx/
Twitter: https://twitter.com/_Angelll__
Snapchat: xangeelx
CONTACT
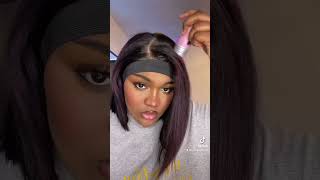
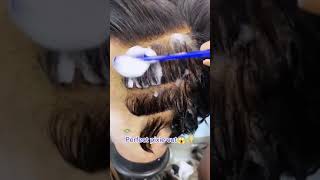
Hey guys welcome back okay, we're gon na start by cleaning the skin with some 91 % alcohol and then I'm just putting the ball cap on and he kept him by the ear. So the cap can lay flat. So now I'm just putting some got to be glued. This is the yellow bottle and I'm spreading it out really thin, because if you put a lot of product it takes longer for the ball cap to dry, and if it's not dry, it can really affect the process. Okay. So now I'm just going your head and spring really lightly with the godzilly spray, and this just helps me with the better hold once you're done with that. Just blow dry will cool air until it's completely dry and now I'm just putting her foundation on there. So you can blend better and give that quad copy fake and then I'm just gon na seal it with some more got to be spray, and then I'm gon na go ahead and blow-dry it one more time, once it's completely dry, you're gon na start cutting you Want to be careful with this process because you don't want to cut your client, and this is just something I like to do I like to say you got to be cool and just spread it all over the hairline, so it can lay flatter or better you. Don'T have to do this because when you put the hold-hold on there it actually just does that for you, but I just like to do that so once I'm done with that, I'm just gon na blow. Try it one more time. So it's all completely dry and everything once I'm done with that. I'M gon na clean the excess blue off with the 91 % alcohol and then I'm gon na go and with the boat hose, can protect to act as a barrier between the glue and her scalp, and it also helps the install lasts longer. Okay. So now I'm placing the wig on her head and you're lining it properly. So I know where to cut the lace and place the glue exactly right. Now, I'm flipping her hair back. So I can see exactly what I'm doing okay. So this is a little trick that I do to help me. Lay the weight better. I just cut along the lace, not right by the hairline just so I can see where to place the glue. So now I'm applying the bolt whole place. Blue. You want to apply very light layers, because if you put a lot, it's going to not dry quickly for one it's gon na dry white, like it's gon na, take a lot, and it's just better for you to just do light layers. You know when the glue is completely dry, when it's all clear and just thin it out that helps a lot um, especially if you put a lot at once, you can just thin it out and then take the excess product and just wait for it to dry. Clear and then apply your next layer. I'M gon na apply about three layers because she doesn't plan on wearing this hair stuff for a very long time. So, as you can see, I let the paint dry clear before I apply the second layer, and that is a must, do not apply another layer unless the glue has dried, clear pay attention to how I'm bidding out the glue. That'S key because if you put a lot like, I said it won't dry, why and your install will not look melted. Sorry guys my camera cut out, while I was laying the wig down, but what you're gon na do is just once you have set it in place, you're just gon na press it in so that it melts into the glue that makes sense. Now you want to cut as close as possible to the hairline again be careful not to cut your client, because it's very easy to cut your client just be careful with this cut, literally where the hair starts growing out of be fundable. Once I cut I'm using the back of my home to lady place right into the cool, so just press it in this. No I'm just gon na continue cutting and again cut as close to where the hair starts going out of the frontal so yeah. I didn't speed up this process because I wanted to show you exactly how I cut my legs, because I know a lot of people have difficulty with that because they don't know where exactly they'll start but again just start cutting as close to where the hair starts. Growing up of the frontal, but you want to cut in like a zigzag once I'm done, cutting I'm gon na go in with the rat tail comb and put some more glue on there, and I'm just going to put that under the lace where I feel like. I didn't put enough glue and again you're gon na want to thin it out so that it doesn't dry, white and yeah. That'S what I'm doing right now just been in and out you once the glue dries clear. I'M going to take my comb and just press the lace into loop, so my client wants a middle part. So here I am just parting right down the middle I'm going to pluck the part a little bit more, so it's more defined now, I'm taking out some baby hairs, not a lot, because I know my client wants her installed to look as natural as possible. But, let's be honest guys like I know you ought to see that meow, it's like that is born out of her scalp, like don't even do like. Let'S get into this mouths like what anyways now I'm just cutting the baby hairs, I'm cutting really short because the shorter it is the more natural-looking it comes out right now, I'm going in with my foaming moves to mold the baby hairs so yeah doing the baby. Here is just like a trial and error thing for me, like don't get mad when you don't hit that like get that right in the first time, you're gon na see me go and a lot and try to like fix it and do what I can to Make it look how I want I'm gon na be using on the got to be sprained just to give it an extra mold once everything set in place, I'm just gon na be tying down her hairline, and this really helps a lot with laying the lace. So while that's drying, I'm just gon na style, the wig she wanted to wear her hair straight. So I'm just flat ironing it do what I hit the hell, stop playing with me period so yeah, and now I'm just coming out the baby hairs, because I want them to look fluffy instead of, like harsh, don't forget to add me on snapchat guys. That'S why I post a lot of my work and my username is gon na be in the description box. So what you just saw me do was define her part with her foundation and now I'm going and with more gossipy spray, just Italian, the flyaways so yeah. This is the finished. Look. I do hope you guys like it. I thought it came out good, but don't forget to Like comment and subscribe, and I will see you guys next time. Bye,


Comments
Jen Caceres: such a clean n easy process, love to see it!
Soph So Real: Even from the base to finish look came out flawless
Chioma: YOURE DOING SO GOOD!
Chioma: Me nextttt