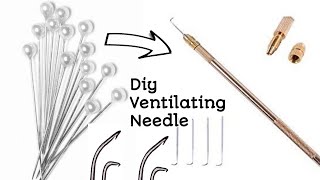
Diy: Ventilating Needle With Office Pin For Your Lace Closure And Frontals
- Posted on 09 November, 2020
- Full Lace Wig
- By Anonymous
This video contains steps in making VENTILATING NEEDLE at home ,with just four materials .
I hope this video is helpful and if it was please like, subscribe, comment and hit the notification button for more videos.
#youtube #diy #ventilating #closurewig #closure
Next: HOW TO MAKE RICE WATER FOR THICK, BLACK,LONG AND FULL HAIR
Thanks
Hello guys welcome to my channel in this video. I will teach you how to make ventilating needle with office paint so um, this video doesn't it. I didn't situate the camera. Well, so most of the things i did were outside the camera, but i'll tell you exactly what i did so it should be clear enough. So the first step was to use my plier to bend the tip of the office, pin a little bit to form a curved end. So that's what i'm doing here, it's a little bit difficult, but with time you get your desired results. So that's what you keep doing till you get a cupped tip. I really apologize that i didn't situate my camera well, but i hope with the little that is being shown and what i said you'll be able to understand this video better. So i had to hit the end of the needle downwards so that i would get that desired result. I want so that's what i'm doing right now. You can heat yours as well as well use a plier or hammer, but not too much you just hit it. So that when you're using the pin to tie the knot in the lace it will be able to the pin, the needle will be able to pass the lace easily without hooking it or tearing it. So that's what i'm doing now so right now, i'm done with the needle i'm done, with the shape pin of the pin i'm going ahead to bond it to the wooden handle i have with me is an old crocheted wooden handle that i decided to use to Make this new ventilating needle, so i'm going to bond it together with my super glue. So now that's what i'm doing so. If is not like strong, you can add more super glue to make it stronger. So that's what i just did now when you're done, you allow it to dry. You leave it out to dry after using the ventilating needle that i made myself to tie my hair to my lace and it's turning out great. So if you watch this video you'll be able to understand and learn how to make your own ventilating needle you don't need to go and buy it again, so you can do it yourself and make your closures and frontiers yourself. So what this video and then you see how i use the ventilating needle and you see how it's very easy to part it passes through the net so easily, because i was i hit, i use a hammer and a plier to hit it together. I later used a piece of a fabric off-camera to use it to hold my glue to stay firm because the pin was shaking so i needed something that will hold it to be stronger, so you can use sand. You can use anything you want or feel like that will hold your pain to stay on the handle or the wooden handle you have so right now i use piece of fabric, so this is how i made it, and this is how it turned out - and this Is what i used it for? This is how my closure is turning out to be like. If you find this video helpful, you can comment like subscribe and also hit the notification button so that you'll be notified. Whenever a new video comes up - and i promise it will be educating and exciting and fun to watch and also it will be fashion related. Okay, so thank you guys and bye.


Comments
ivy: Thanks you just saved me cause where I can't find the ventilating needle .I have sewing pins can I use those instead of office pins
Dev Sss: Nice idea....❤️
She’s Niki: Ventilating needles have a groove on the hook that hold the hairs to knot It could be difficult like this . Try order some eBay or Amazon they’re not expensive.
She’s Niki: Sorry I just saw the end of the video & it’s working so good idea that’s all that matters
Lois: Thanks for this love
Gift Michelle: Pls what kind of pin did you use ?
Mercy Okunima: Please where can I get ventilating needle in portharcourt
Somiethevlogger: Pls subscribe for more videos
Okoro helen: New friend