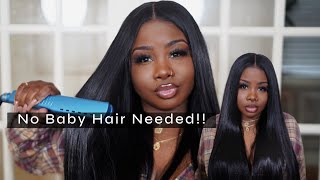
How To Dye Your Wig The Perfect Jet Black!! 30" Straight Hd Lacewig Install | Asteria Hair | Sa
- Posted on 27 January, 2022
- HD Lace Wig
- By Anonymous
Link To Hair➤https://bit.ly/3KmWLxQ
Hair Info: 30inch straight HD 13x4 lace front wig 250%density
Buy One Get One Free Wig➤https://bit.ly/3FEhXMe
❤Using Special Code “xm12” To Get 12% OFF
✨Limited Flash Sale In Facebook Group!Join Now➤https://bit.ly/3pcfZOo
Asteria Hot Selling Hair★ ★ ★ ★ ★
*Invisible Skin Melt HD Lace Wigs➤https://bit.ly/3AgSh7C
Affordable 5*5 Closure Wigs➤https://bit.ly/3GHCFwc
30"- 40" Long Vac Wigs➤https://bit.ly/3A8zuLA
#AsteriaHair ON SALE➤https://bit.ly/33J5uKf
#asteriahair30inches #asteriawig30inches
Wholesale or promotion? Contact Asteria Hair:
WhatsApp: +86 15238065852 Email: [email protected]
Instagram @Asteria__hair https://bit.ly/3AgSuaU
YouTube @Asteria Hair https://bit.ly/3m5EBoA
Hey guys welcome back to my channel, so today i'm going to jump straight into this video. So here i have a 13 by 4 30 inch, lace, frontal wig from asteria here, and i'm going to be showing you guys how to get jet black. So you want to go ahead and grab some freeze, blast spray and coat the inside blow dry it let it get dry and hard and then you're going to go on to your dyeing step. So here i'm using royal navy and jet black. I forgot where i learned this trick from, but i did see it on youtube um, where you guys could. Let me know who you seen it with first, i want to give my credits to them, but yes, so you want to go ahead and get royal navy and jet black and you want to get a bucket of hot water or warm water. It'S okay! You don't have to be burning hot, because it's going to be like really hard for you to like maneuver around hot water, because it is going to burn. You want to go ahead and empty both bottles of dye into the water and mix it all the way out, so that there's no clumps left. You want to mix up everything so you're going to see why i showed you guys um the freeze blast spray trick, because that, like i said in like previous videos that protects the lace so that the dye does not stain the leaves, because once the dye stains The lace you're done you're done. Alright, your lace is done so now it's time to dye the hair. You want to start with the ends of the hair and then take your time and dip and then submerge it all into the dye at one time. Don'T be shy because you, the dye, will only catch certain parts of the hair and it will be botchy, so you don't want that just dump everything in there and then get like a pointed brush. You know a little. I call it. Wig brush get a wig brush and dip and brush and dip and brush throughout the whole entire wig. This is going to evenly spread the dye all in and through the wig. If you do not do this step, you are going to have some brown parts in your wig. It will not look completely jet black, so do not forget to dip and brush dip and brush. So you want to go ahead and leave everything submerged into the die for five minutes, and then you go ahead and rinse everything out and then you can proceed with your bleaching and plucking, and this is why you always supposed to coat your lace with freeze blast Spray before you die because look at that not a stain of dye and my knots are still perfect. So i went ahead and i bleached and i plucked it after and here are the results? Look not one stain, that's after i bleach and plucked it and look how beautiful and nicely jet black my wig is like tell me, i ate i'd, definitely eat that and y'all know it and that's how you do jet black. So now on to the install alone. Buddy, so one thing i like about this wig is that it's really really really full. I believe this was 200 density and it was super full. It was really nice. I love that about it, and the lace, like the lace was super stretchy and mad thin. Like i love when my lace is thin and then the knots the knots on it were super fine, like always when you get in a wig, make sure the description states that they have super fine knots, because it just makes the install much more flawless and everything. Just melts way more better, like uh this, this wig was really nice. I'M never gon na lie shout out to esteria here once again they did their thing with look at it. I know you see that look at that. That is some good hd lace. By the way, yes, this is hd lace. This was this. Wig was amazing. I love that about it. If you're looking for a full wig, five stars, if you're looking for good lace, five stars and if you're looking for nice quality, hair, five stars for asteria here, i would get this here. The link to this hair will be in my description box down below buddy. What do you know about? What do you know them now for this step? You can use any holding spray that you prefer that you like to melt your lace and you want to go ahead and tie down an elastic bin and leave it on for about 20 minutes. And this is what it's going to look like: nothing but skin. Nothing. But skin so now i'm going with my erica j wax stick. My favorite wax stick on the market right now. It definitely tames on my flyaways and keeps my hair super flat and i'm going with my hot comb and i'm gon na begin the baby hair process. So now i'm just flattening all the hair out my way, i'm making sure my part is straight: don't worry about that big old gap in the front, we're going to fix that all right. So now i'm going to be parting out my sections for my baby hairs. If you like, these baby hairs, you're going to go ahead and pay very close attention to see how i got them, because it's better it's better, like it's easier watched than said like, i can't really describe it, but the most i can say here is you want To part a nice little c shape, it doesn't have to be perfect, it could be crooked, it could be straight, however, you prefer, and then you want to take it up from there. So if you do it, if you're trying to aim for these babies that you've seen in my thumbnail, you want to part a nice c shape, starting from right above, like like line it up with your front of your eyebrow to the tail of your brow. So you want to part out that section for baby hair and then so on and so on. What do you know? So you want to make sure when you're shaving the baby hairs down you shave them like how i'm doing it like in a slanted cut. You want to make sure like the beginning of the baby. Hairs are short, and then the middle is like a little short and then the ends are just like a slightly longer like a small, medium large thing, but like you, want to just shave them down, so that the front pieces are shorter than the bottom pieces. But don't make the bottom pieces too too long, but you need them long enough so that when you swirling them, when you put in your gel on that they flip - and you know all that nice stuff they curl upwards nicely and the baby hair swirls into the Rest of the hair neatly: okay, so then you want to go in with your little tiny flat iron and flip these bad boys up curl them upwards. I mean you can curl them downwards if you want to, but i think i try curling them downwards. I prefer curling them. I prefer curling them upwards, so you want to curl them upwards and then curl the whiskers downwards, and now here we go with the baby hairs, i'm going in with some um slick and sleigh jam. This is my favorite gem. I always use this. You guys seen in my previous videos slick and sleigh by she is bomb because she is definitely warm and i'm just go ahead and i'm swoop dee doo, dee, doo thing and curling up my little baby. Hers with the um with the gel and i'm flipping them and whipping them and blipping them and yeah just watch and you're gon na be able to do this too buddy buddy, i am dramatic. I like dramatic edges. I, like dramatic length nails i, like dramatic length nail, sets i like dramatic, hair lengths, so i like dramatic baby hairs. If you do not like dramatic stuff and dramatic baby hairs, you do not have to follow this step. You can just proceed and do your own baby, hair. Anything that you like is what suits you and if it suits you, then that's good for you, but this will suit me. So this is good for me. Then you want to go ahead and spray it with your favorite holding spray and you're set you're all set. You want to go ahead, do your finishing touches and then you know you're good to go. So this last part of the film was supposed to be like a transition film, where i flat iron and show you the end results, but unfortunately, that clip got deleted of me, showing you guys the real length. So all i got was some little snaps and you know like some little cute stuff, but i hope you guys did enjoy this video um. Please leave a comment down below like and subscribe. Don'T forget to share this video and i did change the hairstyle in the end. You'Re gon na see the actual length. This here was super long. It was like 33 34 inches, i'm telling you, but yes, i love this hair. This hair, i give it five stars. I hope you guys like this video. I will see you guys real soon. Peace,
Comments
tiffanyjackson521: Omg I’ve missed your face glad to see a tutorial this is beautiful I’ve seen slayed by Jordan use the Royal Navy and jet black together it gives it this beautiful darkest black that you couldn’t achieve with only jet black dye
Ms. Gaulden: I love the way you did ur edges im bout to go try this rn
The Queen: Beautiful!
Ali Pearl Hair: Great video! Love you so much! Can't wait to invite you to try our product!
Amanda Graham: Lol my bald cap never stays
Lattisostush VLOGS:
Aniya Da’neise: We missed you ❤️
Rose Rose:
BagSznKenyae: Yb better tbh