Super Detailed Bleaching, Plucking, & Install, 4X4 Ginger Wig With Crimps Ft Junoda Hair
- Posted on 25 November, 2022
- HD Lace Wig
- By Anonymous
Within 30 Days NO Reason Free Return Only for My subscribers Place Order
Get Extra $$$ OFF AfterPay & Klarna & Quadpay & Sezzle PAY 4 Equal payment Within 6 weeks!
●▬▬▬▬▬▬▬▬▬♛ #JunodaWig ♛ ▬▬▬▬▬▬▬▬▬ ●
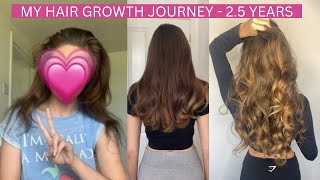
Same hair: 26 inches 210% density 4*4 auburn color body wave lace closure wig
➽➽➽➽➽➽➽➽ https://bit.ly/3EgOsl0 [ Up to 50% OFF!!! ]
https://www.junodawig.com/ ➤HOT SALE wigs: https://bit.ly/3Go0Ke1
More Colored Wig Available: https://bit.ly/3EmJ68a
Using Special Code To Get 15% OFF: JA15 For New Customer
Can Not Miss!!! Invisible HD lace Wigs available: https://bit.ly/3Gl9phx
Recommend human hair bundles with closure: https://bit.ly/3EDpWvN
☛☛☛☛☛☛☛☛♛#blackfridaysale UP TO 60% OFF♛☚☚☚☚☚☚☚☚☚
❥Extra 15% OFF➽➽➽CODE: BF15
❥Extra 20% OFF for 2 Wigs➽➽➽BF20
YouTube @JunodaWig: https://bit.ly/3xborzP
Instagram @junoda_wig: https://www.instagram.com/junoda_wig/
Facebook @JunodaWig: https://business.facebook.com/JunodaWi...
Want To Promote? Order Problem Contact: [email protected]
#junodawig#junodahairstyles#junodahair#lacewig#affordablewig#laceclosurewig
#auburnhairwig#laceclosurewig#bodywavewig#blackfridaysale#blackfirday
Foreign, everyone welcome to me and welcome to another start to finish detailed. As ever, we can stop little video, where I show you how to go from foreign. Like I was saying the video where I teach you how to go from straight out of the back to straight out of the scalp, you feel me yes, so today's video we're gon na be working with a new company. I'Ve never working with before this is June. Oda hair company junoda and I just got the wig - grab the box and for my first time working with them, they they came to impress like y'all. They gave me a whole little curling wand might or might not use this we'll see. But let's get into the hair, because that's what y'all really care for so we've got us a because the season to be red ginger, it's the time and it's so closure. I wanted something very easy and it is a body wave wig and this is their highest density. That'S why it's so full! This is 210 density, 26 inches of body wave whenever people like do a little um, wig unboxings and they show their hair in the beginning. Always honestly, personally, I don't be caring too much for that part, because I feel like duh, the hair gon na look good out of the pack. You can't tell the hair till you like washed. It worn it so they're like oh yeah, look look at it. That doesn't mean anything that doesn't mean things to me. Okay, so currently it's 9. 00 p.m. I want to finish all I'm leaving myself six hours. That'S me being very generous to myself, but let's see if I can finish this whole bleaching, plucking and installing, while filming in six hours I'll keep out there on that part. So first thing: first, here's a look at how the knots look. My thing with red, wigs I've been always trying to figure out if I should die, should bleach the knots or not bleach them because, like since, like the knots themselves are not like dark like with a regular 1B or black wig, it's not that noticeable. I guess really depends on how big the knots on the wig are. Oh and for my my beginners out there wondering bleaching. What is the whole point of bleaching? That'S what are not if you can see right, you see down here those little like those little dots that you see in the spacing right here. Those are the actual literal knots that are tied because they're hand tied onto the lace and the whole purpose of bleaching. It is to use bleaching powder to turn it from a dark color to make it lighter. So it kind of like gives the illusion that, like it's, the knots are disappearing into your scalp. That is why we bleach the knots you don't have to there's ways to get around it. I have a video showing that how I like camouflage my knots and if I don't feel like bleaching it, but I like to bleach my knots. I feel like that extra stuff just really helps it look even more natural. You know, but, okay, let's get into the bleaching, I'm gon na go ahead and just really fast forward through this whole bleaching process, because in hindsight I don't think it really made a difference. I still have yet to find a really good routine to get my red knots to bleach to like a really, you know, noticeable making a different color, because even after bleaching it it kind of came out more orange and mind you. I left it on the wig for about an hour and yeah. The color was bleached but like it was more of an orange color than really blonde. I'Ve been looking around for a better tutorial or just a better way to do it. So I was like I'm going to cut this part out of the video because it didn't really make a difference. So if you have a red wig - and you don't know if you want to dye the knot bleach, the knots or not it's okay, honestly just skip that part. You can use makeup to finesse it unless the knots are like really really big and very noticeable, then I'll try your best to bleach it, and if you want to figure out how I bleach knots, I promise you. I have lots of very detailed tutorials just like this one. Well, not just like this one, because I'm fast forwarding it, but I have detailed tutorials showing how to bleach the knots. I think I'll probably use a stronger bleaching powder, because this one it is strong and works well, but I feel like it probably works best for dark hair, probably not for lifting red hair, so yeah. That'S why I'm just gon na first fast forward through this part. Okay, guys, it's basically been a whole hour and you can see it's like lifted, but it still has more of an orange tint. I'M not trying to start having my hair fall apart on me and then the whole video is paused. So I'm just gon na go ahead. I'M gon na go ahead and wash all of this out. So the next few Clips is me just going ahead and washing the hair with some shampoo, and a lot of this is pertaining to the bleaching process, because, while the wig was very yellow, I did try to use like purple and blue shampoo to help cancel that Out but as well, that didn't make a really big difference and neutralize the color, but I did want to keep these clips in here because, just regardless of bleaching a knot, I always find it important to wash your wigs, and I was kind of talking about that. While it why it's important to wash your wigs because y'all we know this hair comes from China, Asia, wherever I mean Asia, China is in Asia, but you get my just right. So it's it just comes overseas. You should always wash your things: clothes just for your own personal health reasons, so I like to use a moisturizing shampoo, because shampoos can be dry and stripping I'll. Try to like link down below the shampoo that I use, so I'm just going in there and washing the hair out with some shampoo after I do that. I went in with my moisturizing deep conditioner and I like to just let my hair sit in deep conditioner. Like my I like to let my hair say it in deep condition, depending sometimes they're 30 minutes. If I have time I'll do overnight, you know, but since I was kind of trying to like Fast Pace everything I did this, I let it sit for 30 minutes. Just kind of help soften the hair back up after you shampooed it all right. Now, let's get into plucking, I feel like the heroin, but not just a little bit orange. But honestly we will just have to use some makeup magic to fix that. So take what you will from that bleaching tutorial red colored wigs can be a little tricky. If you have some skills that [ __ ], I mean a bleaching red colored. Wigs definitely leave down some. Definitely don't leave down some suggestions below I'm over here using the tissue paper that came with the wig took place over my wig head so that way the notch is a whole lot more visible, because you can, you know it's. A white gives me a white surface to pluck on and I was going to slide her on foreign all right since I already came parted in the middle. That'S great because I always like to have the hair parted in the middle, because knowing the middle helps me know to not pluck right in the center part, unless I'm trying, like you, know thin and out, but for just the hairline. I don't do that now. Here'S my thing I prefer to plug my wig when it's dry, because that way I can tell just exactly how old a hairline is. But since I'm trying to Fast Pace this, I don't have time to let it air dry. So I'm just gon na [, __ ] it wet. There are Pros to plucking your wig wet because you pluck your wig wet. The knots come out easier, sometimes, but sometimes they'll come out a little bit too easy, so be careful and to plug I'm going to be using these Revlon tweezers. These are my favorite tweezers, because these are a little bit too pointy. So I'm gon na be really careful to not poke a hole. These are very sharp, my favorite ones. I can't find them anywhere in my house, so I'm gon na have to do what we have to do and what I've been doing recently is I've been trying if the wig comes like a little bit slightly pre-plucked in the front like this, like you see how, Like it's a little bit thin up here, I've been not plucking at all in the front, just to save myself lots of baby hairs because I feel, like I've been plucking my front hairline too much and don't be having any baby hairs like before. I would still always start plucking in the back, but then after I'll plug a little bit in the front. Now I don't unplug it all in the front trying to get a nice tight grip so really pull it tight. That adds tension, make sure everything's pushed back. So you can see it make sure the hairline is like pushed back flat and neatly, and then I start with the tweezer with a backwards pulling motion like that and then just make my way down so pluck skip, pluck skip right. I plug there. I skip right here. Okay I'll see, I plugged right here so now, I'm skipping there and now I'm going to plug in between that skip right. There just work your way down the line horizontally and don't try to pluck in the same place like you got ta. Do like random pulling out and I always try to make sure I'm pulling the hair out from the root like you pulling out the knots with it right now, I'm going in between there foreign ERS even further back into the hairline. So I was up here right. I was down here and now, I'm like higher up here. Oh skip plot skip creating little gappages, but you don't want to create fat wide gaps. It'S like very, like hairline, Strokes. What helps me the most is like getting like someone like. I really like how they pluck their wigs I'll, get like a Pinterest and spell photo of a plucked hairline and I'll try my best to mimic that kind of what helped me figure out, what I'm going for, because sometimes visually you're, like I don't know what I'm Doing I'm just doing whatever so having like a visual to look at while you're doing it kind of helps you at least, if you're a visual person to see where what you're going for I'm just going further back into the hairline thin it out. Helping my poking holes, because this tweezer is really sharp, so sometimes I'll, like flip the tweezer, the other direction and pluck this way, I'm doing like a back dragging like I'm dragging back, not like a up more like a Back Drag motion. I'Ll. Do that sometimes to get more precise, it's like that's good enough for Neil, like I said, less is more but I'll just be always trying to keep looking, because sometimes too it's annoying when you put the wig on you're like damn this thing, this still looks very Wiggy, that's good enough out enough, we'll do more! Once I install the wig. If I need to, then I just push the hair back to the front and, like I said now, if the hairline is pre-plucked a little bit in the front, I just leave it like this and I'm gon na do the tweaking. If I need to for thinning out the baby hairs later, but if your hairline is really thick and bulky in the front, then I would suggest going ahead and plucking the front just a little bit okay, so I did poke a little bit of a hole right. There in the middle - like - I guess, that's okay - it happens to the best of this. So now I'm going to try to do all of this all right. I'M just trying to show you all this, because look! Your wig does not have to be perfect, like sometimes my wigs will come out perfect while I'm customizing. Sometimes I make little mistakes. You can always fix a little mistake. It'S just about knowing when to stop, but not make it worse, so yeah. Now what I'm gon na do, since the hair is wet, I'm just gon na put it under my little bootleg Amazon Hood dryer to let it dry I'm going to use this opportunity to mold the hairline out with some mousse. This just makes it like much easier to get a flat wig, I'm gon na go in with some moose and flatten the hairline out. So that way, when I founded the dryer, it's gon na set and just make sure you're brushing that product through to get it to actually make the wig flat. Okay, now I'm gon na go in and pluck the middle part a little bit, because I want it to be a little bit wider and that I just try to like look at the grids, because, if you zoom into there's like grid, so I try to just Follow one straight line of the grids going upwards like you're, really gon na like zoom in and look at the lace and follow the line and you're really just pulling out one individual knot. So the sex has to like really attention to detail to get it right. Okay, so here's how the hair is looking right out of the dryer, you see she's nice flat molded. The hair is basically dried, Zoom wow, so I poke just a little bit more holes than I expected, so I'm gon na have to go in later with my nylon thread. It'S like Invisible Thread to fix that bigger hole, but it's okay. It happens. It happens. I'M just gon na be really careful not to get my hot comb on it before like makes the whole rip now. First thing: I'm going to do is tint the lace with some concealer. This is the elf hydrating concealer and shaded deep Chestnut and just buff that in under the lace, this one's really awesome. It'S going to help not make it so orangey in the nuts - and I always say if the lace is like darker than your skin tone. Using the foundation, that's a little bit lighter so that way, you're like you can lighten up the lace, but if it's like HD lace and it's exact skin tone or like transparent, then go ahead and use your exact shade cut off this lace back here in the Back of the way, sometimes the closures, depending on how the wick fits in my head, I won't put the elastic band on because sometimes I'll, just not like fit perfectly, but let's see how it goes with this first secure that nobody cap, no nothing just Vibes out Here yeah, I only suggest you should really worry about doing like a ball cap, if you're like doing like. What'S it called the glued method like actual glue, because that's going to help make create a good barrier to protect your baby, your your real hair, from getting glue on it. Yeah. Look at that this thing, I'm feeling this I'm feeling this you see now that down that prep. I already know it's not about to be real, straightforward to make sure I you just like clips and Combs and stuff to put the wig back, because it just helps you see what you're doing. I never know if my wig is right in the middle. Like I don't know what the middle of my head is, I just hope for the best, sometimes so, to lay down the lace I like to use Ebon lace spray. If you don't know now, you know this is a glueless spray. People say the black can, because it's kind of different cans, which means like different strengths. People say the black can is really good and that it like has much longer hold. I'Ve tried it. Personally, I don't like it, I feel like it. Doesn'T it's too much residue from my opinion. I I like this, but this is like the middle hold. They have a sensitive version. I think that's the silver can I believe. So if you have like reactions when you've tried this before do try their silver alternative out. Next I like to have a nice brow razor I like having very fresh browd razors, so I have a lot. I got a pack of 60 for ten dollars on Amazon. Really just type in face razor pack and they have like a lot so this way I can, I only just use it like every two installs, because it's like the fresher and sharper that Blade is to cut your lace, the better off you are and then as Well, I liked it for cutting my legs for like extra Corners, where I can't use the brow right, the brow razor. I have this little cuticle comb when I say cuticle comb, I literally mean like your nail cuticle. I I just steal these from, like my nail. Cuticle sets I don't really, but you can get them from the beauty supply store as well. If you just check like the nail art section, if I like these for the lace, because it's very sharp and Tiny, so I can get like in the little corners now. I'Ve been really into the whole like widow's peak hairline, so I'm gon na try to create a little widow's peak situation, and I just like part. The hair out, like I just like try to like, create a little triangle with the hairline in the front and our part out here. Sometimes the work, sometimes don't it works a lot better. If you do this on the mannequin head, but I forgot so I'm just free rolling, but I kind of have like a little bit of a Widow's Peak parked up and it works better if the hairs can pull out themselves because you want a clean cut offer To not look funny, but sometimes I just will use a razor like this and shave them all. I just try to spray as close to the hairline as possible, and I just use my fingers to tap the product down to spread it around evenly same thing on this side, and I try to spray more onto the lace than the actual hair. Just to avoid getting the hair all built up with the spray, then to really lock and glue it all down. You got to go in with your blow dryer and I use on a high heat, but medium power so like that and to cover up like the edge of the closure where it stops. I like to use just like push the hair on this side downward to help cover that up. Okay, I, like the oven spray, a lot better than got to be because it got three feelings once you start using this you'd never go back to got to be like got to these trash. Compared to this. I promise you because this is already nice and dry and it feels like it's secure and then just cut the lace right in the center and we go in and I just kind of follow the diagonal. The line the natural hairline curve, okay and then I've cut that off. I like to do one more like little security tap of it just to make sure any of the edges don't lift up because sometimes you're cutting it. It will lift yeah looking pretty good. If I don't feel like the lace, is sticking down I'll go ahead and put my elastic band on and let it sit some more, but I feel like it's stuck so I'm gon na just go ahead and go in for the honestly. Do I need baby hairs, though I like? Oh look, you kind of like it like this. I haven't really into like no baby hair styles. Now we can get into The Styling portion. My first styling, I'm gon na do crimps, because I only do crimps often. So I feel like doing different look forward, so this is a crimper I got from Amazon. It is from the brand Revlon. This crimper was 20 and I got it. I'M gon na put some of this heat. Protectant slash, anti-frizz breaks in the hair. It'S from the brand avian I got it from Sally's Beauty. Supply Store actually go in and trim the ends of the hair. It just makes the hair look healthier and thicker. In my opinion, when I trim the ends like look at that, it's getting broomstick look even when I would pay my own money for hair. I always trim it in it's like I'd always like overshoot by in like an extra inch. If I want a bob, instead of getting an exactly 16 inch Bob, I would always pay my budget to get me an 18 inch wig and cut it to 16 inches because cutting the ends just makes the hair look a whole lot better. I don't know but yeah, so it's a nice blunt chop. So now it's probably more of a 24 than the 26 inch, I'm 5'3, I'm a shorty, that's something I like rubbing short at least I don't need too many inches to make hair. Look long on me short, but you tall girls, yeah. I got that long, torso things I would do to have a long torso. Okay. Now we can proceed to the crimping portion and I like this Andrew Shafer, um hairspray. I saw someone on Tick Tock. That said, she sprays the hair sections with the spray before going in, to really make the crimps nice and defined. So, let's see that works, I'm not going to use too much and I just get the crimper and I try to keep the hair as like straight as possible and I just hold oh, I just hold it on for like five seconds, I'm like five. Four. Three two one, and I just like slide it down the heart, the closer the harder you can keep the thing the better the crimps are like the longer you keep it on there until you press that, like wave in there, it's like the better. It is okay. Five four three, two one, five, four, three, two one and five, four, three, two one, five, four, three, two one. I hope my hair is not melting on there. I think I maybe I got a little bit too hot, just turn the heat down. Five. Four. Three. Two one y'all see that that's a nice little crap your repeats just like that. Little trick s Sharpies don't hit me. Thank you, foreign foreign, for no reason, let's see tonight awake okay, so I decided I liked it without the baby hairs. I feel like the baby hairs were not making sense. Okay, it's cute. I like this, I'm going in a lighter, shade, concealer and I like to just put that in the middle of the part that just makes everything really like you know, hop, make sure you blend it out. Y'All know I was extremely brain dead because it was, like God forbid, not brain dead, but I was extremely just tired at this point. It was like four or five a.m, so I didn't even record a proper intro, but here we are at the end result. I did go ahead and re-wanded, I rewinded, but recrimp it the next day, because this way I like this version too, with the no baby hairs I feel like the curls - are more messy. So something like a messy Beach Wave kind of look and then the next day, here's how it looks like with some baby hairs and crimped, but in a more neat way. I just went ahead and like kind of crimped it on the mannequin, to give it a more neater look, but either way I like both, which one do y'all prefer this baby hair, more neat crimp or the messy no baby hair. Look, let me know down below with that said, as always. Thank you guys so much for watching. I hope you enjoyed this tutorial, make sure you like comment and subscribe and, most importantly, Happy Thanksgiving. I am grateful and thankful for each and every one of y'all, with that said, Peace Out Girl Scouts and goodbye
Comments
Alicia Fonseca: As a beginner you your channel has helped me out alot.There is so much detail and things people don’t talk about
Mersadeze: I used quick blue bleach and it turned out perfect! no brassiness.
Da’Ja Little: So I watch this girl who instead of bleaching her knots on colored wigs she uses color oops and it worked perfectly
justedominique: no misses ever
Britney: Hey do you have a link for the tweezers you recommend??
Meah Wooten: Love your videos!! What do you use to record/edit?
Lí: Could you do a wig collection?
Tori time: Girl send me that wig!!
Tori time: I'm here watching as usual.. late but here