**Detailed** How To: Do Body Wave Curls|| Cut Layers|| Lay Baby Hairs And Style A Unit For Instagram
- Posted on 29 December, 2022
- HD Lace Wig
- By Anonymous
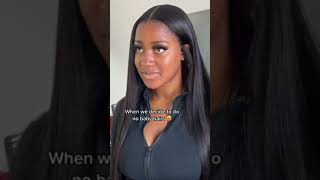
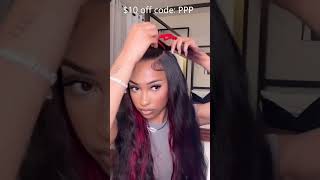
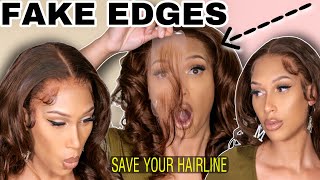
Hey Babes! Welcome back to my channel! In this video I will show you some key pointers steps on how to cut layers, proper cutting layers and curling. How to make your wig units look more appealing to consumers!
------------------------------------------------------------------------------------------------
L I N K S
If you are interested in having a wig made or customized by me email: [email protected] or send me a message via my website! www.lijaeluxe.com
Exact wig from video:
Human Hair Pre Plucked HD Lace Frontal Wigs For Women Loose Body Wave Lace Frontal Wig Human Hair Gluless:
https://a.aliexpress.com/_m0PCVPM
Products Used:
L’oreal HiColor dye- Magenta
Beyond the Zone heat protectant
Tré Semme hair spray level 3 or 4 strength
Luxe Melt Wax Stick
MY WIGS
LUXE ULTIMATE MELT PRODUCTS:
○ https://lijaeluxe.com/products/luxe-me...
○ HOT COMB:
Andis 38330 Professional 450ºF High Heat Ceramic Press Comb with Dual Voltage and Auto Shut-off, Black, 1 Count https://a.co/d/fdpzyQW
------------------------------------------------------------------------------------------------
S O C I A L S :
♡ Instagram: https://www.instagram.com/reel/CmaVKok...=
♡ Tik Tok: https://www.tiktok.com/@kci.xoxo
♡ Snapchat: kci_kocoa
Business hair IG page: @lijaeluxewigs
I N F O:
Camera: Iphone 13 Pro Max
Editing: SPLICE
WEBSITE : HTTPS://LIJAELUXE.COM/
Want to send me something?
SIMPLYKACY
PO BOX: email: [email protected]
Me baby: what's up guys, welcome back to my channel, my name is Casey and if you're new here welcome so today I'll be showing you guys how to curl and style a unit. You know if you have a small business and you want to learn how to start your units for Instagram, and things like that. I am here to show you today. So let's get into it. This is a 22 inch, 13x4 transparent lace unit. I used High color dye in the color magenta to achieve this color with 40 volume developer. So to start, I like to part out the style um The Parting I'd like to do I'm going to be doing a middle part today and I'm just molding it down. So I know how I want the curls to fall and things like that. So that's what you'll see me doing so today, I'm using my T3 curler. I believe it's in the size, one and a half inches. I will double check and leave it in the description and my holding spray is Tresemme and it is level four, I believe, of strength. So I'm taking my wax thick and I'm molding down the flyaways anything like that to get a nice flat base at the top, because your unit should be very flat and neat at the top. So you'll see me go in with the comb and parting out this area. I call it the T-Zone area, where you want there to be like almost like a tee, especially when you're doing a middle part where there's a part in the middle and then a part along the back. That makes it kind of look like a tee, and then you flatten that down. I wish I had a better angle. I apologize guys. I didn't realize that um, I didn't get a good angle on showing you guys what I mean in this part, but I'm just meaning basically just taking some hair from the front to cover the tracks at the back. That'S basically what I'm doing so for this portion, while you're molding, you don't put any wax at the hairline, because if you are doing baby hair or anything like that, it'll be a little bit hard to part out your baby hairs after the fact. So you could just take your hot comb to mold it um. You only put the wax at the tops. Do not use the wax in these areas as of yet not yet. At least you have to wait till you actually part out your baby hairs, which comes later on in the video. So in order to get like really nice full layers into your unit, you need to cut layers. Layers are very important for curls because it basically makes the curls look more full, more voluptuous and gives it more volume, so it's necessary, don't be afraid to cut layers or expect with experiment with cutting layers into your units. It'S very important so right now, I'm parting out the front to start cutting the layers in um. I want to show you I want to like see how I want them to fall, so I'm cutting in like a diagonal. It'S really hard to explain it's better. If you guys just watch foreign and I cut some length off, I just trim it um because I don't like when the ends are stringy and thin. So I like, when it's all nice and full at the bottom. It makes your curls look nicer and it just gives a more. You know a fuller, more voluminous like look to it, so I never leave them on. I always cut the stringy parts off, so it's all one, one lengthen one just even in thick at the ends. Foreign foreign, getting ready to curl so for the curling process, you'll need some pins and you'll need some clips to hold the hair back in place, and this is beyond the Zone, heat protectant spray and it also leaves a nice beautiful shine and it smells amazing. So it's my favorite go-to heat protector for when I'm doing any sort of style with heat foreign. I begin by parting, the back section into two section. This is how I like to curl. I find it being the easiest way, so the back goes into two and then I part out the front. So all together, there'll be four parts, so the back is in two and the the front by itself, and the other side is the exact same way. Foreign out the first section for my curl and clipping the rest up, so that's where the clips come in, and so I am going to actually be spraying every section with the spray. Even though I already sprayed the whole head because of course it didn't get everywhere and I want to make sure that every section gets a little bit of spray and a little bit of Sheen not too much just slightly. Now, when you take your curler, you are going to always try to curl away from your face, always so the curler on each side is always going to go away from your face. Not you don't curl towards your face, bring the curler back like away from your face. Now, I'm going to be honest with you guys, like learning to use a curler overall is a little bit tedious. If you're not used to it, it can take a little bit of time to get used to how the motions work and I'm going to try my best to show you guys how to you that um, the T3 curler. The reason why I love it so much is because it's so light and smooth like it just flows through the hair and it's light too. It'S light to to hold, and it's just like it's just like butter like it's amazing, so I use it it's on more. On the expensive side, but I think it's worth it - I mean you, don't have to start with a curler that expensive you can start with something that is cheaper, but it has to have high heat at least go up to like 220 Celsius, 400 Fahrenheit or somewhere Around that margin, okay, so for curlers, the bigger the curler, the bigger the barrel, the bigger the curls will be okay, they're going to be looser as well. If you use a smaller Barrel, the smaller the barrel, the more tight the curl is going to be, and it's going to be like a different style of curls. So that's what you would go by and you could part up more hair, more thicker sections. When you use a bigger Barrel than when you use a smaller Barrel, you have to part out the sections a bit smaller. So once you let go of the curl you Let It Drop for once like a second just to cool down a little bit, then you use the pin and pin it up. When you pin your curls, the curls will hold better once they're cooled down. You have a longer lasting curl in your hair. So that's why you use the pins um the pins, pull the curls so that it doesn't drop right away and because, when there's too much heat in the curl, when it when it hangs, it's just gon na drop, it's going to drop before it's ready and that's. Okay, too, if you are looking for more of a wave as opposed to a curl, but we're looking for a curl, so I am pinning them up, so we can hold on to that nice full curl. Even when I brush it out, I'm trying my best to show you guys the motion of like how to use the curler. So, while I'm turning the curler, I'm actually pressing on that little knob a little bit to loosen it so that it can help me drag down and twist twist the hair around, because if it, if you don't loosen it with your finger like it, won't allow you To pull the hair down to catch more hair in the curls, I hope that makes sense. You guys you guys foreign! Thank you. So before I curl the front, I am sectioning out the baby hair so that I can finish like molding the front properly before I curl it. So, as we've seen me doing here, I just kind of eyeball where I want the baby hairs to lay on the unit as if it was just a real person's head and then I'm going to go in with my wax stick and mold the rest of the Hair back before I curl it, foreign foreign foreign, foreign, foreign foreign, so this is one side completed and I'm just going to show you how it looks all curled up on one side and I'm basically just going to do the same exact thing going. The other opposite direction. On the other side, I'm going to show you a couple on this side when you're curling the hair. Again, as I mentioned before, it goes in the opposite direction, so you're, basically curling away from your face you're bringing the iron in away from your face, foreign foreign foreign. So I'm just parting out the other side of the baby hair. Sometimes I'm able to use my fingers to try to get the baby hairs even on both sides. I mean you literally just kind of just have to eyeball it. Try to part it out, step back and look if it looks like it's in an even placement on both sides, like the exact same place on both sides, when they're doing um just two baby hairs, they have to be pretty, even so, I'm only making two. So if you're, making like three uh like four two on each side, um and then The Sideburns, then you'd have to part that out right now as well. But I'm only doing two at the top and then the sideburns. And then I'm going to use the hot comb and my holding spray and just slick this side back in place just so that I can go ahead and finish curling it foreign foreign, and this is what the curls look like once I'm done, curling the entire unit And I'm using the holding spray just to give it a light spray around the all the curls just to hold them. Just you know gives an extra little hold and it's not going to make them crunchy, because it's not like stream hold it's just like a nice subtle hold, so it's not gon na make them crunchy or shiny, or anything like that. So don't worry about anything like that, so for cutting the baby hairs. I just wanted to mention that you're going to cut in like a high low fashion, um like on a diagonal so at the top nearest to like the eyebrow you're gon na cut short, shorter and then go longer so kind of like a fashion where, like you're Using your fingers with the scissors to cut shorter and then go longer, so the end of the baby hair should be longer. The part that you brush into the hair should be longer than the actual part, the top I'm curling right now. So I'm using my small mini curler to do this portion of the unit because I don't have one of the pencil flat iron curlers and honestly. This is like my smallest curler and it does the same thing. So I find that I don't need to order one. So I just use this one instead um, so I'm using actually some gel. So this part, I feel like, is very important. If you have gel or guts to be the clear, the gots to be a tube that comes in the black tube, it helps hold the hair down once it's curled and then you're going to use your finger, your finger is going to be like where to hold On this told the style like the whole to mold it you're going to use your finger to help. You mold it like in that in that curvy motion and it really really helps so use your finger and what I mean to say that you guys need a very, very, very light hand when you're. When you are molding this, you do not need to press down on the baby hair. It'S so much easier. When you take the foam and you kind of just move it, you don't have to like try to comb it out or nothing like that. You'Re just kind of moving it foreign foreign foreign. If you realize that the um, the hair is getting a little bit harder or difficult to mold, just add a little bit more foam to it and it'll it'll help um help it just what would I call it help it adhere to styling again. So once you add a little bit more mousse and then you can continue styling, so I didn't I didn't I most down the baby hairs. They won't show, so I just didn't feel like doing them um, and this is what it looks like when it's all done now. I'M just gon na take a wrap to wrap it down so that it can dry. You don't need to pull it too tight, but just tight enough so that it stays on, and then you just dry it I'm using this dryer this blow dryer, because instead of like just putting it under the dryer just to show you guys that you can just Use a blow dryer as well, and here I took my mannequin head and I'm just going to take, take the band off and then take the pins out and brush the curls out. So when you're brushing the curls out, you want to brush backwards brush the hair cut comb, the hair away from the face when you're brushing out the baby hairs you're going to see in a moment ciao, not the baby hairs. I mean when you're brushing out the hair, not the baby hairs. You don't need to brush the baby ears. Sorry, I can't talk today. Apparently, if anyone is looking to start a business or have a business selling wigs, I always suggest that you style your wigs and put them on a mannequin head with the mannequin. That has a makeup done on their face because, like a modern makeup, meaning that the makeup that comes with the medic initially is not very modernized and not very appealing, you want to style the unit and have a makeup artist. If you don't know how to do makeup, I did my mannequins make it myself. You can find one on Instagram and ship, your mannequin head directly to them. Oh, yes, also. It is okay to take the hot comb to just flatten out or even out the um top, because the curls don't need to go that high up. So this is me just correcting that flattening out the top, because you still want the surface to be as flat and neat as possible. So that's what you see me doing right now. I feel like it looks like I'm very being very aggressive while coping this unit out, but I promise you I'm not because if you are too heavy-handed with combing it out you're going to lose the direction of how you want your curls to lay and then you're Gon na have to re-curl some of it and that's good that gets annoying. So try your best not to do that just brush through it softly take your time so that you don't lose the style pattern that you're looking for the! How you want the hair to fall, so the baby hairs um, they did not mold the exact way. I actually molded them. That'S because I didn't let it dry long enough and that's okay. When the unit sells, I will restyle it before I ship it off. So that's no problem. When I ship units I pin the curls back up before I put them in the box and restyle the baby hairs. So it's easy for installation here. Here'S! The final look guys. I hope you enjoyed this tutorial. If you did, if you found it helpful or you learned anything, please give it a thumbs up like subscribe. You know the vibe. Thank you guys so much for tuning in bye,


Comments
itz Sheena: The thumbnail made me come here and I'm glad I did. You did a fantastic job with this unit and now I want to try this so bad! Gotta subscribe and I'm saving this for later. Thank you
Deshawndra Stevens: Do mine lol