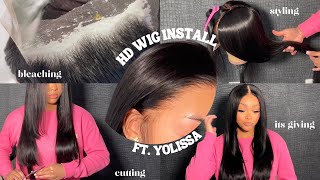
Step By Step No Plucking Frontal Wig Install For Beginners + Detailed Bald Cap Method
- Posted on 18 January, 2023
- HD Lace Wig
- By Anonymous
A Brand New Install for a brand new year. Breaking down all the steps necessary for The Perfect Mell ALL Year Long!
LIKE & Share w your Favorite People!
Hope Everyone is staying safe and practicing proper hygiene. Stay Safe & Sanitized Loves!! xx
Thanks for watching, If you like videos like this please thumbs up!
Like, Comment, & Subscribe!
#BaldCapMethod #FrontalWigInstall #BestInstallEver
_________________________________________________
The Body Wave HD lace wig is from https://www.wowafrican.com
►► : https://www.wowafrican.com/13x6in-thic...
※ ※
13X6in Body Wave Human Virgin Wig[HW03]
Length: 22 inches - Density:150%
13X6 Deep Parting Space
★ Undetectable HD Lace
★ New Clean Hairline
★ Clean Bleached knots
※ ※
Lex15: $ | Lex30 : $
_________________________________________________
P R O D U C T S U S E D
Ruby Kisses foundation cream (R13) - https://amzn.to/3sV7ozI
Got2b Freeze blast spray - https://amzn.to/3jpwFik
hot comb - https://amzn.to/3mIeyWV
tweezers - https://amzn.to/3gENSm3
cork wig head - https://amzn.to/3gLeLoz
wig stand - https://amzn.to/2Wz8sh3
chi silk serum - https://amzn.to/2Y2JSW9
Bio silk serum - https://amzn.to/2Y7h92C
Infiniti pro rainbow titanium flat iron (found the closest one) - https://amzn.to/2Y8PRJd
No nonsense knee-high pantyhose - https://amzn.to/3DmRrax
got2b glue gel - https://amzn.to/3t9EAUx
curved needle and thread
sharp precise cuticle scissors - https://amzn.to/2Y9wI9Z
makeup wipes - https://amzn.to/3BerrfA
91% alcohol - https://amzn.to/3kDaJ2E
Ericka J hold me down Lace glue
1" elastic band - Walmart
eyebrow razor
___________________________________
S O C I A L M E D I A
-Instagram: https://instagram.com/itslexclusive
-Twitter: https://twitter.com/itslexclusive
EMAIL: [email protected]
how to perfectly melt your lace, melt your frontal wig like a pro, frontal wig install, bald cap method for beginners, bald cap method for darkskin, best way to apply lace frontal, how to apply frontal wig, frontal wig for beginners, very detailed lace frontal wig install, bald cap method
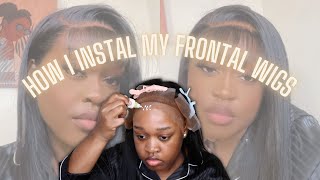
Dance with me, you make me sweet, ie, hello, hello, my beautiful babes, it's been a whole year and a decade since I made a wig install video. Can you imagine so it's only right that I come through with another tutorial for my girls and there's no time for the long talk today. Okay, open up your notes, app so that we can get started we're starting off with a fresh new wig from Wow African hair. This is my first time working with them and even though I decided to give this wig a few tweaks Straight Out of the Box, she looks undeniably gorgeous. I mean my girl requires little to no maintenance. As in like this, wig comes pre-bleached, pre-plugged, pre-protted pre-loved. You can just tell how gentle they were in creating her, in other words, they've done all of the hard work for you and if you're satisfied, all you need to do is install, and I will put a time stamp so that you guys can get to the Actual install, however y'all know I'm a little bit extra, so I had to give my wig an identity of her own as of right now, subtle highlights. Are my go-to look at the moment and to achieve my look, I'm going in randomly to add streaks of bleached pieces to the hair, and let me tell you guys something if you are still using BW bleach powder honey, put that toy down and drop a few Extra big girl coins for this blonde Brilliance, bleach powder, like this, saves you so much time by lifting the color of the hair up to a bright blonde in literally your first goal round. Okay, I kid you not. I was more than prepared to bleach this hair. Multiple times, but with this powder, all I had to do literally was line her up once and wash the hair out with purple shampoo to correct any brassiness, and I got the beautiful ash blonde color that I was going for so a few random streaks of blonde Towards the bottom of the wig is all I did, I used basket weave emotions to pick out the hair that I would be bleaching and then I used foil to not only separate the hair from the other pieces, but foil actually gives your hair a better bleaching Performance because it keeps all of the heat trapped in and you get an even better lift of the color so yeah for the look that I was going for. Listen, I need volume. Okay, I don't play about that. I was short on time and I just used some Beauty Supply bundles in the same length as the hair and beauty supply. Hair is very sketchy. You know you never know what you're gon na get. So I would highly recommend just ordering an extra bundle from the same company that you're getting your hair from and because I didn't know how all the bundles that I got with Lyft. I just played it safe and opted to adding the extra bundle after the bleaching process, but you can certainly do this beforehand, especially if you're using care of the same quality, but to add the bundles on I'm filling in any gaps between the wefts of the wig. Using some black hair glue and a blow dryer on a cold setting just to dry it up and seal the hair down when it is done properly, and you maintain the hair very well. This glue can last you from now until the end of time. Until Jesus comes like, I can promise you that, but once the hair is on before anything, I like to get this step out of the way, and that is tinting my lace to match my skin tone or my skin color. I use the arcade Beauty, Duo, color Foundation, thinking from the Beauty Supply, but moving on, I'm starting with using my Moroccan Argan Oil for some Sheen and movement, and you can use the pump version or you can use the spray version. I personally, like the spray version right now, but I use the pump version in this one. However, I'm getting all of that serum all in the hair and then I am blow drying her up with this blow dryer brush, and let me tell you guys I am putting you guys so many gems in this video. I promise you this blow. Dryer is the absolute truth, a total Game Changer like I don't know why I wasn't hip to it before, but I will never go back. This had my hair frizz free sleek, and it gave my hair so much movements without the wahala of holding a brush in one hand and the blow dryer and another, like I didn't, have to do any of that this hand dryer or blow dryer brush. Does the work for you and again, this wig is pre-plugged in everything, so all I'm really doing is just molding down the hair and sleeking her up um. I didn't really have to do anything else. I really only had to do all of this extra work because I changed the parting. It was originally a middle part and I changed it to a side part for the final step of getting this hair ready for insulation. I'M giving her some body with layers, and I first cut each side of the hair into a blunt cut, because I really wanted. Like heavy bottom curls and I'm just thinning it out just a little bit so there's not too blunt at the end, the blunt cut we did it just gives us like these heavy set and - and it looks so good, especially when the hair is curled like especially With some loose curls, I'm adding some layers to her and this wig came to life. A good install just gets me so lit. I was so ready to install this hair before a good. Install comes a good foundation, a perfect, bald cap method and I really should be coming on here. Looking a bit more presentable, but uh you guys are my babes okay. I really don't mind. I hardly ever do podcasts, but when I do, I love making sure that I take the proper steps in a ball cap that will eat every single time. First things. First, the cap I've tried the regular caps and I just I couldn't get with the program. Okay, they're bulky they're flimsy they take forever to find a color that seamlessly matches my skin tone without all the extra work of adding Foundation to the cap and this one, and that I couldn't do it. Okay. These knee highs, however, are a really good alternative to the regular, bald caps. But imagine thinking you found the best thing and then you find something even better. That is how I feel about these pantyhose. You guys they're thin they're lightweight, but they still have that durability. That you want in a cap and to install this I'm starting off with a water soluble gel and for me the got to be gel in the Black Bottle works perfectly fine, and I use that to slick back all of my edges. You know just to get them out of the way, but also to create a really flat foundation for my cap and my wig to lay on so just gather as much as those hairs as you can and set it down with a blow dryer on a cool Setting I blow dry her up until she is dry to the touch and I typically wouldn't mix a fresh install with a fresh face of makeup. But of course I had to do so for the sake of this video and I'm just cleaning that entire area up that the wig is going to be placed on with a makeup wipe and for the rest of us that have no makeup on, as you should, Especially when you want that, oh that fresh install just make sure you go over your skin with some alcohol to wipe away any dirt. You know excess oils, and you know that type of thing and once it's dry, then I put my cap back on. I wasted. No time in cutting my ears out - and this is the first thing I always do so - that I can make sure I have the proper flat placement that I like and if you are not loving the idea of this cap already, then maybe the fact that the Hole that I cut stayed very small and secure. Unlike a regular, bald cap wood, you know using my got to be glue or, like my got, to be spray, rather I'm just spraying down that first layer directly onto my hairline, using only small amounts at a time. Just try to get in full control of where that spray goes, and the trick is to make sure that I spray a little bit further back and I use my fingers to like drag it down, and this just helps you avoid all of that glue running down Your face, you know I dry her down until she is completely dry to the touch and the second layer goes right on and I'm making sure I spray a good amount by my ears so that that area is in place, especially when we cut that cap off. I blow dried that layer up and then I spray down a third layer. I promise you this third layer is really just for good luck, because, honestly, if it's pretty secure by the second layer, then you're really good to go. Okay, I just sprayed that third layer for security and to make sure that that cap is not gon na move a single inch under my leg. Your wig cap is such a crucial part of a good install and this wig cap, or this pantyhose rather will make the job even easier. For you, then, with a small pair of scissors, I cut all of the excess cap up in the front and I try to go as close as possible to the glued parts. And then I also cut the extra cap in the back as well and just tie that piece in the back into a knot and because this is pantyhose, you guys we still have at least three more uses of that leg alone. Using some lace glue, I'm using the Erica J lace glue and I'm just going to use this to tack down any pieces that may be sticking up, and I really didn't need to do it because honey the proof is in the pudding. Okay, this cap does not need another, damn thing done to it, but I just wanted to at least show you guys all the options that you have in the Bobcat method. But next, with my beauty supply lace Foundation, I'm just going to be blending that powder all over the cap as the cherry on top to really give that true, scalp, color and girl. I'M telling you this pantyhose is the truth. Okay, if you haven't made the switch after this video, you are truly playing yourself. Okay, you're, not blame me you're playing yourself with the regular thick Beauty, Supply caps, you'd be losing sleep just at least get it to match to your skin tone. I don't like stress, so I'm definitely going to be sticking it through with these pantyhose, because they are the best thing to ever happen to my weight gain and the best part is they come in so many shades, so you are sure to find something that works For you, whether you're light skin dark skin middle skin brown, skin bright skin, it will work for you once the wig is back on. I am positioning her in the exact places that I want her and babe. I just knew this install was gon na, be a banker like the music was sounding sweet to her. My smile was getting brighter. My instincts literally just told me that this look was gon na, be one for the books, so without wasting time, I'm cutting the ear tabs off of the lace using a small pair of scissors and I'm cutting as close to my ears as possible, so that when I'Ve cut all of that lace off all I'm left with is a seamless cut that frames my ears so perfectly, and as soon as I complete ear tab one I go ahead and repeat the same to the other, then all you want to do is take your Lace foundation and mark up the perimeter of your hairline. I like doing this with a shade that is close to my skin tone. As far as the markings go, I really just love focusing on the dips and turns of the hairlines, rather than creating like a whole entire outline of the frontal. Not only is that a bit tacky for me, but two um, it's very visible. I don't like that. For the glue down grab a hold of your favorite glue, mine is currently the Erica J lace glue and just go ahead and spread thin layers across your hairline, making sure that you are not bringing that glue past any of the markings that you made. I try to make my glue about an inch wide so that that glue is gripping onto my wig very, very well. I wait for the first layer to dry down then move in with another layer. I aim for about two or three layers, depending on the hold that I want and how long I want this install to be with the two layers that I did. This install lasted me for about seven to nine days. Like girl, I was ready to take her off my head. Using the hairline markings that we made pulling. The lace back over should be very simple match up the markings as best as possible and then then stamp that lace into the glue. I do one side at a time and then I use my comb to press that lace right in there. I place an elastic band on and I gave her about 10 minutes or so to melt and just look at the scalp that that creates all that's left for. You now is to just cut the lace off and I used a brow razor to do so and I'm just cutting zigzag motions. This also allows your lace to blend in seamlessly into your skin, and you guys know that I wouldn't lie to you, because the proof is in the pudding. My dear my lace is unclockable, a few parts of the lace did not catch any glue, so I just went ahead and fixed that right up and to seal that all in I'm going in with my two favorite lace sprays at the moment, but you guys this Is where I messed up to avoid making the mistake that I made try not to mix too many glues and sprays at once. I use the ORS in the oven spray in this video, but moving forward. I now use the Fantasia holding spray and that will have your lace. Melted, mixing up a concoction of glues and sprays was honestly just a recipe for disaster, and you guys know that I'm an OG when it comes to this wig stuff. So I definitely did fix her up a lot, but please don't make the same mistakes that I made okay moving forward, I decided to go for some baby hairs with this look and I'm starting with carving out the hairs first in the areas that I want. The baby hairs to be in - and I just kind of braided them down for the meantime, to keep them out of the way. And once I finalize the hairs that I wanted, I cut the hair down into the length that was suitable for me and I curled them downwards, using a pencil, curler or pencil flat iron, rather so that those hairs can fall in the direction that I really want Them to my best kept secret is using lace spray for my baby hairs. I don't know what it is, but I just cannot get with the mousse gang. I just can't like it gets so messy for me and I feel like putting something that is so wet on lace just makes it lift so I'll, just stick it through with my or as spray, and that does the trick for me. Maybe there are better options out there, but I just haven't found that yet. Finally, though, I'm bringing this unit to life with the styling face and I'm going for some tight bouncy curls that will loosen up and fall beautifully for a more like effortless. Look I'm using my T3 curler to achieve this look and I believe this is the one inch barrel but look girl I like going for smaller wands, just because I prefer, for my curling wand, to do all the work for me. I find that when I use my looser barrels, the curls just drop and I'm left with doing the work over and over again. So when the smaller Barrel curls loosen, they look so good and they last even longer. But the goal here is to curl your hair backwards and away from your face to allow your hair to fall nicely and frame your face. Do Goods a few moments later, I'm left with such pretty curls, and I give all the credit to this T3 curler for making it so easy to achieve this look also, I give the credit to wow African hair, because you guys this hair is gorgeous. This is easily one of my favorite installs, like the Melt makes sense. The hair color suits me so well, like ah tell me, I'm not a president's wife in this. Look on some Scandal type wave, if you know you know, but that is it for this video. I hope you dolls enjoyed it and I will see you in my next one foreign

Comments
Therealtati: omg I love this hair you killed this!
Raliat A: This was too good. Thanks Lex we’ve missed you ! I can’t wait to perfect my installs this year!
JackieFacia: One thing about my girl… she’s going to create some bomb content! From start to finish you had my attention. Taught me a thing and two that’ll help me on my next install, thank you
Olawoomi : Always a hit, love it. Well done lex❤️
Nu: Love it
Oyinde Akinwumi: Did such a good job lex
Cynthia Patton: Thank you!. So beautiful!! May I ask, what color is the beauty supply lace foundation do you use? Thank you!
Boatemaa: Ayyy please don’t leave us hanging like that. Hope all is well. Love you
Manolopriss: Missed you girl! lol Back like you never left! Thank you sis!
Amara Uzo: I missed your vids. Deffo needed this for prom
Irene mdede: WOOOH babes I live your energy. Hair is
Mbali Mahe: Been waiting for you girl❤️
Esther Sowell: They have quality hair and the wigs are beautiful just to expensive for me
Palesa Malgas: Dont disappear on us this year❤
Aquarian231990: Pretty Pretty Pretty
pri’s diary: Can you do a curling video ?
ItsKarryanne: Hey gorgeous girl
Zuzzie: QUALITY CONTENT SIS IS BACKKKKKKKKK!!!! HALLELUJAH !!!!!
AllThingsGoodWithSontie: and she’s back
Kharah Jay: My girl is back, and I am messing wid it!!
Caleb Boadi: First transitions
Charmila Remolebogile: Girl finally❤️
Nozipho Ibeabuchi: Updated make up routine babe if you don't mind pls ❤
_Maïmouna_: Le retour de notre star❤️❤️
Asy Manjola: Welcome back
tinu0la : Let stop leaving us please
Mbali Mahe: Yassss
Lady cg: Very pretty babe
Maimuna Ahmed: Missed you
Nozipho Ibeabuchi: Lexxxxiii