$60 *Synthetic* Lace Front Wig Install *Flawless*
- Posted on 29 June, 2022
- HD Lace Wig
- By Anonymous
hi everyone! hope you enjoyed this video! Don't forget to like comment and subscribe, and I'll keep making content for you guys!
FOLLOW MY OTHER SOCIAL MEDIAS:
INSTAGRAM: https://www.instagram.com/liichanell/
TIKTOK: https://www.tiktok.com/@lichanel?lang=...
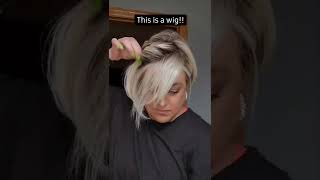
Hey guys and welcome back to my channel, okay. Okay, if you guys want to know how to achieve this seamless flawless synthetic wig install then keep on watching, hey guys and welcome back to my channel, so i am coming back with yet another wig install video um. I really like making these hair videos, if you guys like watching them, then go ahead and like comment and subscribe, but for today i am going to be doing i'm going to be installing a synthetic, equal wig. This is the way that i'm going to be installing today. This is my first time ever ever installing this wig. This is my first time ever purchasing it so y'all going through this experience with me. Okay, first off, i'm gon na insert a photo of how it came in the box how it came right out of the box, the hairline of it when they just came out the box and everything they. It is pre-plucked by the company and everything. So if you are a beginner for like synthetic wigs or just wigs in general, this is like the perfect wig for you, because it's already pre-plugged they already have that natural hairline. But for me i decided to go ahead and pluck anyways, and also this is like my first time really going in plucking with the wig, so we're gon na go ahead. Try this wig on see how it fits all that good stuff, and i hope i gave the girls help. Oh my gosh okay, but but let's just go ahead and get straight into it, so i already have my wig cap on already. If you guys see me looking down here, it's because i have a mirror right in front of me. I have my mirror right in front of me. I'M giving the girls give the girls balls okay for now, um y'all. I am so excited to please leave on my head, i'm so excited for you, like. Okay, all right stop playing. So this is the hair. It'S it's so beautiful, it's literally so beautiful so bouncy. I didn't comb my fingers through it or anything but y'all. This is the texture of it. It'S like a body wave, so so pretty, and then i'm gon na put it on just so. You guys can see how the plucking is and how i want to see how i did as well, because i said before it's like my first time really going in with like plucking a wig. So, let's see how i did in the back of this wig there's an elastic band, which i really really find super duper helpful for that extra security and it comes with three clips as well. So if you guys like that, then this is really like the way for you girl, oh, oh, okay, okay, well, first of all, my ball cap um, i'm gon na i'm gon na put some like powder over that and all right, but i just want to see How it looks on my head are y'all. Looking at this, are we seeing the same wig? Are we seeing the same wig? Okay, it's really giving scalp y'all. I really did that. Whoa! Okay, i'm ready to put this wig on okay, okay! So now that i see how well i did, because that was actually pretty good for my first time, we're gon na go ahead and start really doing what it do. So i might just do a voiceover for this segment of the video, but let's get into it. Okay, guys so i have my bald cap on, i am ready to go. I am going to be using this got to be hair glue for my install for my bald cap method. Um. I actually haven't really been doing ball cap methods that much i only do a ball cap methods only when i really really want to achieve a very natural looking wig install something very seamless, very flawless, um. Obviously, right here i am cutting out the ear tabs and i am now securing the bald cap onto the glue. Now i go ahead and spray the got to be glue spray all around the perimeter of the bald cap and i go ahead and dry it off. Obviously, you could use a blow dryer, that's way more effective and faster, but i mean either way as long as it dries you're good. So moving on, i am going to be using this powder on my bald cap to make sure that when i apply and install the wig it matches my actual skin color. As you can see, i'm putting it on my ball cap um later on, i'm going to be also putting the powder on the lace of the wig just to make sure that everything is evenly distributed. Everything is my skin tone because you don't want to put the wig on and then next thing you know you're walking around with two different shades of skin colors. Like that's not cute. That'S not gon na give you that flawless. Look okay, y'all, so boom all right. Clearly, we see that the powder has um transferred a little bit and the roots of the hair don't be afraid when this happens simply just get some alcohol, a napkin and just smoothly rub it throughout the roots of your hair or of the wig um. It would easily come off. Do not worry um, i'm sure water would do just fine, okay guys. So let me bring you in a little closer, so y'all can see exactly what i'm doing so right now, i'm just kind of mapping out exactly where i want the wig to lay when i install it and glue it and make sure that everything is good. I soon am going to be cutting out the um ear tabs as right here, i'm going to be cutting out the ear tabs um just so my ears can move freely because sometimes when i do install wigs, my ear sometimes be looking a little. You know deformed and we don't want that. Look obviously so just make sure you cut out the ear tabs if necessary and right here, i'm going to be taking my got to be glue from earlier, and i'm just going to be laying that around the perimeter of my bald cap um. As you see, i'm using the end of my rat tail comb to lay everything flat to make sure that everything is evenly distributed. There'S no place on the perimeter of my ball cap that has too much glue that has too little glue, i'm just evenly distributing it all around okay, so, right here after i am pretty much done with drying out the glue um it's most of it is pretty Clear so i'm gon na take that as a good sign to go ahead and lay this wig down in place. Y'All make sure you know exactly where you want to place your wig uh make sure you have the hairline exactly where you want it. Obviously, right here, i kind of you know had a little hiccup, but as long as you know, you can fix it. You'Re good right now, i'm just over here trying to map out the hairline of the wig to match um my hairline, and for it to be in for it to cover the bald cap that i have underneath as well. Okay, guys! So, let's really get into it! It looks like scalp y'all, it's really coming together. Now, i'm going to be taking my got to be glue spray and i'm going to be spraying it right over the glue that i laid down as you can see the spray just kind of melts everything down. So i'm just going to be spraying it all around the perimeter where i laid my glue be careful with this step because you don't want any glue to be getting in your eye. Getting in your eyebrows, just you know just try to keep it controlled. You know, but i'm gon na be spraying it after that, i'm just gon na be drying it out and while i'm drying it out, i'm gon na be taking my rat tail comb and pressing down on my lace while i'm drying it. So if you have a blow, dryer that'll be more effective, but in this case i didn't have a blow dryer near me, so i just kind of i just fanned it. I just fanned my lace and you know that worked just as well so you're good. Now, on to the next step is melting, the lace with either an elastic band, a head wrap a scarf just go ahead and make sure you tie that lace down. Don'T do it too tightly, you know, don't don't tie it too tight for me, but make sure that you know it's tight enough where you know like okay, it's secure, the lace is gon na be melted. I do recommend you having an elastic band because i feel like that's like the ultimate product to having a melted lace but girl. I made my head scarf last okay, so it worked out just perfectly so i went ahead. I took a little break um and make sure that my lace was good and kind of marinating, but right now i am taking off the scarf. Now, don't don't mind the powder on my head scarf but, as you can see you know, the lace is now melted. Obviously, the glue was a little was still a bit wet when i tied it down. So it's a little white right now, but we're gon na spray right over it and it's going to melt right in so right now. What i'm gon na do is i'm basically just taking my edge brush and i'm kind of passing it throughout the hairline, because it is a bit stiff from the glue and the glue spray. So i'm just making sure that it's not really stiff anymore. It has that movement all that good stuff. This step is very optional. This is just my preference, but y'all could definitely just skip this step and call it a day, okay guys. So this step is pretty self-explanatory, but i'm gon na be taking one of my small eyebrow razors and i'm gon na be cutting the lace as close to the hairline as possible, cut in with that natural flow of the hairline um. If you just have scissors, then make sure you're cutting it kind of in like a zigzag format, because you don't want it to be completely straight, because if it's completely straight then you'll be able to really see the difference with the lace and the skin. You want it to all basically look like scalp, so if you do have an eyebrow razor, i do recommend that. But if you just have scissors, then baby, it's okay, you can make it work. Just make sure you cut in a zig zag format, but that's pretty much it that's what i'm doing right now. Okay, so after i am done perfecting the cutting of my lace, i'm gon na be taking my got to be glue spray and i'm gon na be kind of melting, the lace a little bit, because you can see it's a bit ashy, it's looking a little bit. Ashy, so i'm going to take that spray and just spray it right over. It gives what it needs to give okay and obviously, if you have another type of spray, other than got to be glue, then definitely use that if it's gon na work, you're good, like y'all, let's give a scalp so right now, i'm just kind of drying out The gossipy blue spray, but soon enough i will be going off camera to style my hair and to make sure i do my baby hairs um, so yeah you'll see me in my final result. Now: okay, guys, this is the final look of my wig install. Thank you guys so much for watching this video. If you guys want to see my baby hair tutorial, then let me know down below, because i did do my baby hairs off camera, but this is how it looks. You know what, for the first time of me, purchasing this wig and for like plucking bruh. I did that okay, so this is basically how the hair came out. Let me show you guys the back of the hair as well. The curls is curling, the curls are so bright, but that's pretty much it for this video go ahead like comment and subscribe for yet another video and and i'll see you guys in my next upload, see you guys later bye in

Comments
Jaden Greene: Lili killing it with these hair videos❤
ᵋ bri ᵌ: Omg you look great in it purr
Алина Антонова: Bendiciones hermosa Celina que Dios te cuidex donde quiera que QUINZAA.Monster encantan tus videos.
Bbgmanagement_sa: please do a how to pluck a synthetic wig video please
sorayah guillaumette: Chanel I, Girl u killing it...that hair I so beautiful
sorayah guillaumette: Chanel u should open a hair salon
lvnszn: periodd, ate that up
Dakya😍🤍: Earlyy!
sorayah guillaumette: Chanel I c u , what ok ok
luh jo: First