Start To Finish How To Make A 40 Inch Frontal Wig Using Krazy Glue| & Install |Thebhslay
- Posted on 01 November, 2021
- HD Lace Wig
- By Anonymous
TheBhSlay Brand
5(40”) Raw Hair Bundles with 20” Straight Frontal (Relaunch This month)
All Products Used in this video can be Purchased On ➡️ www.ibhslays.com ⬅️
Welcome to IAmBeautifulHustlerTV .
Be sure to SUBSCRIBE & TURN ON YOUR ALERTS
——————————————————
MY PERSONAL YOUTUBE CHANNEL : In The Life Of A BeautifulHustler https://www.youtube.com/channel/UCB9xX...
——————————————————
Follow My Socials:
Instagram:_Beautifulhustler
@thebhslay
@iambeautifulhustler
Twitter:_Beautifulhustl
YouTube :IAmBeautifulHustlerTV
✨For Sponsorships ,Reviews,& Questions
Email:[email protected]
786-571-1313
To Purchase Hair & Products Www.ibhslays.com
Allow 3-14 Business Days For All Orders
——————————————————
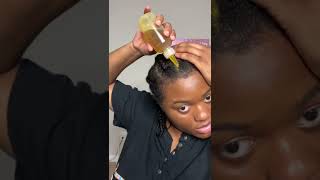
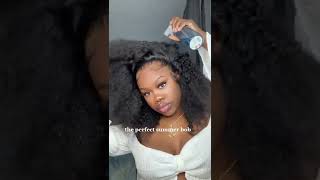
Hey beauties and welcome back to my channel, if you are new to my channel, just go ahead and click that subscribe button and turn on your bells. Now, today we are back with another wig making, video okay and it's been a while, since i posted a wig making video the last one, i did was with the gorilla glue, but today i'm going to kind of use that same method. Today, with creating my 40 inch wig, but instead of using the gorilla glue, i will be using the regular uh crazy glue, okay, little smaller tools and guys. For starters, you will need a few of them um, especially if you have a lot of hair to a bond in now right now i am well. I will be using um hair from my collection and i'm getting ready to relaunch my hair brand this month. I have not came up with the dates as of yet, but i do want you guys to be on the lookout for it. So the hair that i'm using in this video, as i mentioned, is from my brand, the bh slay and i am using five bundles of 40 inch straight hair and i'm also using a um. I believe it was a 22 inch, hd lace, front tool from my collection as well. Now this hair did come in the natural brown color, but uh for this look, and this was the look that i did for my photo shoot, which i will attach pictures at the end of this video um. This hair did come natural brown, but i did go ahead and dye this hair uh jet black. For the frontal. I did the um water dye method, but for the bundles i actually used the permanent jet black dies. So it's kind of a difference in the jet black um on the frontal versus the bundles, but once everything was all blended together, it all just matched perfectly fine. Okay. So today, as i mentioned, i will be using the crazy glue method. Now i did not have any t-pins, i don't know what it is about, the t-pins. I always lose them, no matter how many times i actually buy them. So when i had to do uh this frontal, like when i had to put this frontal on without having anything to hold it into place, um, i just really had to like pay attention to what i was doing. So i just took a needle as you can see, and i placed it in the back of the frontal and even though i have no t-pins to hold anything um, you still want to make sure you create a m-shape with your frontal when you go to placing It onto the wig head - and i am using that crazy glue and just adding the crazy glue on the the thick part of that frontal and just gluing it down now. I did not use any needle any thread whatsoever when it came to making this wig. I literally only use the bottoms that i was gon na put to make the wig the dome cap itself and also that crazy glue, so no needle no thread straight crazy glue and my wig was laid okay, secure and laid to the t. Okay, now, as you can see, i went ahead and i tacked down the back of that wig. My wig is still doing the m shape um, you know, and you do want to place that frontal um a little bit past that hairline. So you know just to make sure that your wig fit um. Do what works best for you. You know everybody has size, is different, so make it fit to your head as much as possible. Okay! So now i'm going in with my first uh, my first uh 40 inch bundle and when i, when it comes to making my wigs, i really prefer to double weft. I don't really like to single wefts uh. I really feel like when you single weft, you can't get as much hair that you want in your wig. So when you do double your tracks, you have the you know opportunity to get more bundles in and like i mentioned, i did have five bundles of that 40 inch, so i wanted to get most, if not most all of it. You know well, if not all of it, then most of it, okay, so um first thing i did was just go ahead and take that crazy glue and put it onto the tracks, and i just went in the same motion that i would if i was doing A regular bonding on a client so the same way that you make your wig is the same way that you would um do the install as if you were doing a regular frontal bonding okay. So you know you put your your frontal one first and then you begin to bond your tracks in going from left to right still going in that curve motion and then, once you get close to closing up your um little half circle, you start to place the Tracks going straight across okay, so that's all i'm going to do as far as when it comes to making this wig and as you can see just like that gorilla glue, that crazy glue sticks on there instantly and it's like dry instantly, and you don't have to Worry about anything okay, so this is just as secure as the gorilla the gorilla glue wig. When i, like, i mentioned before, when i made the wig using a gorilla glue, the crazy glue works, just as you know, i'm saying effective, so make sure you guys try this method out. If you do try it out, let me know how it works for you and, like i mentioned um, this is going to be like a repetition so, but i'm still going to show you guys step by step. Um me creating the wig and then, of course me actually um. You know kind of pre-styling the wig, so once i put it on it's just like a one, two three, but not only will you see me make the wig in this video. You will also see me install it and then i will also drop the finishing look and it's um also my pictures from the photo shoot overall. So i hope you guys enjoy this video. It'S pretty lengthy. We have to go through a few steps, but i know you guys would definitely learn something from it. So um get your pen and paper, your snacks or whatever, and let's get into it hello and i'm just going to keep you know, adding the track still going and that see my circle motion and i'm just going to repeat this because i know someone is still Going to ask down in the comments the hair in this video is from my collection and i will be relaunching uh my hair brand this month. I am not set on a date as of yet, but it will be. You know mentioned and also posted down in the community section on on. You know on my channel, but this is five bundles of 40 inch raw hair. This is from my raw hair collection. I forgot to mention that so this is 40 inch bundles. This is five bundles of 40 inch for my raw hair collection. This hair did come natural brown, but i did go ahead and dye a jet black, and i also let these bundles air dry, so i have not flat ironed them or anything yet, since they are dried and as you can see, the quality of this hair before I even get to the styling and everything else. Okay, and if you follow me, one of my social medias, you can see i've been wearing this 40 inch wig a few times. Okay, so i'll take this wig out i'll put it back in when i feel like. I want to be you know, rapunzel and then i'll take it out again and then do something shorter, then i'll, be back. Rapunzel again put my wig right back on okay. So this is what it's looking like. I lift the wig up, so you guys can see how long it is and the quality, but you guys will definitely see the real quality once i go ahead and flat iron, but sometimes you can just look at hair and just know if it's good or not. Okay, so um, once i finish gluing all of this in, i will go ahead and um begin to prep the wig. As far as doing my part down the middle, using my wax sticks, smoothing everything out and off camera. I did press this hair out to the tee just using a little heat protectant and my babyliss flat iron, so you guys will get to see what it look like before i install it. I'Ll actually drop a video of the finished look of me, creating the wig, and then we will get into the install so keep watching you and, as i mentioned before, when it comes to closing the wig up, i go from taking those tracks in that half circle Motion to gluing them straight across and that just helps make sure that the wig is flat and all tracks are covered. Now this is a very, very, very common mistake. I see in a lot of stylists, especially those who are beginning off like when they do their frontal bondings. They keep that that you motion going all the way to the end, and it just looks crazy at the top. It does not blend in uh blend in when it comes to um, covering your tracks. With that, you know the hair from the frontal, like it just looks a mess. Okay. This is a big mistake that a lot of beginners make when it comes to making when it comes to making wigs and when it comes to doing frontal bonding. You have to know when to start to lay those tracks straight across once you lay those tracks stayed across uh straight across when it comes to you to part of a section of the back of the front to the cover the tracks is going to help transition. Their frontal to their bundles to be nice flat and smooth. You cannot go in the. U motion, all the way up to the top to the very end, because then you're gon na have just a bunch of chaos. Okay, so be sure that once you get enough of those tracks going in a umotion - and you are getting close to - maybe your last three to four tracks bond them going straight across and, as you can see, as i'm bonding those straight across it's closing up. And it's flowing and it's smooth, no tracks will be showing and it would just be a cute, simple flat and neat transition to closing and finishing off your wig okay. So that's exactly what i'm doing here and i just gave you guys the reason exactly why i do it this way and now that i'm adding that last track, i could go ahead and begin to um. Take the wig off the mannequin, which is gon na, be a little tough. You know it's gon na be a little tough, but it's not like completely stuck okay, because it is crazy glue. It does seep through a little bit on your dome head. So it's going to take a little. You know pull to get the wig off of the dome cap. You can glue it on another cap, like you, could put a cap on top and then glue the dome if you prefer, but me i just rip it off. Like it's a dome here, it ain't gon na hurt so um, and i do not recommend that you do this. Try to make you a wig onto your own head with no crazy glue. Do not do that at all. Do it on a mannequin that way you can just rip it off the mannequin, your truck still going to be secured and you can do what you got to do. Okay, so now that i'm done gluing all those tracks, i'm going inside flipping the wig inside out and cutting all that extra dome cap off um, where the frontal part is now this wig is so secure because remind y'all remind um, i told y'all. I did not use no needle or no thread to sew down that frontal part. So the fact that i just went and cut the extra dome cap off where um that front tool um where their part was underneath that frontal it did not come apart. The frontal didn't rip off fall off nothing. It is that secure okay, so i went and cut off that extra dome cap from underneath that um frontal part and now, with the little one t pin. I do have i'm about to go ahead and get my middle part situated. Then i'm going to go in with my a hot comb and my bh slay wax stick and get this sleek in and pressing this thing down. Okay, because i like my bus down the middle, is nice and sleek okay, and especially with the jet black color and the fact that i was doing my photo shoot. I did not want to do no baby hairs or nothing like that, so i just kept it straight and sleek, and you know i made sure that before i even installed the wig or created the wig, i have plugged the front tool first and then i had Colored it and then you know everything else so um now, i'm just going to go in with that uh bh slay wax stick like i mentioned, and this is from my collection as well, and i'm just going to go ahead and begin to wax the front down And begin to hot comb, now a lot of people do ask me: how did i purchase? How can i purchase your products? My link to my website is always down below in my description box um, because this is not a sponsored video. This is strictly from my brand my collection, my everything. It will be right there at the top of the description, so my website is www.iph.com so be sure to read the description to see where to purchase the products and also um. When i do have my relaunch date of my hair collection, that will be down in the description as well, and it's still the same website. So the same website that i sell my products is the same website that you book your appointments and it's that same website. That you um buy your hair, okay and just start out there right now. I am not taking appointments as far as you know, as far as on my booking site, because guys starting this month, but today being november 1st, i will be traveling from city to city teaching classes taking appointments, and i will have some hair and install deals. Everything that you need to know, okay, so the first city that i will be in is orlando florida. So if you are watching this video and you are in orlando florida - i will be there november 18th to the 21st of this month. Yes, the weekend before thanksgiving be sure to text me. My number is also down in the description box. If you need to book an appointment, if you are in orlando florida, okay, but everything i'm saying in this video will be listed down below so after orlando city. I don't know which city i'm hitting up next but make sure y'all do go to the community section and drop your city down below. Where i said you think i should travel to to take those appointments and t shows one-on-one classes. Okay, so show love, show support if you want me in your city drop your city down below the city that gets. The most requests is the places that i will travel to and you guys can go ahead and book your appointments, but, like i mentioned, orlando is the first that i will be in november 18th through the 21st the weekend before thanksgiving. So if you are close or you can get to that area, just go ahead and text me and book details everything down below in the description box, but in the meantime, between time, i'm just going to continue to hop comb and press the top of this wig Nice and flat, and then i will go ahead and flat iron, it off camera and we will get into the finished look of the wig and then the installation process and just another key point that i wanted to reiterate that i said before: do you see how Like i was able to part the back of that frontal and it lay completely flat where the tracks were placed and that's why i say be careful of how you lay those lash finishing tracks, make sure you make them lay straight across. So, just like how i showed you how smooth and how flat that transition was, it would give you that same effect. So go on that see my circle, but when you get to those last three to four tracks lay them directly straight across and you will have that smooth transition, like i just showed you here up close and personal. As you can see, the hairline is looking good. The hair is looking good, so i'm just going to go ahead and press this wig out to the tee off camera and then show you guys the finishing look before the install, and this is what you call a sleek nice silky raw hair bust down the middle Wig, like this wig looks so freaking good, like do y'all see that and y'all don't even understand in real life time. I really made this wig in 30 minutes, like my makeup. Appointment was like in 30 minutes and i had to do what i had to do. Well, my makeup problem was like an hour, so i made the wig in 30 minutes and put my wig on in 30. Minutes like i could not play no games, but this is what the wig looks like fresh off the mannequin onto my head. Okay, y'all see that nice yeah - i see it so now. I'M gon na go ahead and just jump straight into putting a wig on my head. I already placed the foundation in the inside of the wig. I use that ruby kisses palette level. 14. So i mean, if you can style your weight before you put it on, because it just makes your life so much easier, uh like easier y'all like honestly, okay, so i went ahead and sleeped it down flat ironed it because nobody was there. I was home alone and nobody was gon na press. My damn 40 inch like me anyways. So i'm like that's why i pressed my wig and i styled it before i put it on and now i'm just gon na go ahead and you know cut the extra flaps from around the ears um of the frontal. So i could fit my hair perfectly and then i would go straight in and begin to add my layers of my adhesive and get this wig tacked down and, of course, i'm going in with about three layers of my lace: mill, uh max adhesive, okay: this is The mega size bottle, i do have four sizes mini regular, medium and mega, so i am using the mega size. Okay, so right now, i'm just going with my first layer, i'm just going to spray that thing out. You want to get the glue on the cap as well as in front of that cap, where your hairline is so once you put all of your layers that you desire to use, depending on what kind of hole that you want, um, you wait for it to Turn clear and then you begin to tack your wig down so um. Once i add all my layers, i will go ahead and begin to tuck the wig down, so i went ahead and added all my layers and when that glue going to turn clear, i went ahead and start to place my wig right on down, like i told Y'All, i was on a press for time, so baby had no time to waste, so i went ahead and tacked down that one side. Then i went in with the blow dryer and blow dry that lace on in because yeah, like i said, pressed for time and he had no time aways. So i'm just taking uh the blow dryer on the heat setting and just blow drying that side into place. Getting it nice and secure and then i will go ahead and pull my other side down into the glue and also blow dry blow dry, that on the heat setting and once the other side is down. I will go ahead and take my melt belt. Tie my lace down for 10 minutes and let that sit before so i can um, you know, remove it and then cut off the extra lace and then type down. Whatever else is needed, add more foundation if needed, spray, my hairline and, of course, re-tie it down once again. So now that i have removed that melt belt, if you have that low hairline like me, then you already know this method is nothing new. So i went ahead and pulled down the hair in the center. That was not glued down because it does not match my hairline, and i just took some scissors sitting right down the middle and, of course, going in with my lace lighter begin to raise off all of that extra lace going around. You know around the front of the hairline and with a fresh razor fresh lace glider. It just makes the job so much easier, so it just glides right on across that lace and get everything off that you do not need and then once i repeat this on both sides, i will go in and tack down whatever else, maybe lifting on the edge Or razor it off depending on, if i need that hair to cover anything or not as far as like on my hairline, but if not, it will get cut off. Okay - and i will do this to both sides - add more foundation to my hairline if needed spray. It and then tie it down once again, you and now that all that is tacked down. I'M just going to take my sideburn area just raise her down shorter, so it don't seem like i, you know just to create, like some natural side burns without having to create actual baby hairs. I just wanted to shorten it down, so i could look. You know a little more natural on the side versus just having like a 20 inch sideburn, like i just think, that's so tacky, but to each his own. But now i'm taking that foundation brush and just tapping my hairline once again and then i will go in with that holding spray and i do like to use tresemme um. They have like level five, so the higher the level the stronger the whole. So i just go in with that level: five tresemme uh holding spray spray, my hairline tie it down again and once i remove that um that uh, what you call it that melt belt, then i go ahead and you know basically complete the install because i'm not Adding no baby hairs and i had to get the heck out the dough to make it to my makeup appointment on time. Okay, so yeah, i'm just gon na go ahead and tie that thing down and you guys will see the finishing look and then, when you see me again, i will be dressed up with my makeup done. In my you know, my um, my costume or whatever, that i had to wear for my photo shoot so just stay watching. You know for the final results and just to see my photo shoot pictures if you did not see them already. How they came out is foreign, and this is what it looked like: nice, clean and smooth application. Um, if you like me, i hate wearing my hair, just straight down my face like this, so i always end up pulling one side behind, but this is what it looks like after my makeup beat my makeup. Artist beat my face down to the guys y'all, and this was me getting ready. You know with my costume one, that i was doing my photo shoot, which is angie yeah, yeah, cute red lessons. That'S been giving with the chat black and, of course, last but not least, here are the results to my photo shoot pictures. I hope you guys enjoyed this video. I hope you guys love the outcome. Finished look as well as my photo shoot pictures. Thank you guys for watching. I will see you on the next video stay tuned details down below in description box.

Comments
Taneisha Campbell: New York City….. I was actually in the beginning process of sewing a wig BUT GURLLLL guess who’s about to attempt to make this wig with krazy glue. ♀️ ME that’s who You did your thing with this right here. #GameChanger
Crowned by Chrissyy: You did tf out of this wig and install!!
It’s just lexx: I’m making 2 tonight thank you for this !
IAMDRL LYN: thats so crazy because i just bought 6 bundles of 40" and a 22" transparent lace closure i needed this !
lneal2800: Always slaying the Thumbnail! I love bone straight unit! This Gorgeous!
ZRO Waist: I been sleeping on you girl you done woke me up im addicted to these styles i need to take a class
Britt Clay: Babyyyyy, I LOVE EVERYTHINGGGG ABT THIS VIDEO the hair, the wig making process & on down to the PHOTO SHOOT WAS SLAYEDDD !!! Like literally *chefs kiss*
Pretty Kimmy: Love this definitely gonna try this
Christine Zapata: Can the likes match the views for my good sis!!!!!!!! You slayed per usual looks flawless
Dear Promises: Now I’ve used hot glue but I definitely have to give crazy glue a try , Amazing work
Nikki Harrison: I’m so addicted to your glue… chile my clients install lasts them over a month with 6 layers #bombproducts You killed that photo shoot
kidablue: Great look!!!
carl mosley: your hair make up and always look beautiful
Rehenia Jones: Girl, Arrogant Tae ain’t got nothing on you!!!! You in a class by yourself with those Blessed Hands. You n the unit look gorgeous Sis!!!
MrsQueen LadyRed: You definitely slayed and also did the damn thing on your photoshoot as well
Janet Perkins: Beautiful!!!
Lauryn Weathersby: Babyyyy those lashes love the instal also
Princess R: Yessssss girl you look good!!
Jessica Andrews: So beautiful ❤️
Jenn J: Typically how long does the wig last being that you used glue…and is it washable? I can’t sew for anything but I can most definitely do this!
BlaqueBeauti2u Johnson: Yessssssss I’ve been waiting on this look.
Queen of Beau: You killed it
Caramel Crunches: Lovely
Shakita Brown: Hey sis loving your hair but!!!!sis you killed that photo shot❤️
smokeahontas everyday: Can you make a 5x5 or 6x6 closure wig like this too so I can see how you lay your tracks for the closure wig with the gorilla glue or crazy glue please you teach me so much just by making a video you just don't know God bless you sis
Nicole Nixon: So bomb, how long would the crazy glue typically last with this method, on a wig unit?
Queen of Beau: Its always something about those inches
Valerie Naylor: You look freaking gorgeous big period
Tasha Moore: Yesssss love it
𝒢𝓊𝒸𝒸𝒾: Do you prefer krazy glue over the gorilla brush on glue?
Hair Vendor in China: good job
MsKneshaC: U made TF out that wig. Come to Richmond, VA so I can book love your work❤️amazing
Vuitton Troi.: Lmaoo i use krazy glue to add bundles whenever my wigs thin out after a while works lik a charm
Kimberly Smith: Per usual another slay
Devin Zortman: I did this and sewed the tracks after
smokeahontas everyday: How long did the wig stay together
ربى محمد: فنانه مبدعه ❤❤
Cherry Johnson: “And with the one T pin I do have…”
Baby Girl: Freakin genuis
Valerie Naylor: Do you post your hairstyles on tiktok and your makeup tips because you should go viral cuz you know how to do makeup and hair good
Tracy Freeman:
modelchiic17: period !!!!!!! ❤️❤️❤️❤️❤️❤️
Shirley J: Idk what it is but I love your voice
deseraymiles87:
Queen of Beau:
stephine brown: ❤️❤️❤️❤️
christabella201: Ok...but does the crazy glue not make the wig/tracks crunchy/stiff tho? love this method but jus wondering. Been waiting for this sus..tyfs
Nikki Harrison: #crazydopeslayer
Kianna Edwards: ❤️❤️❤️❤️
Jade-Symone: Please come to Dallas in February
Truely Telly: Come to NY
Jessica Carter: Come to Charlotte NC
kidablue: CHARLOTTE NC
Tiaras channel: Tallahassee