*Must See* How To 100% Glue Less 99J Wig Install Ft Oq Hair
- Posted on 06 February, 2022
- HD Lace Wig
- By Anonymous
━━━━━━━━OQHAIR━━━━━━━━
Use Code “QUEENYT” Enjoy Extra 10% Off
Buy Now Pay Later With Quadpay
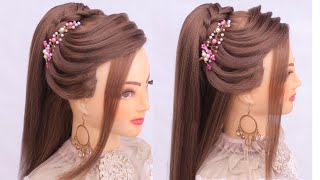
#oqhair deets: 99J Burgundy Straight Wig in 26inch 180density
Shop the same wig in the video ► https://bit.ly/3J6EzqV
new-in Color Wigs ► https://bit.ly/3rtlMQE
HOT SALE WIGS ► https://bit.ly/331y4q1
Easy Going Wig► https://bit.ly/3rsgxRo
#OQHAIR Official Store ► https://bit.ly/3HBh9JZ
Follow OQHAIR For More Discounts & Giveaways
Instagram: @oqhair_web ► https://www.instagram.com/oqhair_web/
FaceBook: @OQ HAIR ► https://www.facebook.com/oqhair
YouTube: @OQHAIR QUEENS ►
https://www.youtube.com/channel/UCWAFI...
TikTok: @oqhair ► https://www.tiktok.com/@oqhair
Pinterest: @OQHAIR ► https://www.pinterest.com/OQHAIRCollec...
Contact OQ Hair
Email: [email protected]
WhatsApp: +86 186 0399 8603
——————————————————————
♡KEEP UP WITH ME♡
IG: @Hypnoticlaadyy
TikTok: @Hypnoticlaadyy
Email: [email protected] ——————————————————————
Ladies welcome back to my channel, the company i will be working with today is original queen hair. Here, i'm showing you the lashes. They sent me a wig cap um. It also came with a brochure and it has tips and tricks on how to maintain your wig. A discount code and then all their social media website links um if you guys want to check them out online. This is the wig. This is their 13x4 lace wig in 26 inches. It did come with hd lace and i did go ahead off camera bleach. The knots and pluck it um here, i'm just showing you guys the lace is transparent or hd. Now i'm going to get in and show you guys that i'm going to make this a glueless install, we are going to start by cutting out our ear tabs on each side. This is what makes or break your frontal when doing the glueless wig install. So this has to be done correctly. Take your time once you part out your section, you want to cut that out and, as you guys can see, your ear should be showing you want to repeat that process. On the other side, like so part out your little ear section cut out that excess hair and then once that's done we're going to get our elastic band our needle and thread and get ready to sew this in and guys. Don'T worry, i'm going to show you guys how to do this in depth and in detail next, you want to take your needle and thread and then your elastic band of your choice. I did get this knit elastic band off of amazon, prime and it came in like two days. It came in a whole little roll and i'm using my needle and thread and my elastic now. You just want to pull out a strip like this, and here i'm going to show you guys where we're going to be placing the strip at once. We have cut our ear holes out, as you can see the top of the lace right there. That is where your lace is going to be, laying and i'm going to show you. This is where you want to place your band to sew it down. You want to make sure you don't put it in front of the hairline, because you don't want to be able to see the thread or the band through the lace. So, as you guys can see, i'm starting with some black thread just making me a little foundation. Knot and then once i get that through i'm going to pull my bands and we will start sewing in one side and then i'm going to show you guys the other side like so i'm going to take your elastic band and we're going to measure from ear To ear you want to put right where, in your hairline right at the beginning of your hairline, not in front of your hairline, because that's where your lace is going to be, and you just want to stretch that out to the tightness of your liking. And then we're going to match that up once you see how much you have you want to go ahead and cut that off with some scissors like so i go in and cut like. Maybe a half an inch off that, because i really wanted mine really really tight. Um, like i said you do the tightness to your liking, whatever makes comfortable um, don't do it too tight to where you will have a headache, because you won't want to keep the wig on long now, i'm starting at the end, and i'm just sewing this down And i did speed this up for the second video, because it took me forever trying to record this and actually show y'all with me sewing it. So here i'm showing you the best. I can i'm just taking my needle and thread and doing some little simple interlocking knots sewing the band into the lace and i'm just making sure i'm starting behind the hairline. So that way, you don't see the bands through the lace once you put it on, like you guys see, you can see my thread, but you can't see the band, but once we get through you guys are gon na see you're not going to be able to See that at all but yeah once everything is knotted and secured, you want to pull pull on in just a little bit, just make sure it's secure, and then you want to start the same process on the other side, as you guys can see, i'm just starting. My little foundation knot and then i'm going to place my band on top and then sew that in starting from one side working my way to the end of the lace where the ear tab is and like i said, i did speed this up. Just for the sake of the video um, it was really hard for me trying to record this and show you guys, but i tried the best i could with getting it in focus and in the camera. Um and my don't mind my voice y'all, i i am a little under the weather, but we're gon na make it do what it do. You know the show, don't stop a little cold ain't gon na do nothing but, as you guys can see, i'm just sewing that down i'm doing a little simple interlocking and then, when i once i get to the end, i'm going to double knot it and then We'Re going to cut that excess string off with my scissors, and this is what your band should look like. Now we are going to put the wig on and try it on to make sure everything's, nice and secure. If you like, the placement of everything, once you have tried, the wig on, you can go ahead and get ready to cut off your excess lace and lay everything down, and you could tell how tight it was. How, like the lace, was buckled when i pulled it up and it's not even um glued down, yet i really, i really wanted it tight. So, as you guys can see, i got it as flat as possible. You want to make sure everything's, nice and laid down and then i'm going to go in with my eyebrow razor and i'm going to go back in and focus on, so i can be in camera and you want to cut off that excess lace. Now you can see it's already giving scalp baby just wait, so i put the makeup on there and then we're going to really make it do what it do, but you guys see how i put the band behind my hairline, so you really couldn't tell that the Band was right there and if you have natural color hair, of course, this would be easier to do with this being a red unit or a 99 j unit. I just used the thread that i had. If you are really picky about that, you can go out to your local beauty, supply, store or sewing store and get red thread if you absolutely have to have red thread, but i don't care that much so yeah, i'm just repeating the same process. Switching in between my scissors or my cuticle, sorry, my cuticle scissors or my eyebrow razor - i just wanted to give it like a jagged edge um. You don't want to do a straight line, cutting your legs because it looks very detectable, so i'm just going cutting in crisscross just to make it try to look unrealistic or jagged so that way, um once everything is laid, it does look as realistic as possible. Once that's done, we're going to go in with some makeup and put that on top once my lace is cut. I'M gon na go in with my la pro girl concealer in the color medium beige, and i'm just gon na put that on the excess of my lace with my elf blending eyeshadow brush um. I don't really know what brush this is. I just know it's just some type of blending brush but, as you guys can see as soon as i put the concealer on top, it is blending effortlessly. It'S giving exactly what i needed to give scalp. So i'm going to do that on the other side. Like so um, if the lace is coming up or flipping up, don't worry about it. That just means i'm pulling a little too tight, but once we get pull out the baby hairs and lay everything down, you won't have to worry about that anymore, but uh. Once you get to this step, we're almost halfway done um. All we have to do is pull out our baby hairs um, i am doing a bust down middle part, so i'm going to take my nutrients wax stick and i'm going to put that on the top. Just to you know, smooth everything out and then i'm going to go in with my hot comb. You want to use your hot comb on your hottest setting or your blow dryer, whichever one sorry use your blow dryer um - and this is my songbird dryer - that i got off of amazon and it did come with a comb. Um. Don'T pay attention to my comb. Bristles, i know they all up and throwing up gang signs and don't worry about it, but um. You want to just blow dry this out and i got this method from um, arrogant, tay. I just like to blow out the hair first, get it nice and flat before actually going in with a hot comb on top just so when i do hit it with the hot comb, it ends up being super super flat and that's what we want. So you guys can see how much of a difference it made with the blow dryer for me doing one side and not blow drying the other. So i'm going to repeat the process on the other side and then once i like the flatness of that, i'm going to go over that with the blow, not the blow. Dryer. Sorry, the hot comb just to get it extra flat and then we're going to pull out our baby hairs and get ready to lay those down like so next, i'm going in with my hot comb and we're just going to press everything out to make it all. Nice and flat um, i did go in and pull my baby hairs out with my rat tail comb. I just pulled out a thin layer and i'm going to go in and separate the two um, the hairline and my baby hairs, and i'm just going to comb everything back with the hot comb to make sure everything's, nice and flat um. Once that's done, you want to go ahead and lay your baby hairs down with some nairobi setting spray and wrap that down with a head scarf and well. Actually, i'm not even going to use a head scarf this time, y'all um! Once i get everything nice and flat to my liking, i'm going to go in with my elf concealer, and this is one shade lighter than me, because this is going to go down my part, i'm going to take a precision uh, i guess a precision concealer brush And i'm just going to run that down my part and blend that out um. You always want to go in with a concealer. That'S a little bit lighter than your shade or right above your shade. So that way it blends, because your scalp is not darker than you know your face or anything it's usually lighter. So you get the idea. Next, i'm going to go in with my composi straightener. I got that off of amazon and i'm going to curl my baby hairs. I don't know what i was doing um i usually try to curl them up, but for some reason i think i have watched erika tay's little frontal ponytail and i see that he was curling hairs down. So i was trying to do that and it wasn't really working for me. So i just you know stuck to what i know and curled him right back up because baby hoof in a hoof in a play, not not me so um. You know curl them up. If you can't curl them down, you know do what do do what works best for you honey, because that was a little struggle for me now, i'm gon na go in with my nairobi setting foam and my got to be glued in the yellow bottle gel to Lay down my baby hairs, um, i'm not doing nothing super crazy. I usually use my eyebrow spoolie and i was using like an actual edge control brush this time so yeah. I was just being real risque this time with this hairstyle. But with this being a you know completely gluelish unit, i guess you know we can make it do what it do. It ain't no harm um. Once i camera focus um, you guys can see that i just try to make it look real natural and soft, like some little soft fluffy, looking baby hairs, um and i'm going to repeat that on one side until i get to the other like so, and then Once that's done, um we are going to press everything out and then that will be the finished look. So, okay, after everything is laid. This is what the lace is. Looking like, it's giving very much scalp. I like it for this to be, you know completely glueless and with no adhesive spray or anything. Next, i'm going to take my silk pressing comb and i got that from my local beauty supply store and i'm also going to take my nano, titanium, baby babyliss pro straightener and we are just going to go right in and press out this hair um. I use a straightener, like maybe two or three times running it through with the silk pressing comb, and it gets it bones straight. How i need it to um, make sure y'all hit the back of that wig. I hate when i see bone straight hair and be looking laid and slayed all in the front, and then you turn around in that back, be looking real crunchy. You know real wobbly, real, real um, what you call it when you got a crooked spine uh damn. I can't think about what it's called right now, but that's what i'm talking about! That'S what y'all always be giving me. Sometimes, when you be having a damn crooked spine in the back we'd be looking freaking as hell in the back. Um straighten that out, but yeah um run your straightener, like i said two three times until you get it nice and flat. We'Re going for bone straight, butts down middle part, baby don't play so once you get it bone straight um that will be the completed. Look y'all, i'm in love with this hair, i say: 10 out of 10 and lastly, i'm going to go in with my la pro girl powder - and this is one shade lighter than my skin tone, just to go over the lace one more time to give it That scalp look because this is a completely glueless unit and i must say for it to be completely glueless. I think it's very much given scalp and for for the ladies who's trying to say this cap this this ain't completely glueless. I just wanted to slow mo run by my comb. You guys see i'm running my comb up under my lace, all the way through baby get into it 100 glueless. We just use the elastic band and we laid and slayed that thing like so honey don't play, and i just want to show you guys on all the way down on each side. It is completely glueless 100 glueless. You can take this off at night when you get ready and slap it right back on your head in the morning, like nothing ever happened like. I think i'm going to install all my wigs like this now, because why not you get to save your edges? You ain't got to worry about gluing, nothing down and it still looks like scalp y'all see that comb gliding baby, you see it, you see it completely glueless and we ain't got no ball cap up under there. Tell me, that's, not scalp did the job. The job is done baby, we did it, but, as you guys can see, 100 glueless glueless now get into the hair. Again this is their 99j. This is original queen. This is uh original queen hair. This is their 99j lace front um. This is their 13x4. In the color 99j, it did come in brazilian straight or bone straight and 180 density, and it is in 26 inches getting to it getting to it. Look at that luster look at that shine. Look at that body and i didn't put anything but just a little heat, protectant spray in this hair and, like i said, i ran my straightener through it with my silk press and comb, and it's definitely given what it's supposed to give. So if you guys like this video, please give it a thumbs up, don't forget to like comment and subscribe. Tell me what you guys think about this video. Let me know what you guys think about the hair, the company. Would you recommend, when you gon na, go by, let me know, but don't forget, to hit the like comment and subscribe? Don'T forget to hit that bell y'all, so y'all get a post notifications for when i upload my next video. But i hope you guys enjoyed this and i'll see you guys later bye.

Comments
Asia Anea: I love your videos ! I learned how to install my wigs because of you & im only getting better at it now
THE BARBIE: I just did this method on my unit and I love it. I find it to be way more manageable with less mess!❣️ Per usual you slayed this tutorial miss lady.
Vickie Vell: Love it! Looks so pretty
Jackie Davis: FLAWLESS MELT That beautiful Vibrate Color goes really well with your skintone !!
KISS HAIR: Love the color, it's so beautiful!
OQHAIR QUEENS: A great wig tutorial, ma'am, thanks for your share
Beautiful Mom's: Your contact is really cool , and your personality is off the chain. keep up the good work. I love watching your videos!!
Litty Kitty: Bomb I just ordered a 30 inch water wave and used the new bald cap method you recommended with the panty hose instead of the old cap method but now I want this wig
NEANEY SHEPARD: Always amazing!! I learn something every time #FLAWLESS BADDIE
Taylor Brown: I love your content it has really helped me with my wig installs! Could you do a video with the dyson blow dryer/curler?
G Fearless: And another one……always slaying!
Theresa Butler: It's definitely giving luv❣️
Jewels dynasty: Girlllllllll yasssss my bday coming up on the 21st I'm most definitely purchasing a wig thanks susss
Miracle Burns: Yesss baby girl! This is bomb
Alexandria U: I would pay someone to do this for me
Raynesher Rp: You are giving me effe twin
Dee Luther: Another Good Video Lovely thumbnail tho Your Beyond Beautiful you are Makeup always on Point Cute Ass eyelashes tho GoodmorninG Happy Sunday Too Have a MarvelouS Productive Week ahead Stay Bless n Be Safe Always
Kemo Bennett: Your so talented my dearest....
OverThinker: Girl you said hoes wigs be looking like scoliosis Personally I don’t like when the wig is so far down on the forehead it look like a hoodie stay safe gorgeous!!!
tamasha williams: Beautiful honey love it❤❤
I AM PRETTY: What’s the name of this music playing in the background??❤️
Marilyn Monroe: ❤️
Sheron Newhouse: LMAO , "Straighten that shit out"! I'm Dead!
Kids Naydie: Can you make a video of your top 10 wigs
Antsii: New fav method
Bobby Goines: Hypnotic vlogs are lit and dopehypnotized by your eyes sunshine
Angie: Crooked back of the head as$, u funny