Updated Headband Wig Tutorial | Sew Method Start To Finish
- Posted on 16 February, 2021
- Headband Wig
- By Anonymous
#headband wig #headband wig tutorial #updated tutorial #sew method start to finish
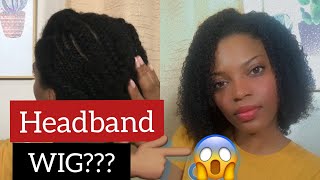
Today's video is an UPDATED HEADBAND WIG tutorial | SEW METHOD start to finish. The first previous one was with the glue method now this is an updated headband wig tutorial with the sew method. Hope you enjoy and this helps.
ITEMS USED
Dummy head: https://amzn.to/3ceYTY5
wig cap: https://amzn.to/3plssw5
scissors: https://amzn.to/2RLs9Mt
Dome wig cap: https://amzn.to/3qrlneK spanded
Metallic marker: https://amzn.to/2ZovPrv
headband: https://amzn.to/32PcG4C
velcro: https://amzn.to/2RIHxt1
Needle and pins (optional): https://amzn.to/32N9JRR
Thread: https://amzn.to/3u5UEqn
Best SEO/Tag Tool: https://www.tubebuddy.com/Omoyeeromosele
FILMING EQUIPMENT
camera: https://amzn.to/3ceZQj7 (main camera)
Lenses: https://amzn.to/2RKaF3m (kit lense)
https://amzn.to/2RHrcET (blurry background)
Audio: https://amzn.to/33E1uqo
Tripod: https://amzn.to/3cdMovS
LET'S WORK TOGETHER: [email protected]
**KEEP IN TOUCH WITH ME**
Instagram: http://www.instagram.com/omoye_eromose...
Snapchat: http://www.snapchat.com/add/omoye_erom...
Facebook: http://www.facebook.com/theomoyeeromos...
Music by LEx Lidia - Diamond Girl - https://thmatc.co/?l=A00F1B13
DISCLAIMER: Links included in this description might be affiliate links. If you purchase a product or service with the links that I provide I may receive a small commission. There is no additional charge to you! Thanks for your support.
**If you are reading up to this point, remember to be the change you want to see in the world and you are loved. Catch you in my next one or chat with me on my socials.
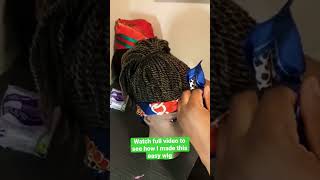
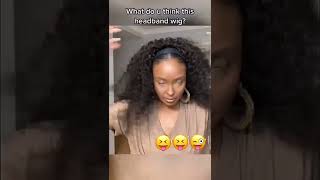
It'S not going anywhere, i'm kidding ba, like this is getting about my head, yellow, beaks, oh legs, hi guys welcome! Welcome back to my channel! So since you guys liked the previous video i did on how to make a headband wig, i decided to do an updated video with the sewing method, instead of gluing down like what i did in the previous video. So if this sounds like something you're interested in, don't forget to give this video a thumbs up subscribe, you i know you're going to like it. I know if you have any questions, do not hesitate to ask, i'm always ready to answer them. If anything, i'm always too ready to answer them. So just keep on watching and you'll see everything i did and the final results. So the first thing you're going to need is your dummy header, and this is the choice of wig cap i'm using today. That is because we're using this cap, i would have to cut off some excess pieces, which i honestly don't want to do, and i had this cap lying around. I feel like this particular type of cup just makes it easier. That is not to say that you cannot use this type. You can use this step, as you said in the previous video. I used something similar to this, like the don't cut, but the mesh of it. But i would say if you are using this kind of cap, a dome cap either like a thick spandex cap or the mesh type, you should use a metallic sharpie, something like a marker. You could use tailored chalk or just something lighter to make the lines to mark your tracks for sewing your weft down. Next, i have the headband. I got this from dollar store. It comes in a pack of three and it was um 1.25 cents, canadian dollars, but i don't i don't know if i can link how, where i got it from the dollar store. So i'm going to leave a link from amazon in the description and then, of course, you're going to have to have your wefts. My mom brought cut it from me back home from nigeria from the beauty supply store. So i don't get it from any hair company for anyone, that's wondering it's, not human hair and it's 100 synthetic either it's kind of like remy hair and it's in 24 inches. What i like is that the texture is kind of similar to when your natural hair will blown out or relaxed so 4c. Is it 4c? The way we'll see here is when it's blown out. It'S not exactly kinky straight, but it's close. So i kind of like that. I also have my pair of scissors you're, always in the fell scissors. Please don't try our fitnesses, then, of course, since i'm using the same method, i have my tread and needles and velcro for the headband part like you're fastening, so make sure it's secure. I honestly wish this was a bit bigger or this is what i could find at home some clips. This is very optional. You can decide to add clips a lot. I don't think i'm going to be adding in this tutorial, but of course you guys would know when i'm done right now, i'm just going to show you how i attach the velcro to the headband, then i'm going to start saying the wig. So i'm going to be using the black headband just because everything i'm working with is black. I feel like it's better to use the same color when you're working with for the headbands same i'm going to rip it open and then attach the velcro i'm trying to make this as neat as possible, like i don't just want to see it apart, but at The same time, i'm just going to be following the same line that, like it, was sewn on just to try and make it as easy as possible. Now we have like a headband, that's great we're going somewhere and i'm just going to go ahead to attach the velcro rubber comes in two parts, this part, and this part, so why he puts it together. Like this honestly, i feel like you can use any other thing. It doesn't have to be velcro, so videos where people have used bra straps as the headband plastic. You just need a system that super simple one hooks and one closes for fastening, so you can use any other fastening system that can be applicable to this. Just improvise be creative. That'S the point: that's the point of not buying it and making it yourself, because you want to save money and you want to improvise and be creative. I can't believe hoping that you like me too, now that i'm done with sewing it down, and this is what it looks like i'm just going to go ahead to the other part of the headband and sew the other part of the velcro down. Then i'm going to start making the wig if you're confused about how to sew this down, to use a running stitch, you could use like a loop stitch like it's the same way that you would sew down your bundles and i have other videos i'm going to Link to this video, where i showed you how to sew down bundles for the for the other part of the velcro, i'm going to start sewing it from the very end, just because i already sewed this part away from the end like the way belt. Yes, like the way belt, a belt has different holes to adjust the different sizes. That'S the point of making this part longer and because i saw this part of the velcro on this side on this inside i'm going to have to suit the other side of the vehicle, the opposite direction. Just so you can overlap. This is how it's here here. I'M going to have to fold this over and sew the other part of the velcro. Here you want to be careful so, like you, don't make it too tight, but sometimes not too. Yes, hoping that's what i got ta do to get you on. I can't believe hoping that you like me too, hoping that you is me too bad with the finest the hottest cool cat she just pipe it down so exciting sex machine. I swear was robotic. I like it when she speak, but let's stop by the talking like red fool: imma get this party rocking classic yeah. You know what i mean before the end of this song: lingerie all the way. If you really wanna, i think hoping that you like me too. I'M done with the week, it took me about three hours to finish the whole thing, and that was because i was playing music. I was busting, some non-existent moves, i'm saying this because you do need to take your time and just get it right. The first time just take your time and do it you can get very boring like doing it over and over just you know chill. So this is what it looks like now. So this is what it looks like when it's on my head. I do not put clips in this just cause, i feel like with the elastic it's already secure enough and then the type of cap i used. I already had those elastic extra elastic straps at the back to secure it. I saw the last track very close to the headband, but not on the headband. I know that maybe a bit difficult to see because both of them are black, the tread is black. So there's no contrast. I'M just going to do my makeup and then i'll put this on and show you what it looks like what the finished look is like. This is what it looks like and i'm not hiding myself. Oh, i'm really loving it and i really like the fact that it's vlogs i keep touching touching my head anytime. I have a new piece of heads and we can't do anything. I just i'm always touching my head. What do you do if you don't have front hair? If you don't have edges - and i honestly don't really have edges, i just made: do it's what's the little that is left if you're like me, or what's that me and you actually have no edges left, you could just wear, it could drag it just like drag It all the way back, like you, don't need to do baby hair with your headband wig. You could drag it all the way back, so it's somewhere here! Oh that is scarf. I suck at time scars well, i hope, you're better than me, whichever that you're comfortable with you can see how firm this thing is, it's not going anywhere, which is why i prefer using this particular cup giddy ba like this is getting about my head yeah and That is it. It was super easy to do and trust me. You can't do it. If i can do it, you can't do it just take your time. Please subscribe. Thank you. Don'T forget to give this video a thumbs up. Let me know if you have any questions at all relating to this in the comment section, let me know what you think of this video. If it was helpful, if you are going to try it out and be sure to tag me, if you do try it out turn on your notification, icon bell thing: is there please turn it on so you'll be aware whenever a new video is up for me, If you watched my previous video of this - oh my god, this is a lot of things and if just just let's chat, please, let's, like i love talking with you guys, i i genuinely do i enjoy chatting with you guys so yeah i'll see you right next To bye,

Comments
GERALDINE NDOKWU: Wow! It looks so gorgeous and easy....might give it a try
GERALDINE NDOKWU: Beautiful ❤️
NZUBE: I love your videos, and how excited you usually are while talking to us. E show say e dey sweet your belle. Thanks for this video Omoye. Hope you are enjoying Canada, love from Lag, Nigeria
Sharon Oraa: Finally
Olajumoke Odofin: you look good mehn. Lets manifest rich men
GERALDINE NDOKWU: 3hrs.....wow! Heheheeee