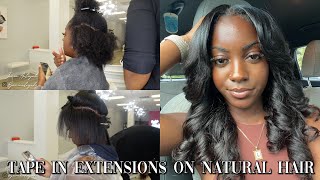
Headband Wig Install And Styling - #Amazonhair#Tutorial#Protectivestyling#Headbandwig#Naturalhair
- Posted on 10 August, 2021
- Headband Wig
- By Anonymous
Sharing a headband wig tutorial. Got this from amazon and love it! Shoutout to my sister Ama for the video idea! Try this and let me know in the comments what you think about this headband wig.
Socials:
Instagram - @kukieeee
Facebook - https://www.facebook.com/benedicta.for...
Hair from amazon - https://www.amazon.com/dp/B08TH7JR1H
Pearl braid out glaze - https://www.sallybeauty.com/hair-care/...-
Got to be glued gel - https://www.target.com/p/got2b-glued-s...-
Related content
Hair:
Braid out - https://www.youtube.com/watch?v=UCp9xC...
Wash and Go - https://www.youtube.com/watch?v=6dyOLR...
Perm rod set - https://www.youtube.com/watch?v=GeNg-z...
Pre-poo - https://www.youtube.com/watch?v=m7ZvbN...
DIY deep conditioning - https://www.youtube.com/watch?v=TqWWbl...
Hair growth secrets - https://www.youtube.com/watch?v=XqAFSZ...
Faith/Inspiration
Singleness and waiting - https://www.youtube.com/watch?v=NNWA2L...
Talking to Dad - https://www.youtube.com/watch?v=jFBzk4...
Divine stops - https://www.youtube.com/watch?v=nZHpZu...
Music
Morning Light by Martha Mier - https://www.youtube.com/watch?v=aQjDWN...
Verse of encouragement
Isaiah 60:1
Arise, shine; for your light has come, And the glory of the LORD has risen upon you
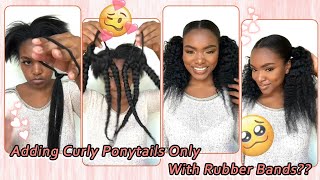
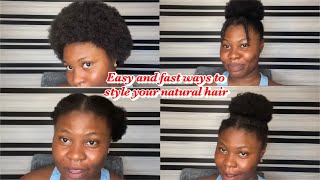
Hello, wait you're on your way. I thought you said: 5. 30., oh nia, my hair didn't turn out the way i wanted. I don't know what to do. Oh lordy, what are we gon na do? What are we gon na do? I was trying to do a twist out. I did it yesterday, but if you have natural hair or some sort of curly hair, this situation is all too familiar. Hi. Everyone welcome back to my channel today we're a little bit theatric, but that's because i am here to show you how to turn a crisis situation like what you just saw intervictory. Sometimes your hairstyles, don't unless you want them to, especially if you have curly kinky hair, you can do all the prep you want. You can use all of our products, but - and today i am here to help you figure something out, we'll be showing you a very simple hair tutorial, using headband wigs from amazon upon removing the unit. I noticed that it was brownish and had some red streaks in there, so i decided to dye it in the color black using this revlon color: silk permanent dye, so i went ahead and mixed them together. It'S a really simple two-step process. So i'm going to go ahead and do that and remember to wear your gloves. If you decide to do the dyeing yourself at home, just be careful, i put a rubber in the sink so that it doesn't stain it so i'll go ahead and allow it to dry the spoon out after drying it. I dried it in a regular dryer and then i used a blow dryer and i really like the definition. I may have to condition it a little bit and also get rid of some of the ends once i install it, but i definitely prefer this color. I think it matches much better with my natural hair color versus the other color, which wasn't too bad. But i could see some red streaks in there and which is why i had to dye it just to make sure that it turned out a little bit closer to my natural hair color. I didn't prep the hair at this point. If you're in a hurry, i need to get out of the door, i will put some water on it, even if you're not either way. I'M using this pearl braid up glaze that i used in my wash and go video with helen and i'm just gon na add a layer of that color everything down. I do not have a wig cap, but if you do have a wig cap, this is a good point to just put the wig cap in there. I went ahead and used some cut to be glued to define the front of the hair and i'm going to allow it to dry for about 10 minutes. Let'S go ahead and install this unit. It came out with a little bit of brown. Unfortunately, i'm not sure how that happened, but it has these combs, four of them all together, and you want to just go ahead and just throw it on. It'S really that simple and those combs will allow you to secure it really well in there. This unit is definitely one of those that is convenient if you need to get out of the door in 5, 10. 15 minutes. However, you need to and just go ahead and yeah, i really like it. I think it matches really well with my hair. So now let's go ahead and style yay. This is definitely my favorite part of every video, the styling, i'm gon na use this mesh. Looking um band that i picked up from nordstrom rack, but i think h m had a similar one at the beginning of the summer. I'M not sure if they have it anymore, but that's pretty much it there. You go number two. I'M gon na use this very flowery looking. It is definitely very embellished and i'm gon na try and fit that on top. I would say that previous headband, i would use it for something more formal, like work or like a play or dinner. This one, i would take it out for maybe brunch or something a little bit more playful. I think it's always so important to match your accessories and for this look i wanted to fluff all the hair a bit, so i'm going to go ahead and use the comb and go in there. That'S it if you want to um, just adjust the hair a little bit go ahead and do that and i'm just going to show you guys how i did that you just need some pins go in there great and for a third look. I'M using this card that i picked up from the thrift store. The thrift store is definitely your best bet for unique headpieces. If you're in ghana, i got some really nice scarves from my collar around the cocoa board area, so check that place out. It'S on the floor 161c. That'S your joint right there! If you want some very unique pieces, i'm just going to make a knot at the top of the hair and i'm just going to try and secure it. It almost looks like a pre-made headband, but i like the fact that if you use a scarf from the thrift store or something it's also going to give a different look to this particular styling process. So yeah try different things. Um. You can pick up a ready-made bands or you can pick up a scarf from the thrift store anywhere that you get your scarves, and that also creates another look and i am pretty sure, you're gon na, like it. I had some trouble with it, but for the next look i decided to try something that i sort of thought about, which is braiding together some hair pieces. If you have some braiding hair pieces that you are not using go ahead and make a three strand twist out of those and then you can use it as a hair accessory, i think it's really fun to kind of play around with these things and for a Headband wig, like this, the possibilities are endless. So now i'm just gon na go ahead and use it as if it's actually a headband isn't that cool. I think it's absolutely cool, so i ended up pinning it all across the hair. I can still see a part of the band showing which wasn't really part of the plan, but hey. Let'S just keep this moving, but just remember to make sure that the band which is attached to the hair piece is not showing. But if you went ahead and did this, it should look something like this and just now try and create more volume around it. Just to conceal that part of the headband. I really decided to switch this up a little bit because i didn't use a headband and change the earrings and i got these from sheen by the way yay look number four. This was also really fun. So all right, look number four is all done all right. Let'S move on to the next one, what is a tutorial without some african print, so i decided to create two different looks with this african print. I love african print headbands because of the color the pattern i mean it's just so lively and just tie one option, and at this point i don't think i should say anything. You can just see what i'm about to do, but the second option would be trying to do like trying to pull all of the hair up so right. That'S all i'm gon na say and that's pretty much. It two different looks using this head wrap, which is an african print. If you like this video comment down below, let me know exactly what you enjoyed about it if you're going to try this particular unit. Please tag me on your socials. If you do take pictures, i would love to see exactly how you're rocking this unit and also the different styles that you come up with that'd, be so fun. Thank you so much for watching i'll be back with another tutorial. I will leave all the information pertaining to where i got the unit from on amazon and all the other products that i use down in the description box and thank you so much for watching comment subscribe. If you haven't already, i will see you soon. I love jesus
Comments
Vera Andoh: Love love it! Definitely going to try this!
Chinwe: my favorite is the colorful headband and the braided one :)
Adwoa Lotty: