How To Make A Human Hair Wig!! Tutorial/ Drag Transformation Xx
- Posted on 14 June, 2020
- Lace Front Wig
- By Anonymous
AGAIN, I APOLOGISE FOR THE AUDIO AT TIMES DURING THE VIDEO XX
PRODUCTS USED
BUNDLES:
613 blonde, 30,30,32,34 inches
https://a.aliexpress.com/_BUwj4Y
FRONTAL:
613 blonde 20 inches
https://a.aliexpress.com/_BSFCEY
DOME CAP:
https://www.amazon.co.uk/dp/B07T488VKN...
NEEDLES AND T PINS:
https://www.amazon.co.uk/dp/B07H9V4VGH...
BEIGE THREAD:
https://www.amazon.co.uk/dp/B06XKNZ1PT...
DYE BOWLS AND BRUSHES:
https://www.amazon.co.uk/dp/B07QXCBGW6...
HAIR DYE:
Ion Light ash brown and very light ash blonde permanent hair colour
Ion 6% 20vol developer
https://www.sallybeauty.co.uk/brands/i...
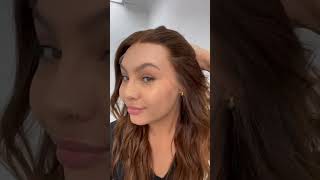
Hi, let me just start this video off by saying a couple of things: um, if you do not support black lives matter, if you are not willing to use your voice to stand up and support black lives matter, then please, unsubscribe to this channel. We are going through crazy times at the moment um, and this is our time now to use our voices whatever the size of the platform we are on. We need to speak out and make a change for the better. Yes, welcome back hi if you're new hello, i want to say thank you to all the subscribers and people that have viewed my videos over the past couple months. It'S been crazy. Views have gone up, subscribers have gone up so welcome new people hi. Today'S video is going to be another wig tutorial. I posted a wig tutorial a couple videos back on how to curl long synthetic wigs. It went down quite well and i've seen a few of you have followed the tutorial and your results were amazing. That'S lovely! To see so, i'm going to do a tutorial with human hair and show you how i make a wig human hair. Wigs are super duper expensive for the good ones, you're paying crazy amounts of money. For so i'm going to teach you how to do that. For a fraction of the price, my mom is facetiming me just hang on a second i'll call. You back i'm now going to show you what you need for this video by the way. Sorry about the hat i genuinely woke up hours ago and haven't done a single thing to my physical appearance apart from put a hat on, it is what it is. The first thing you'll need is hair. I have four bundles of 613 hair. This is from face beauty, blonde hair. On aliexpress. I will link where i got this hair down below in the description box. Two 30 inch bundles one 32 inch bundle and one 34 inch bundle. So far, it's great it's nice and silky, it's lovely and long. One thing i will say which can be forgiven as you can see, they go quite thin towards the bottoms and i got really long hair just because i think there's a chance i'll end up cutting a little bit of the length off just to keep the thickness Going through - and i also have this - which is called a lace frontal - some of you may know what it is, if you don't, it is a panel of lace with hair knotted into it to create a hairline, it's 613 hair, which is the basic standard blonde hair. This is 20 inches and has transparent lace. I like transparent lace purely because you have more control over what color you tint it depending on your skin tone. You also need a canvas, wig block. You can get it from amazon and i like to wrap mine in cling film and tape them together. Just so it's cleaner, so it's easier to clean them and if you have a damp wig and you want to put the wig on this wig block, it doesn't make the canvas go down and weird and smelly cool. You need a spandex dome cap um, which is what we will be making the wig on it's from amazon from beauty, supply stores, they're pretty easy to get just type in spandex stone cap, and this is what you'll get next thing is some thread. I actually have blonde thread that i'm going to use for this, but i cannot find it for the life of me make sure it's quite thick thread as well, not flimsy, and you will need some curved needles, as you can see, and some t-pins as well. Amazon is a great vessel to get things like this. That'S basically what you'll need for making the wig. What i'm also going to do is customize the wig and color it and see how that goes. This is more of an experiment for me, so if it works out, you will get to see it if it doesn't. Maybe you'll probably get to see it anyway and notice, where i went wrong. Little dye hair dye bowls with a selection of brushes these, so cheap off amazon, again um they're, not a high end at all i'll link it all down below okay. Another thing is purple shampoo, silver shampoo. This is the provoke one which is pretty standard in the uk. Last but not least, the hair dyes. Now i have been doing a bit of research and figured that a box dye from boots is probably not the best way to go. If i want better results, so i went onto the sally's website and had a look to see what that was, and i ended up with the brand ion. The six percent 20 volt cream developer have three dies: light ash brown. I'Ve got two of those and very light ash blonde. Okay. So that's what that is what i've got, trying to figure out, why i ordered two light: ash browns and one very light ash blonde, we'll make it work. Those are the sort of essential things i'm going to be using for this wig transformation, slash tutorial, experiment: okay, let's get started with the first step. Okay, so i thought i would do a voiceover for this part just because at the time i wasn't really sure what i was doing so to prevent me from talking up my ass completely. I thought i'd just. Do it like this, so i am getting the bundles ready, cutting the elastic off and then unraveling them. I'M making sure i'm brushing my fingers through the hair just because it can get so um tangled so to prevent that. I'M just doing that and then i'm folding, the bundles in half and then folding them in half again and then folding them in half again then, to secure that in place, i'm going to take some hair pins and just poke them through the top of the wefts And then twist, the top of the hairpin just to kind of secure it all in place, i'm going to do it like three hairpins on each bundle. Just like this look at that, i should be a hand model for industrial gloves, lovely right, i'm taking a bucket of water and filling it up with warm water and then taking my purple shampoo and squeezing it in to the water and mixing it in with my Hands, i'm not measuring anything because i'm just sort of experimenting and then what i'm doing is taking the frontal first and just dunking it in and out of the water just to see how long and how fast the purple shampoo would take to the hair. And it took pretty much straight away, so you literally don't need to spend any more than like 20 seconds on each piece of hair. I found that the purple shampoo took to the ends of the hair, a lot quicker, because i imagine that because the hair was thinner, it just worked out like that. So i'm concentrating the purple shampoo on the roots of the bundles, as you can see, and then, as it shampoo, i am just rinsing them out with some cold water, just like this hi, it's the next day, purely because i couldn't find my beige thread. So i got some more. Obviously you can use black thread, it's just better to have a color, that's closer to the hair that you're working with. So as you can see what i've done is. I have washed the hair in this purple shampoo. So it's more of a like a platinum color, as opposed to that sort of brassy, yellow blonde, like more of sort of a blank canvas. Take your spandex dome cap and put it over the wig block and take your t pins. Just secure the back of the dome cap and to the head now, what you want to do is take your frontal over the wig block and position them in place. So i've positioned the frontal over the wig cap and the hairline is just falling about a centimeter. In front of where the wig cap is and just going to clip it in front, so it's out of the way make sure the back of the frontal, if that makes sense, is flat against the wig cap. I'M putting the thread through the needle and halving it and then tying a knot at the end. So take your needle and thread it underneath and through the end of the frontal just thread your needle through the end of the thread, just where the knot is just so, it's nice and secure, then you're going to do is you're going to go underneath and through And as the needle comes through, take your thread, wrap it around twice and simply just pull the thread and needle through like that. Now you can sort of see where i've stitched across now that the frontal is now stitched on what i'm going to do now is. Do the wefts so to create a guideline on the wig cap, i'm literally taking a piece of thread lining up against the wig cap and getting a white eyeliner pencil and just drawing the lines like a thumb width apart from each other. Just so, i can like be assured that my wefts are going to be sewn on straight, so what you're going to do now is you're going to take your weft size it up along the bottom of the wig cap and then just cut it okay, when you're Starting off sewing on your first weft you're, going to put the needle through the actual weft, like so and then you're going to thread through the wig cap and then just like you did with the frontal you're gon na thread, the needle through just before the knot Thread the needle through where the knot is, and so you have the weft secured and then what you're gon na do is just t, pin the other end of the weft down and start sewing and when you're sewing don't go through the actual, don't go through the Weft, like you did the first time because you want to protect the bundles underneath and over wrapping it around twice and pulling the thread. Okay. So obviously i worked my way up sewing all the tracks in and i've now finished the wig, i'm just showing you the inside of the construction of the wig. I obviously cut off the excess wig cap and, as i worked my way up the wig cap, the tracks, i started to sew them straighter and shorter, just to reduce the bulk of the wig. Now, what i'm doing is turning the wig inside out and getting the hair out of the way and just spraying a couple of layers of got to be glued hairspray onto the lace just to protect the lace from the die. So i'm starting off by sectioning off the front of the wig, and i want to leave this hair out because i'm going to dye the very light ash blonde color. But what i'm doing now is mixing the light ash brown. So it's two parts developer, one part die and i'm starting at the very back of the wig and going to just saturate the roots, i'm going every two tracks and just going section by section working my way up to the top. So i had a bit of a change of heart once i'd finished the route section and i'm just taking that light ash brown color and dragging it further down to create more of an ombre effect rather than a definite root. So now i'm taking that front section that i left out originally and completely saturating that, in the very light ash blonde, color and sort of twisting it to keep it out the way, then i'm covering the rest of the hair that i've left out with the very Light ash blonde and sort of blending in where the dark meets the light with my fingers. So it's not a definite line and i'm just showing you that i've fully saturated the hair. Like i said, i am not a professional hairdresser, so i'm sort of hoping for the best here and i do apologize if i'm offending any professional colorists, i'm going to show you the finished wig. I see you just as much as you see this wig lace. Okay, a lot happened since i turned the camera off after that dye job. The only thing that's changed is the fact that i have now just washed it and dried it and put a bit of a curl into it. So here she is on a wig block. As you can see, the colors worked out quite well disclaimer hi. So i'm really sorry about this. Basically, my audio was all over the place towards the end of this video. I don't quite know what was going on with my microphone, but i will sort it out for the next video i promise i'm just going to be running in and out of voice overs, just to sort of give you the rundown on what i was doing with The wig and showing you at the same time, don't worry, i'm super annoyed about it too. So please forgive me so. Basically, i blow-dried the wig straight after washing out all the dye and then i curled it with my straightener slightly and just pinned it into place. So that when i let the hair down it'll, just sort of have a nice wave to it, oh she's wiggless right, i'm just explaining to you that i sewed in a elastic strap to the back of the wig. Just so, when i put it on my head, it just feels a lot tighter and more secure. There you go. I made a wig, take these clips out of the wig. As you can see, i've cut the lace um pretty close to the hairline. I'Ve left about half a centimeter of lace, um, just the longevity of the wig, because, let's face it, i think you all know i'm a man in a wig. Okay, so pretty sure you all recognize this yellow canister. It is the got to be glued hairspray. I'M just pinning my hair back off my face and then lining up the wig with my actual hairline, i'm peeling the lace back. So i can then take the hairspray and sort of just spray, a light layer on the circumference of my hairline and then once i've done that i'm then going to take my hair dryer on the cool setting and just dry kind of dry it until it goes. Tacky and just tap it just so, you know how tacky it's going to be, and then just repeat that for a second layer and then take the lace and lay it down on the hairline make sure the lace is all flat holding the lace. With my finger and then just blast it again with the cool give it a brush because you're not a messy, i feel like i'm living my um sort of craft 90s. Oh god that sounds so cliche. Okay. That is the finished. Look, i'm so happy with how this hair turned out, and i hope you are too give it a thumbs up if you liked it, and let me know what you think down below in the comment section: i'd love you to subscribe. If you haven't already um and if you want to be notified, whenever i upload a new video hit the notification button i'll link all the products i use down below in the description box, also cool and follow me on instagram as well, please i have two instagrams Because i sometimes look like this - and i sometimes well don't look like this. My everyday instagram is alex pinder a-l-e-x-p-i-n-d-e-r and then my drag instagram is luna. Bundy, l-u-n-a-b-u-n-d-y, yeah i'll see you in the next one. Alright,


Comments
Julie M: You're so talented, i love the final result of the wig you did a very good job <3
shay g: i absolutely adore you thank you for speaking out about the black lives matter movement much respect
sunsetseasonsims: Thank you for speaking out, it means a lot to me as a mixed baby knowing that you care about us. Much love ❤️
luis: girl how is he gorgeous in and out of drag . also I am learning a lot about hair and drag makeup from you so thank you for that. imma look fabulous after quarantine
Susan Summers: Love the hair. It really suits you. Is there no end to your skills? Would love to see the make up tutorial for this look as it really compliments the wig. Again you look sensational...... wish I had your capabilities
Aastik: Wow i love the final results , and the color of this wig turned out to be pretty well.
H M: Sophisticated rasps ! beautifully done ,you look gorgeous.
Chamilla Foxx: Loved the video, I make my own wigs as well. If I may I suggest sewing on the frontal last so you can replace it without having to take the whole thing apart. I start by Traci g where the frontal will go and then do the lines in the back like you did. Love your channel!
Superb Media Content Creator: You are an amazing talent... the wig looks amazing and you do too...
Adam Ashman: The wig is beautiful wow
BMediaHQ: A good tip to protect the lace from dye is using vaseline :)
ItsTejYo: The one drag queen that looks so fucking incredible that makes me feel like I could give drag a try lmaoo
Maya Sondhi: thats a really pretty colour for a wig!!
Otavio C: OMG, YOU'RE SO TALENTED, BRILLIANT, PERFECT
charlie Remi: New subscriber here thanks for sharing your energy is welcoming well done you did a good job your hair and makeup look beautiful,please can you do a tutorial on how u did your eyebrows
Hannah Ponting: This wig is MAJOR!!! Amazing ! I love it DING DONG!!!!!!
Paul Rodgers: I love this! Beautiful work! how much was the hair and lace frontal?
Eduardo Dadourian: This is great. I really learn a lot from this channel.Loving my sexy new teacher. Kisses from Buenos Aires.
Ron Gomes: You are a extremely talented creative man very impressive and knowledgeable
DONALD SAUNDERS: You worked that wig.
Nikolas - W - B -: Amazing
Jasmine Wadsworth: Beautiful wig and u r beautiful ❤️❤️
Adriannd: Every other youtuber: "hi guys welcome back to my channel' Alex :*pops his shoulder then looks at you*
BTS KIM V OPPA: U look lovely omg
Lorenzo Ciciro: You're literally Lourdes Leon in that first wig
luis: quick question will you do a online drag show or a performance atleast?
Lewis Easter: Insaaaaane!
roberto castillo: Hermoso Te amo Saludos desde chile
LEXXXA TRANS MTY: Stunning
Duncan Leighton: LOVELY HUMAN ❤️
Jennifer Jao: Beautiful ...lovely
K ZM: Hope you’re sleeping well! x
skull music: Good work
rextrek: subscribed - Love anything Drag Related! Do you watch Jaymes Mansfield? He does amazing things / styles with WIGS
Alexander Diaz: Can I stAck another wig exactly like that one on top ?
Rossinoo: the beginning is my entire mood for quarantine
Fared Sharudden: I just love you. That’s it. Done. And also, #BLM
Denilson Alcudia:
Keenan-lee Strauss: Not even mad at the platinum blonde color
Xavier Ames: Better than pro.
BINOY SAIKIA: Nice
August BarbieDoll: Ouuu you got a nice tan
Adam Ashman: I think I’m in love with you
Ty jones: Not you serving looks ⭐️⭐️
Malik Arshad joiya 786: Nice
Bundy:
machiel: Nice
Madam Bubli: Whooooo love you so much my sweet heard
Aissa Nougba: you have such nice shoulders
LouisClarkeClare: Wizard
Carlo Miclat: Ow it's passed 2 days before I saw it