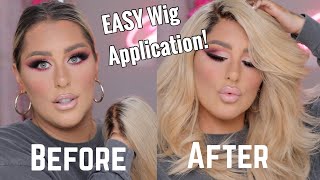
How To Style A Wig: Finger Waves Tutorial | Drag Queen Wig
- Posted on 16 May, 2019
- Lace Front Wig
- By Anonymous
instagram.com/shopwillbeauty
Hey dolls, welcome back to my channel. My name is: will I'm the owner of shop well beauty, I'm a web designer and stylist, and I sell my Styles and lace fronts online at Shopville, beauty, calm, I've had a lot of questions on how I style my signature. Finger wave style, so I thought I'd show you guys how I do the entire process start to finish. Using synthetic ways from the shop will beauty, so let's just jump right into it. Let me show you what you're gon na need. You'Re gon na need a wig head. I have extend, you can have a wig clamp, anything to secure your wake head down one and one eighth inch rollers. You can buy them on Amazon from the company Dyanne 3 inch pearl head pins, you're. Also gon na need a synthetic wig. This wig is a 26 inch. The style name is Evelyn at shop, well, beauty, calm and the color is ash blonde. This is my favorite color that we offer so here I have my wig head on my wig stand. I'M gon na take my wig. This is all very basic, so we're gon na put the Evelyn style right on her. We'Re gon na want to make sure she's, nice and centered. Some people use smaller pins. For this you don't have to use the purl head pins, but I just like to have only one pin to keep myself organized, so I just use the same thing for everything and then, of course, you're gon na want to pin some in the back. So I just part her wherever I want and you can go on the other side and for the other way or you can do a metal part with this technique. Those have to adjust your roller set accordingly and when she looks good, we're ready to start pinning in the rollers, so with this hair, we're rolling it in this direction going this way. So it's literally going in the direction that you want the hair to fall, and then the rollers on this section want to fall to the left and then every other roller falls away from the biggest. When I take my sections, I make them about the length and the width of one of my rollers, so I placed the hair down on the hairline like so, and then I take my brush and I go right along the edge of the roller and pull up And then, in terms of the length of the section I look at the roller here, I can have a bit more, so I'm going to take this a little bit of section right here. I pull all the way in the other direction. I got my ends and nice and tamed. I can't be tamed Miley what's good and then we roll her nice and neatly there. Next we're gon na take two pins one for the front one for the back and she is nice and secured in there. So we're gon na repeat that again, just one space over so again we're getting a section of the length and the width of the roller pulling it as far back as we can in the other direction. Wrapping our ends around the roller and neatly rolling it all. In and pinning her in to please so I'm going to speed this up and do this entire section section number one you so now we're going to do the other side of the part, so we're going to take the same exact size, section and roll it in The opposite direction that we just did so the hair will roll this direction. So now we need to take the same rollers in the same size sections and have the hair fall away from the face. So every single roller that we're about to do goes in the same direction. I'M going to take two sections at the uppermost part of the head. So here we have now these two sections, one two rolling away from the face. So now, I'm literally just going to do the same thing in the same direction with the same size, sections on the rest of the head you so here we have two rows now, I'm just stopping to show you reference. This was the first row of the back that we did, and this is the second and all of the hair again is rolling away from the face. These rollers will line up with some of the first ones. You did so see how this roller, here from the front of the wig flows right into these and then flows back into the other side. Okay, so now all of the hair is up in these rollers. It'S all nice and neat for the most part. So, with synthetic hair I recommend using steam. Steam is amazing for synthetic hair. It allows you to heat up the hair super hot. So then it can cool down and reset into the new pattern that it's in, so that what you're gon na want to do that either get a handheld steamer, a big steam or whatever you can and then you're going to. You can do this. However, you want you're gon na have to jerry-rig it. It'S gon na be kind of a mess, but this is just how you do it. I just use one trash bag grover over the wig. I have my steamer up and going I'm gon na. Do this off camera, but I'm just going to show you how I do it you're gon na take your steamer wrap this around and close it tight and then you're going to sit here for like five minutes. I know that Lake was ash blonde. This is an orange ginger color and I have the same exact roller pattern. Same exact thing. The only difference is the hair color. This has already been steamed. It was steamed like a day or two ago, so she's ready to be styled after you've seen the wigs that you really have to let them cool down and dry so for teasing. You'Re really gon na want to make sure you have some super high hold hairspray. So I always have two different styles. I have a spritz hairspray, which is non aerosol and I just pump it up for that and then for aerosol. I use got to be, or I use any other high fold aerosol hairspray. Next, we're going to take our teasing brush and we are going to let down the rollers each row at a time. So here's this bottom row and you see how bouncy this curl is. So what you're gon na do is brush out the section and then I kind of have a little technique here. So you're gon na take the section from underneath you're going to go from the top with your teasing brush all the way down and then you're gon na just kind of make it big and fluffy by teasing it lightly throughout not too much do the same thing Again, with the other section just make it nice and fluffy, and then what you're gon na do is pull both sections get rid of any weird little knots that just look like they're, not in the right place and then you're gon na take your teasing brush and Go about half way or wherever you see like the most hair gathered and push it all the way down. After that's done. Take your hairspray, I'm just gon na use the spritz from pump it up, get her nice and sprayed on both sides and leave her be so we're gon na take the next row, which is three rollers, so pretty much as you go up, you're gon na start Gathering more and more hair in each row - and this is why we made all of our rollers super neat and in line with each other lightly. Tease the section do that for each one, then what I do is I'll take two sections at a time: tease them together really gathering it at that root and then take another section into it. So this section is good: we're gon na spritz, her and move on. So now that we've done those first, three like lines of hair, we're gon na kind of gather this together lightly to kind of neaten ourselves up before we move on taking your teasing brush just lightly place your hand on top of the head to secure it down And brush starting from the roots all the way to the bottom and we're good to move on. So we're going to move on to this next row, leave these three rollers that we're going to deal with them. Last now we're going to take out the rest of these rollers, except for these three, so we're going to do this row and then this back one in the middle tease those out and then I'll show you what to do next. So when I'm doing this, much brushing I like to have one of these kind of fluffier lighter, teasing brushes, but the regular old rat tail plastic. One is good. This one's really nice. I think I got it on Amazon. So the reason I like this better is because it doesn't brush as much of the hair up as the other one, it's a little better, at smoothing without removing so much of volume. So now that we have this here, nice and T's, we want to brush it out to get rid of the frizziness, but we want to be able to maintain that curl pattern and volume at the same time. So I just like to kind of start with the front on one side: remember, I'm brushing all the way to the ends of the hair. I'M not going bam, bam, bam, bam, bam and now all the way down doll. So now we can really start working on those finger waves. So what we're going to do is use our hands to hold the curls in place. So we're gon na start here and you can kind of see the curl is already defined and when you look at the front meanwhile make sure both of the front sides look fairly meet you'll see that the roller ends here. The wave just ends right there. So you can follow that and just go with that and really hold it nice and tight. I have a really tight between my thumb and my pointer finger and then we're just gon na. Do that all the way around so now, you're gon na want a bunch of a duckbill clips they're about two or three inches and they're this size. You don't want the little size you want the duckbill clips. You can buy them in large quantities online. So what I'm going to do this wave right here BAM we're gon na take that clip and secure her in place and we're going to do that all the way around the way. You can honestly leave this because we're going to go back and play with this section a little later, we're really just focus on the back right now move on to that next wave. So pretty much at this point you can decide if you want to leave these curls of bouncy and free or if you want to maybe do another wave or two of the finger waves. I'M going to do one more I like to leave a little bit of fluffiness. At the end, it makes it easier to maintain and easier to ship, but, let's add one more just so you guys can see. So now we have these nice finger waves all set in place, I'm just going to take a little bit of hairspray and now we're just going to deal with the front. So we're going to start with this little section, I notice I kind of lost some of the volume it's kind of moved down the hair to here. I need to just pull that and you really just kind of need to listen to the hair, sometimes like, especially in the front I kind of got ta let the waves dictate themselves. Sometimes I mean you can always kind of fudge with it, but getting super nit picky like isn't helping anyone and cut, pin this in place, and all of these waves are going to line up with these clips. This is going to be pretty much the same. The only reason why I didn't do this with everything else is because this section is like the most important to getting that signature. Finger, wave, look and almost needs to rest on top of everything else and by making it its own teased piece. It makes upkeep and maintenance and refreshing it much easier, so we're gon na take all of these out. First take about a third of the roller along the front. This is a little different, so it's like this, and this is just gon na help kind of reduce any roller marks cuz. As you see here, there's a space between each roller, and we don't want that. So I just kind of tease this section a little bit to kind of get rid of that and then we're good to move on. So now it'll be a look a little messy, but it's okay, because we're hiding and we're doing some illusions over here. So we're going to take the first section and now we've got these three sections and now we're going to tease them all together. I always just brush it out a little bit to get everything kind of on the same page. So we've got this and now we're gon na tease it from every direction. A lot pretty much want to tease it until she stands up on her own when she stands up on her own teaser, more so teaser even more. We want this a gorgeous big finger. Wave, this is like the first thing people see on the wig, so we do that just a dusting of hairspray. We can switch to our other brush and finish up this doll. So I always start with the front and then I go underneath behind and then I really just start brushing this top section now I just kind of am guiding the hair like up and around so we can get this here and then you know we're just really. It'S hard to explain, but you need to kind of just brush the hair in a way that you can guide these finger waves to fall, how you want them to, and you have a lot of options. You can pull the hair forward and cover an eye for a very sultry look. I kind of cheat it back a little bit, so it's not so in-your-face and usually have it fall there, and it just helps with the hairline of the wig and things it really gorgeous. So now we're ready for some clips for this first wave you're pretty much done the brushing and teasing and all of that so kind of take a clip to reinforce that front. Little scoop on both sides of the part now you're going to want to take your hairspray, both of them and douse literally in these hair sprays. First I going with the spritz. Then I go in with the aerosol like a lot. This is some drag hair and we want her to stay and you're gon na want to take a hair, dryer and use heat to set that hairspray in place like some goddamn cement. As you do, this use your hands to set any flyaways and you can like really kind of lay any flyaways down. So it's perfectly smooth and beautiful, and the heat helps you kind of guide those flyaways to lay down all right. So now that we have everything set and in place, you can remove the duckbill clips. If you want, if you're going right to the gig, take I'm out, I always recommend taking the clips out after you get to the gig put them back in and then transport them and join for three wigs into a bag. It'S not gon na help them. Last long term, but as you can see, we used a lot of these clips so having those in handy is good and yeah. All the things are lining up. They look gorgeous and I am going to take out these clips and kind of show you a final look and a before and after and we'll wrap right up. Okay. So this is our final look. She is stunning she's beauty. She was gracious. Miss United States she's an extract superstar she's here to show you how it's done and I'm obsessed this is the look that kind of I made my brand off of. I just had a bunch of looks just like this and a ton of different colors and they kept selling and selling and selling, and now I'm a full-time wig designer and I'm selling wigs to everyone like all over the world. It'S really amazing. So I'm really grateful that you guys have been giving me that business and that attention and that support. So I want to give something back to you guys, so you can take my wigs. All of my wigs are made to be styled. They are built with layering. They aren't just a long strands of hair plopped onto a wig cap, they're, high quality, synthetic wigs, 180 percent density, unique hair lines and yeah having that layering built into the wig style helps you so much with a finger wave. If all of the hair is super long, one length it's hard for the hair to hold these curls when you have layering it kind of reduces the weight, so it doesn't pull down on itself. So that's all I'm gon na say about that. My wigs also are meant to just be teased out from out of the back and I'd love to show you guys the video on how to tease out my different styles for a gorgeous over-the-top drag. Look, so that's it for this video, you guys. I hope you really liked it and I hope it was useful if you have any questions, make sure to comment below. You can always message me on Instagram. It'S at shop will beauty and if you started doing this and you're like girl, this isn't for me. Let me tell you something: I'm a wig designer and I sell wigs. I sell lace, friends that are unstyled that I have designed myself and I sells custom styles. So if you want to order a finger wave wig, you can go right to my website shop. Well, beauty, calm, click on custom styles and pick your favorite wig and it'll be on your doorstep, usually within a month. So if you have any questions again comment below message, man, Instagram at shop will beauty. I do giveaways and sales and super amazing offers for my customers and you'll find all of that on my Instagram all right doll. Thank you so much for watching make sure to click that subscribe button and the notification bell. So you can see more wig videos as soon as they come out. Toodles
Comments
D I V A Kingsley: I like this video, because you’re very descriptive...not everyone on YouTube actually takes the time to tell the viewers the reason WHY you did something regarding techniques, longevity, etc.. Thanks and keep up the good work.
SUBMERGED VISIONS: Genius with the pearl ended pins. What a pro who knows how to explain his techniques to non-pros.
Samuel's Mashups: Love your honesty and explanations! Crystal clear, thanks for this tutorial!
Anastasia •: Thank you so much! I just started to learn wig styling techniques, so your video really helpful ♥️
Taylor-Morgan Rose: This was sooo educational. I hope you go far in this industry. You do the work and have the passion and it shows!
Duncan Gelder: This was the best tutorial for putting the rollers in place! I always go to start my wigs and get SO confused about where to put the rollers!
Brigette Bitch: Omf this is beautiful- it looks just like the one that Blair st Clair wore on all stars x
Mike Salas: This is amazing!! Thank you!! This instruction was perfect!
tfibby14: Love how you motivate and encourage everyone
Luzia Moba: Hi, I make wigs but I'm new to making drag queen wigs. So thanks for the video. I'm making the wigs for my clients ♥️♥️♥️
Hugh Ryan: This is an awesome tutorial - thank you!
Bree Quinn: LOVED THIS! It seems so hard to find tutorials like this. Thank you.
The Wilma Fingerdoo Review: I have been looking for a tutorial just like this for EVER! Thanks. Seriously! xox
Eddie Rivera: I am so excited to get this! Can’t wait! You’re so talented luv!
Paige Bell: I had to subscribe after watching! You speak very well on camera and the quality of your videos are plus the talent !!! Love everything about your content
Tishara Doby: “Once she stand up on her own... tease her more!”
Vikingtje._: Make more wig tutorials I love it !!
Rowan Lee: You are the first person to actually say what size of rollers you use! I've watched so many drag wig tutorials for a vintage side part finger wave/marcel style and no one ever mentions the rollers size! Sizer Matters!
Dyane Caputo Arenas: I love that style very much, wow!!! ❤️❤️❤️
E Allen: Very detailed. Thanks. Very well done!!!
Tishara Doby: I’m scared I’m going to mess it up when I “tease” it
Nom R: i love how you explain everything ❤️❤️
Alex Makhoul: Thanks so much for this, really insightful
Jaro London CZ: I love this video thanks for tutorial
nice ralph: It looks amazing......you are so creative!
Scarlet Jackalope: So I actually bought one of your wigs forever ago, and I was a little too ambitious about the color of it, thinking it was dark enough. Is there anyway we can recolor the wigs to a darker color?
TrinityArray Starr: TY So much !!! I just got my bulk order of duck bill hairpins and Pearl handled pins from Amazon today. I'm so excited to start this look on my wig's thank you once again much love and respect! ~T~
Enrique: This was so we'll explained. Thank you.
Cryptic Lilac: I’m so Glad I found this video!!! Finally know how it’s done lollll. So much work though! Will the style last a long time?
Craig Calame: Please don’t take this negatively.I love your work. I have learned a lot from you. However, I am not a queen, I’m a clown. Designing the wig is basically the same. The main differences is you have higher quality wigs. Again, I can now improve my wigs when I clown, Thank you
Britanny O’Brien: I love this video and I’m grateful for his clarity!! But I’m pretty sure these are considered Hollywood waves & not fingerwaves.. not positive but just saying... also I wonder how well it will work on human hair
Kelly Karamelo: Beatiful job Queen ️❤️
Sarah Money: This is Incredible. Thank you
Marianna Rosales: New subscriber! This is exactly what i needed!
Mell Flowers: Thank you, this is a very good video!
Rebecca Hardwick: Beautiful!
Quainterri Shockley: Beautiful job done
Chanel555 Addict: Hey love can you make a tutorial on how to do an updo or a pony tail on a synthetic wig
Inan Palisoc: very good tutorial!
A&O W.: GREAT VIDEO THANKS FOR THE TIPS.IS THIS WIG REAL HAIR ? OR CAN YOU DO THIS ON A SYNTHETIC ?
Nizzy Mac: oohhh yass hunny right on time i just got those rollers! great video!
Vanté M: Perfect video for beginners
Kawaii Franchesca: Wow, you're AMAZING!
Hugh Ryan: How exactly do you "tame the ends"? My rollers aren't anywhere near as neat as yours and as I roll the hair it starts coming loose, even though I'm maintaining tension :(
RainbowUnicorn Poo: What wig stand do you use? Mine are all plastic and they melt with the steam. I need an all metal one
Margot Hime: Hi ! Does someone has a good link for rollers ? I only find the "spaghetti" roller form on amazon
Tishara Doby: Best tutorial!!!
ImANGIEnation *: I don't know what happened but I had my lovely wig I followed every step but when I used the dryer at the end the wig became almost straight omg
levzahav9: What's the advantage of synthetic over real hair?
Melish Hamilton: You bout to have the queens come get a wig done
Kelsie Parker: can you do this on a human hair wig?
Begwenly: I'm literally losing my shit because this wig has a widows peek and ice been looking for a widows peek wig forever
Luis Villadiego: amazing - will you style one for me?
Utilisateur Introuvable: Is it all of your wig synthetics or natural human hair ? I need to know ❤
Hair Jewels: Hi is it better to use a synthetic wig??? I'm watching your video and trying to do this wig a human unit and I don't want to tangle the hair
Benji Adeyemo: Ammmazing!
Kawaii Franchesca: You just got a new subbie ❣
Anahera Edwards: Are these real human hair wigs or synthetic?
Tishara Doby: Giving me Jessica Rabbit
Nizzy Mac: "like some gotdamn cement" LOL! okkuurttt!!
Jasmin W.: tik tok bought me here and I am so glad
Jaylin Hogan: What type of curls did he use???
Soraya kueen: Yes