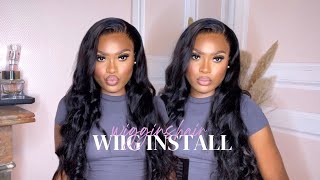
Diy Side Part Closure Sew In | Wiggins Hair
- Posted on 25 July, 2019
- T Part Wig
- By Anonymous
www.kasiamaebeauty.com Business email: [email protected] IG: https://www.instagram.com/hairbykasia/... Twitter: https://twitter.com/KasiaMae_Beauty
Lace tint: https://shopbeyani.myshopify.com/produ...
❤#wigginshair in the video ➤ http://bit.ly/2IoVlFp
Hair details: #loosedeepwave 18 20 22 with 20 inches #6*6closure
Input code "KasiaMae" to get $ 6 OFF
❤Hot sale #straighthair 3 bundles with #13*4lacefrontal ➤ http://bit.ly/2XUj8Cp
❤The new #bodywave 3 bundles with 6*6 lace closure ➤ http://bit.ly/2XVk5ua
❤Top selling #6*6laceclosurewigs ➤ http://bit.ly/2XW8ZVC
❤Hot sale loose deep wave #13*6lacefrontalwigs ➤ http://bit.ly/2XW92AM
Wiggins Loose Deep wave Promotion ➤ http://bit.ly/2XUi80Z
Don`t miss our big #wigsale: http://bit.ly/2RBxTWK
♛ Wiggins Hair Official Website ➤ http://bit.ly/2XW8TgI
Get $$$ off on wigginshair.com ➤ http://bit.ly/2XVjVD4
►Summer Crazy Promotion in 2019
UP TO 46% OFF
Code: SUMMER,Input Can Save $6
Over $199, Get $8 Coupon (Code:WG199)
Over $399, Give A Free 8 Inches Bob Wig
Follow @wigginshair on instagram: https://goo.gl/AhdsXo
Facebook @wigginshair : https://goo.gl/GqrSQt
E-mail: [email protected] (Provide Wholesale)
WhatsApp: 0086 17703997280
So being using Wiggins hair, I'm gon na leave everything about this here in the description bar below. As far as the curl pattern and the length of this hair and the dimensions of the closure, because also, I will add it somewhere down here in this video. So I hope y'all enjoy this tutorial. Let'S get started okay yeah, so we gon na jump right in with this closure. This is a six by six closure. It'S not a four by four, so it's much much bigger than the average closure. They also sent me three bundles 22, 24 and 26 inch bundles. This is loose wave, hair, y'all ready now, like I said before. I believe everything in the description bar below but imma get started with braiding. My hair super super fast. No, I'm just gon na be doing some Queen Latifah braids, okay, because you just need them braids to go straight back. You need to look like you're fresh out of jail. That'S the little block work! So after you do that, you know you gon na wanna clinch your lips tight. I don't know why I was making this face anyway. We'Re going to be using some God to be glue, spray or gel, either way, just smooth do hair back and make sure your baby here are going backwards and not for because you don't want to catch those up into the glue. So you just gon na slip them back, then we're gon na be using this skin tone cap. This isn't my skin tone, but it is someone's skin tone. It is a little bit too dark for me, but we're gon na be using some got to be glue. Sprayed so stick that down to my head, I realized when I got to this part hey, I need to cut a hole with my ears cuz. It'S not gon na stick on the side. So after I do this, I'm gon na go ahead and cut a little hole on the side to me sure that the cap adheres by my ear so make sure you do that before I'm also going to be putting on this netting cap. I know a lot of people like to use the hard ones, but it's just easier for me to do the saltines on myself, so yeah, I'm just gon na be sewing that on and then I'm gon na be cutting off the remainder of both of those caps. Before the netting cap, I'm making sure to leave the space for where my closure Ruby, so that it's not netting under my closure and I'm gon na be using a little bit of my makeup to kind of try to lighten up this cap, which didn't really go. As planned, but anyway, I'm gon na be using some 91 % alcohol to wipe away that extra makeup and I'm going to be pinching the closure and putting it on my head to kind of see where it'll sit and I'm gon na make a snip. By my ear and I'm going to cut off the little side, part as you can see right here, just so, it can fit smoothly on my ear so that well by my ear, so that I can put my hair behind my ear. I'M also gon na be taking this elastic band and measuring it so that my closure can fit snugly on my head. I'M not doing it tight, I'm just doing it so that the closure will be able to sit without moving. I didn't do anything I just parted. It just trying to see like how it's gon na look on my head and now I'm going to go ahead and start plugging it. So I'm just using some loose to get away. You can use a spray bottle of water or whatever some type of wet products, to make to make it easier to pluck so I'm gon na start with the smaller side. Basically, this way like most of my baby here and my sideburns is gon na, be so I'm gon na part out a thin section and then begin to pluck behind that. So I'm just plucking pluck and pluck in I plucked a lot because I wanted to give a super super natural look. I wanted it to look like it was coming from and I'm actually don't have super super fool energy, so it only made sense to thin those edges out really really good, so yeah. It'S really no method to this of the important and plucking and making sure not to plug too much in one area. That makes sense so right now, I'm playing around with the baby here, trying to see kind of how the baby here would lay on my head. Just to make sure I don't need to pluck any more so I am gon na kinda like play around with them and see how I want them to be and make sure that I'm come. I'M done with the plucking assess and I'm gon na blow charming place to kind of mold them down, but I'm actually gon na end up combing them out. Once I put it on my head cuz, I have to cut off the lace. I didn't end up cutting off a little small piece of the side on this side. That'S gon na be by the weeds. If that makes it so I put inside the sock that I originally cut off, but I'm just cutting it up until the elastic bands. So I'm just gon na be putting it on putting it in place and seeing how it looks and then I'm going to be combing it out and then I'm going to apply my glue. So right now I'm trying to see where to place the glue egg so that I can make sure that I don't go past the laces that make sense. I don't know why I didn't put it on here, but this is Trina. The Dreamweavers glue I'm going to be putting our four coats of this glue one coat. The first coat is basically to really adhere the cap down and then the other three are on my skin, mostly so those are going to be the layers that are actually for the lace itself to stick down, but make sure that you are letting the glue dry Clear and tacky before you apply your next layer of glue. Okay, so now I'm pulling the closure over the glue making sure to line up the glue and the hair so that there isn't any so there isn't too much lace in the glue. I don't know how, if I'm making that make sense, but just to make sure that the glue and the hair line is lining up. So I'm gon na come back the baby here in the edges a little bit so that I can cut the lace off, but mostly I'm like sticking. Oh actually, I'm like that's not what I'm about to do. I'M about to pull down the edges. I'M sticking it down with the teeth of the comb and I'm pulling down the edges, because I'm about to put some black scrap strips on my hair to kind of hold down the lace. If that makes sense, it's kind of like molding in the glue before you cut off the lace, to give like a really strong hold on the glue. I hope that's making sense, but anyway I feel sit for like 10 minutes, go ahead and then proceed to cut off the lace. You'Re gon na get a better hold. If you do this step, so please don't skip out on that step. I know it might seem like it's unnecessary, but it's really not so at this point I'm cutting off my legs, I'm doing very, very small snips kind of like it's not really a zigzag, but it's like a just a jagged cut, because it's like super small slips. So then, I'm going to be pulling down those baby here and continuing to kind of stick to making sure I stick the glue down. Oh and I'm gon na cut my baby here, I'm doing like then natural-looking baby hair for um closure. I don't know I just wanted to look super super super natural, so um, I'm gon na be just molding my baby hands to place. I am using some lot of body mousse. I do not, and I recommend you use a lot of body moves. Don'T do it. It has alcohol in it, don't use a alcohol-free moves because you are going to encounter issues using this loose, so use Nairobi, phone or something or some type of alcohol-free mousse. But anyway, I'm going to start slowing down my closure. So I did use some wax wrap, wrap strips to tie down the front part and I'm going to be sewing down the closure. So I started in the middle and I'm going down one side and then I'm gon na go down the other side um. It'S really not much to it once you tie it down top since you glued the front and you tied it down with wrap strips. The closure, isn't really gon na move. Also, I'm going to be sewing the front part of my closure down, so I'm making small stitches. So it's like a big stitch. That'S underneath the closure, but the part that you can see. It'S really really small. I hope that makes sense. I really do so yeah after I do that I'm gon na do the other side, and this side is not sewing all the way. It'S basically song to my ear, because I mean there is no hair there so on so I just sewed it as far as I could get it basically. So for the track part, I am doubling my width, so this is me store my tools together and going. I'M going to be started in the back of my head, so I'm just sewing. I think I'm so over handy. I don't know, I'm just sewing these chefs say yeah. It'S really no method to how I did this. Considering that I can't see the back of my head, so I'm just feeling for it, so I pretty much just did it and hope for the best I did as best as I could. Luckily, it came out not being lumpy or bumpy, but I basically was sewing that first track underneath my braids, my back braids yeah. That'S that's really about it. I also made sure to sew in a smile, so keep that in mind. So I'm just gon na fast forward it at this point, I'm sewing in the tracks are cursed all off, so I'm flipping over my track. I am not cutting them, I'm flipping them over and I think I'm gon na go ahead and slow down so that you can see me flipping my track over okay, so right here I have slowed it down so you're gon na see I make a knot and Then I fold the tracks, the opposite direction, making sure that they're flat then I'm going to go on top of the track and go around needle twice and then I'm gon na keep sewing and I'm sure I just did it. You know I don't know it. Just comes out flat, so if you want it to be flat, do it like how I did yeah? I was so geeked up about my closure, but basically I am done with the install I'm just going to be using my hot comb to make sure that I get it flat as possible. This is the key if you don't have a hot comb, whether you really have I'm just saying: okay, so I'm just showing y'all out of different places. You can part your closure out since it's a six by six, you have endless possibilities of where you could party. Okay, maybe not a list, but you have a really big part of space so anyway, after that, I'm going to be spraying it with some water and I'm going to brush it out and diffuse it and that's pretty much it for the styling of this hair. What lace tip that I use this lace tip? I will link this in the description bar below this is not sponsored. I just like this lace to well, it's possible, not them at least so, and the curl pattern is here is so perfect. It'S not curly, but it's not like body way either. I don't know, but it's so pretty my hair. This feel a little with how it came out and more proud of myself that I actually set up here. Dude is freaking, so in cuz I want the gluteus right then, but um just to let y'all know I didn't end up using the full three bundles. I had most of my last bundle. I literally only used one piece of my last bundle, but it is still super full. You can try to fit as many bundles and shoes need, but honestly fist, the closure covered so much of my head. I hope he hit so since the closure covers so much of my head. I couldn't even fit in her bundles. If I wanted to yes, I came out so good and I'm gon na take some pictures outside and try to do some pictures and videos outside. So the child can see it in the natural lighting and I hope y'all enjoyed this tutorial. I told you, I often have heavy hitters coming free office. I got the things home because these videos - that's beep, bleep, all the all the newest Rhian hairstyles and how to do them and new stuff just pick up here. Oh I see yeah


Comments
TheeMillennial Diva: "it's not my skin tone but it's somebody's skin tone" sent me but your hair came out bomb!!!
taylor johnise: i've never seen this method like how you sewed that front part of the closure down as well as gluing the very front. i like that and it makes it seem way more secure!
Shanyce: You make it look SO easy!
Rocky Rocky: This was hands down the best video with the best results!!! What did you do with the lace tint? I need more videos like this! I like the band and the net as well!!!
Mrs.Sickhumor Tv!: That hair is beautiful definitely got to check this company out. Great job as always ❤️
Amani Styles: This is beautiful plucking is so hard for me
NightBlossom: This is sooo good! Can you please show how you care for your hair while in a sew in?
Tony Balony: This looks so good! And you seem so sweet :) Good job hunny!
Alexis Young: This is the best one I’ve seen someone do on their own head. Wow.
Eboni Daniels: I love this I wonder if I can try and make a wig like this
Desiree Williams: You did amazing!! Inspiration!!
Unarine Dagada: “I knew that it would come out good, but it just exceeded my expectations” , love your energy! SUBSCRIBED
Money Meaux: I liked and subscribed based on the voice over. And the results are amazing as well
WaydaMinJade: I’m a beginner and want to learn more. Can you do a detailed video of of how did your elastic band and bleaching the knots ? I’ve never did a sew in before
ChiChi: hi! it looks so good on you and i would like to try it. i wanted to know how long did the closure stay bonded unitil it started to lift?
Asia -Lorren: I love watching your videos! Came out BOMB I love love love that hair gotta get me some shoooot
Shamia: Huntayyy i saw them mayven sew deals but i just live learning myself!!!!!!!THANKU SOOO MUCH FOR TAKING UR TIME TO TEACH US!!!!
BrwnSugr: Wow it came out so good, will definitely have to try this method and also I LOVE Wiggins hair
Queen Universe Beauty: I watched this Just 100 times now and she still my favorite
Kierra Malone: Your hair looks amazing.
Latoya L.: I love it!!! I’m definitely here to stay! ❤️
Brittney Porter: Could you also use your glue-less method for the side part or do you have to use glue when doing a side part?
Glam Gvddess: This is CUUUTTE!! I thought you misspelled frontal cause i definitely thought it was one.
Latrice Finch: I love it!!❤️
Brena Long: Sis you did tf out of that hair
v porshe: So pretty u do such great work
NaTaya Cooper: Beautiful ❤️
Truth Be told: You did a great job
Queen.: Simply beautiful
Queen Universe Beauty: This video over 100 times and she still my favorite
CupcakeLove: Do you think this same style can be achieved with a 5x5 closure? Can *2* parts fit on a 5x5 closure?
Luxxury: im never this early ❤️ idk why you don’t have more subscribers, you do the best hair.
Ashley Owens: I love it❤
Effortlessly Dupree: That looks really good
SaQuana James: I love this sooo much
EbonyW: Sis you did that!
Mz Chocolitt: Ok them fresh outta jails....Great job I love how it came out
Leslie Adams: One word STUNNING!!!!! Ok period.
Brenda Porter: Over all how did you like the hair as a sew-in? How much shedding or tangling? Did the hair nap at the back of your head? Please be honest I am thinking about ordering this hair.☺
Mya523: Your tutorial look easy but I still can’t do it myself
Angel Josephs: Ur color is beautiful what did you do to get the ombré color?
Letoya Chantelle: Hey! Can you swim with a closure? You’re looks really good
Mrs. Francis: Are you putting the needle through the wefts?
Cherise Wilson: this look good !
Tanya Anderson: It came out super bomb
Olive B: This video came just in time
kimberly Smith: U know how to do some hair I’m here falling asleep on your video but stayed awake til the end
Ashley Sad’e: How long did this style last sweetheart
toryannia greer: Did you bleach your knots?
KDub: Nice work
Denitra Steele: Yes girl it come out cute....my girl
Shanita Simpson: Is the closure a free part??
Livvy Nicole: "this isnt my skin tone but its someones skin tone" ☠️☠️
Heavenly Brown: You used all 3 bundles?
jenn jenn: Can I use eco gel or any gel to do edges on a lace?
Queen E: snapped
Damaria Rhines: Did you ever make the video with the swoop extended ponytail for short hair
Bre Beauty: ❤️❤️
New New: @KasiaMae Beauty They can’t tell you nothing sweetie.. Another One
Kersha Beaver: very nice job
Shiva Trishul: I know you don't know me and this will probably seem weird... but I saw your video on IG and for a moment thought it was myself. That's never happened to me before.
Sudan-Eden Thorpe: Oo this come out way better than frontals cause frontal side parts be to short
Cyber Snot: “Clinch ya lips tight”
Jessica Willis: You look like Naomie Harris ❤
Agyeiwaa Boateng: Plzz with the hair lengths with which one did u start first, from short to long or what
Cashay Barnett: I love this so much ! Are u from Chicago ?
Aja Scott: So did u bleach it.?
The KeyahJohnson: Lace tint link
leah imil: girl where you located? can you do mines
Lady Kim A: New Subscriber
ZaiQuria King: I hope I don’t fuck my head up Friday but you did food
Zimone: Why glue the closure down if you was goin to sew it ??
Kasia Young: Girl we got the same name
FashionablyFrugal: YOU ARE TALENTED
WaydaMinJade: Did you leave the band on ? This video went so fast lol.
Kiyah Boo:
Shadone Valentine: Do you do hair and are you in houston girl I love your hair
Brenda Porter: Hi are you in the Dallas, Tx area?
Tatia Ana: Ficou linda meu amor so nao gostei da touca como vc vai lava seu cabelo
SOLÈIL: Do minesssss
Niyah R.: Idk if yk or not but some body opened your door @ 2:59- 3:02
Breezydoesittt: Did you glue the band to the closure or sewed it on there?
wolf old ass Thug: Embrace your own damn hair girl