How To Make Brading Ponytail Wig Using Braiding Hair And Old Clothes
- Posted on 18 November, 2021
- T Part Wig
- By Anonymous
Hello babies
In today video I show another method on how to make brading ponytail wig using BRAIDING hair but at the same time using old clothes as hair band, I hope you find this video is helpful and useful
If yes kindly SUBSCRIBE, LIKE, COMENT AND SHARE Thank you so much
Have a blessed week
#DiyPonytailBradingWig #DiyHairBandWig
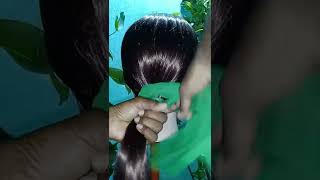
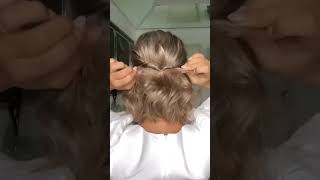
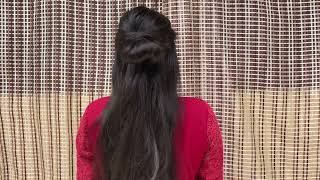
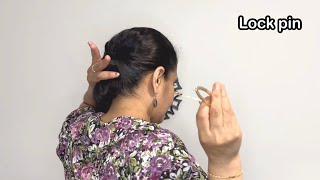
Hi guys welcome, welcome, welcome again to my channel in today's video i'll, be showing you how i make this braided ponytail wig, but if it's the first time to cross by my channel. Thank you so much you're welcome! Welcome! Welcome phil at home! Please! Before you leave! Don'T forget to smash the subscribe button below like this video and turn on notification bell, so that you don't miss any new video. Every time when i upload, i use three packages of braiding hair from darling company. I don't know which color number is this and i use one of my old clothes, so i go ahead and cut remove the lower part of this t-shirt, and then i cut one more time to get the size of hair band i'll work with it. Here you have to be careful and you can choose any color of your old clothes darling. We are not going to throw any old clothes anymore, because here i'll show you a lot of techniques so make sure you subscribe, so that you don't miss any any technique. So after i cut and i make sure it's four and half inches, then i go ahead and i pin it here and i make sure i pin half of this hair paint and then i take a needle in the end, then i start seal it when you Seal it, you have to make sure you put this clothes middle, equal parts, then you can seal it in order to get a good hairband and you can seal any type of seal you want. But for me i use this technique to seal it and then i go to end and i seal back again to make sure i seal well, and these have been secured enough. I'M telling you we are going to look beauty, but at the same time we are not going to block our bank account just because we want to look beauty, so we are looking beautiful at the lowest price. So after i repeat, then i go ahead in the cut then, after that i turn in out, and then i pin it again, you can see you can start to see. Uh hair bend start to come out, have good shape and when i pin it, i make sure i pin half of this hair band. So after i finish, pin i go ahead and start to prepare braiding hair. This is the one i did before so guys. I will be showing you one piece on how i make this braiding hair, so this is the size of the hair. I use and i divide one side and make sure it's smaller than other, then small, size cross middle here and make three strand. I make sure all sides they are even and after that, the small size i divide. I attach it here on the yarn. This is the smallest one. Then i start to bread. When you are braiding, do not tie too much. You must make sure your braiding is moving because end of the day we are going to remove this braiding from this yarn. So you have to make sure you not tie too much. So i continue to braiding, but just a normal braiding. If you know how to braid just a normal braiding and if you don't know how to braid just this very simple way, each one pull back and make sure you hold it well in the middle and keep moving move your finger. If you don't know how to break keep practice guys the first time, maybe you'll not get perfect, but the more you practice, you'll get perfect and neat braiding, so guys no give up keep practice in one day. Yes, so i continue to braid this braiding line till i finish all braiding hair in case you don't know how to feel or to add some hair from one side. This is how i add, then i keep going. If you add big amounts, your braiding one side will bend a little, but if you add small section every time when you want add hair, then you'll get very clean line so guys i kept go to end and after i finish braiding i go ahead and take Scissors and i trim off all the excess hair to make sure my lines. They are clean and this is how they look like guys. Then i remove it from the yarn, and this is it so here we are going to attach it and how i attach it. Every time i make sure i attach all two sides of these clothes or hair band, then i attach the braiding. Don'T attach one side of this hairband, because this hairband will slide when you put on your ponytail. Wig will slide one side, but if you attach both side i mean this cloth because you bend it in the middle. If you attach, both sides will be easy and when you put your ponytail wig will fit perfect. When i attach this braiding hair, some braiding, i attach two times some. I attack three times some four times, depending on how i feel this braiding hair secured. So when i feel like this spreading does not secure enough, i seal more, because i don't want to make ponytail wig that i'll wear one time or two time. I won't make something i wear long time here. I already sell two rounds so i'll go ahead and add the third round of braiding hair, and this will be the last one so because i use two different colors. I use this black color in this. I don't know, should i call it red or purple? I don't know so. I mix i put two black and uh to this purple color because i just want this ponytail wig to look uniform. That'S why i decided to mix this braiding hair and here guys, i'm done with seal this braiding hair. So i go ahead and attach this wig clip and attach this wig clip over here almost end of this week, because here i'll attach it on my hair immediately after i put this wig to secure this ponytail wig. If you don't have this wig clip, it's okay, you can use bobby pin so guys. This is how my ponytail wig look like this is out, and this is in you can't tell it's clothes i cut and my wig clip is here. So i do a very rough lines and guys here i'll show you how i attach this ponytail wig on my hair. So the first thing i did, i make sure i attach that wig clip on my hair and then i take a bobby pin to secure the rest of hair band remain, and then i continue to roll this wig on top of my hair. Also here i add, bobby, pin just to make sure this wig secured enough, because i don't want to put on then when i go out, i find one side is hanging, so i have to be careful. Then this is the peace remain so i'll pull it till. Here and then i take a bobby, pin and secure it again. I take several pieces of hair and i put it on top here. You have to make sure they are beautiful enough roll it. Well, till you finish this hair and then after i finish, i take a bobby pin also to secure it well, and this is the final result for today's video guys. I hope you enjoy watching this video and you get something if yes kindly like this video comment share and don't forget to subscribe honey. I love you guys so much and i'll see you soon on my next video bye, bye,
Comments
Janey Jack: I wish you know how much you give me energy Everytime when I watching your video, I love how creative you are
ryan yang: I will make this wig thank you
楊大峰: Sis thank you for this video help me a lot
楊駿峰: Very detailed