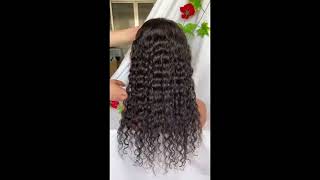
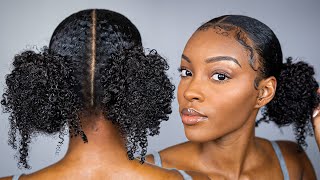
How To: Side Part Quick Weave Super Natural & Under $100
- Posted on 02 September, 2022
- T Part Wig
- By Anonymous
This is a video on how I do my QUICK WEAVE! Super natural and easy to do and it is under $100.
The hair that I used is "Purple Pack" x 2
Link To Products: https://www.amazon.com/shop/anicolec_
♡ F O L L O W M Y S O C I A L S ♡
◦ Instagram: https://www.instagram.com/anicolec_
◦ TikTok: https://vm.tiktok.com/ZTdav9gLs/
◦ Pinterest: https://pin.it/3hGCzxg
◦ Email: [email protected]
Music by Lexy Panterra - Want Him Now - https://thmatc.co/?l=ACEE2A06
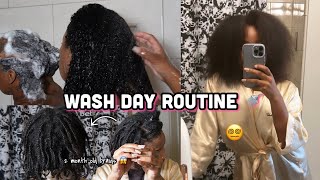
Hi guys, okay, today, i am going to be showing you guys how i achieve my quick, weave, um now disclaimer. This will require for you. If you are natural for you to put heat on your hair, probably a little bit more heat than you may want to um, i mentioned in a previous video of mine that i was over being natural. Now that doesn't mean that i am not um take care. Taking care of my hair anymore, or that i am going to go and get a perm, but because of postpartum and a whole bunch of different other things, um, i am going to be cutting my hair. I want to cut it into a bob, so um. I just feel like prior to me doing that or whenever i get around to doing it um i want to have fun with my hair. I don't want to be restricted and i know for me. I used to try to not ever straighten my hair because i was afraid of heat damage and different things like that, but i don't want to feel limited anymore. So with that being said, i am not so much as worried about heat damage because it's hair it can grow back. I can cut it off start all over. I'M not opposed to doing that right now. I just want to have fun with my hair. I don't want to be limited to just getting braids or wearing buns or wearing wigs like i normally um would do to achieve like a straight look so yeah. This is how it looks. Super simple super easy um before i get started, i'm gon na tell you that the curling um iron, that i'm using in this video, is by remington. Now it's not just the best one. If i were you, i would invest in something a little bit better. I think i got this from like tj, maxx or marshalls, but it kind of like broke on me. You can even tell that the screw is coming out. I had to put like a makeshift screw in there just to even use it so just a disclaimer, but i really like the way that my curls look when i curl it with a um curling iron like this, as opposed to curling it with a flat iron. So yeah just a disclaimer but yeah that is pretty much it. I hope you guys enjoyed this video. I love you guys and i'll talk to you guys soon, bye, okay, so right now, all i'm doing is parting, my hair on the way i want it to be parted. So if you wanted a middle part, of course, you'll part your hair down the middle. I want it like a deep side part. So that's what i'm doing right now and then i'm going to go ahead and um section off hair on each side of the part so that it can lay over the track. And you want to make sure that you have enough hair. If you do not leave out enough hair to cover the tracks, then it's not going to look good, so yeah. I'M making sure that i leave out a nice amount. You don't want to leave out too much and you don't want to leave out too little um. The smaller your um section is the more hair you'll need um. So for this one i only used about two packs now for this. This is like a traditional glue in when i do my versatile, um uh, quick weave. When i do my versatile, quick weave, i tend to use more hair um, just simply because i want it to be fuller for this one. I just use standard pack hair, and i only use two if i wanted to, i could have possibly used two and a half, but two packs was more than enough for me to get the to achieve the style that i wanted. So then, i went ahead and i left out some of the hair on the side of my hair, just because i wanted to be able to pull it back and have it to go behind my ear now, if you do not care about that part, you don't Have to leave out as much hair as i did. I left out some on this side and then right in this next clip you'll see where i left out a little bit um in that part, that's right there, uh in the front of my hair, so yeah you want to leave out wherever you feel like how You want to be able to pull your hair back, that's how you want to be able to leave out your hair um. So once i did this, i just began the braiding process. Now i did not do no super super neat braids, but you want to make sure your foundation is as flat as possible. Um. This braid pattern is one that i use, often even when i'm doing like wigs. If i'm doing a side part, this is a braid pattern. I just braid my hair down and then i connect each braid as i'm going to the previous braid or to the next braid. I should say um that way when i'm ending, i usually end up with. Maybe one or two braids and then i'm completely done so like i said you want to make sure they don't have to be super small, but they need to be small enough so that you can have a flat foundation so that your hair isn't sticking up now. You'Ll notice that it's kind of like bumpy in the back of my hair, when you see me, put my stocking cap and stuff on later on, but i promise you once you glue it on. You can't tell but yeah that's pretty much. All that i do when it comes to that is just make sure that i connect the braid from the previous braid into them, so that when i end it, i can either end with one depending on how small you do them or for me, most of the Time i probably end up with uh two braids total in the back, and i just keep doing this all around my entire head but, like i said, as you can see, i'm not doing super small braids, but your foundation honestly and totally depends on you and how Much time you feel like you want to spend braiding your hair. For me, i want to spend as less possible time that i can so yeah. Now, i'm just going to the next side of my hair and i'm braiding across um. You can also braid your hair straight back. If you want, i see a lot of people do that as well. This is just something that i do just also so that i can ensure that i don't have any lumps at the top of my hair when i'm gluing my hair down. That'S something that i do not like, and sometimes i notice that if my braids aren't as small as they should be, when i'm braiding straight to the back, then there can be not huge lumps but some type of lumps, and we don't want that. At least i don't, i don't really care for the way that it looks, or at least i feel like i can tell when i do it that way, but just braiding and then connecting it to the previous phrase. So yeah um and i just don't give a okay so now that my hair is braided, i'm gon na go in and spray gossipy on my hair before i apply the cap now. For this part, you can't apply morning glory, but i just always usually apply. Some got to be um a bunch of it, and then i end up going in with a blow dryer and drying it. You do not because i believe got to bleed got to bleed. I believe got to be: has alcohol in it. So if you're someone that does not like having alcohol on your hair, then you can just skip this part and just apply the morning glory on your hair um to ensure that your hair doesn't get damaged from the glue. So now i'm just going to go in with a stocking cap. You can use a brown. You can use a black one honestly to me. It doesn't matter because the stocking cap shouldn't be showing i mean of course me personally, i wouldn't go in with like a cream colored one or anything like that. Black and brown, black or brown are usually the go-to for me, and then i also apply two of them on my hair, just for extra security and then i'll go in with my morning, glory and i'll saturate that all over my head now for me, i usually Go in with probably about the whole tube, but before i do that, i did just trace out where my um leave out is with a white color pencil so that i know when i'm laying and placing my tracks, where not to put the um the tracks and The glue and everything like that so yeah, i'm going in with a bunch of morning glory like i use practically the whole bottle just to saturate my hair. You probably don't need that much, but for me i'm gon na turn up. So i'm gon na use a bunch of it just because i want to make sure that my hair does not come out or that glue does not get on my natural hair. So i do this process so many times and then once i finish this, i probably let it dry because i applied so much for about 30 to 45 minutes. I think the bottle tells you that you can wait. 15. I want to say, but i just waited 45 minutes um. I did it when i did. I wasn't in a rush, so yeah, if you are, you could always sit under like a hooded dryer. I just let my air dry and yeah. I just went about my business and then i came back to lay my tracks. Okay, so now that my morning, glory has dry, i'm gon na go in with my glue before i go in with the glue um, you want to measure out your track from ear to ear um. The mistake that i made was going too far in front of my ear with the tracks um, i should have just gone made sure everything was behind my ear. First, i was talking, i wasn't paying attention. I was on the phone. That was my mistake. Rookie mistake, but i'm here for you to not make that same mistake now it didn't mess up with the overall uh turnout on how my hair came out, but i do feel like i just would have rather do that just because later on in the video i Have to go in with shorter pieces to kind of fill in and not continue to go over my ear, if that makes sense so between each track and each glue um placement i go in with my blow dryer and i blow the track with the glue to Make sure that it is um secure and make sure that it has dried. So you want to make sure that you do that and you want to make sure that you do it for at least a few seconds. So that way, your tracks aren't slipping and you don't want to apply too much glue on it either. So it's super simple. You just measure your track glue, your track layer track dryer track. It'S four simple steps, and as long as you do that you'll be okay. Um - and i just do this all up my head now early in the video - i told you about how you probably saw how, in the back it looked as if there was a hump, but once you start gluing your hair down. You cannot tell where my braids are: the foundation is still flat and everything like that so yeah, that's all i do is measure glue, lay dry and i do it all up my head until i get to the top of my head and then i usually go About it a little bit different once you are at the top near the line. Okay, so now that you're at the top of your hair, you want to just um start cutting your tracks and laying them in smaller pieces and smaller sections, and this is usually where your hair is. Probably you want to go as close as possible together so that you cannot see that stocking cap and so that you cannot see in between those tracks in the previous tracks. Now, the closer that you go with your hair, the more that you more hair that you would have to use like i said i used two um packs of hair, but right here, because i started going super super close, i did have to go in with, like Some bundles that i had laying around and i just applied - maybe two or three small pieces from that, but that's also because in the back of my head i did apply my hair super close now. I know some people will space out in the back of the hair um more so than in the front so that they can have more um hair in the front. But for me i want it to be full all the way around. So once you're done, laying your tracks and drying them, you go in with your scissors and be careful to not cut your hair and just cut out that um the rest of that stocking cap, so that you can unbraid your leave out and yeah begin the flat Ironing and i just process - give a i'll scream it loud at the top of my lungs cause. I know that he's the one now i ain't giving him up and i just don't give a okay. So right here, i just went in with my flat iron um. I'M sorry my straightening comb and i just did my edges first now, like i said in the beginning of the video, if you do not like to apply so much heat to your hair, you can honestly just go in with the flat iron. But for me it's not bothering me at this point, so i'm just going in with my flat iron. I didn't do too many passes over it uh my hair got pretty straight with that. First pass um, but i did go in. I want to say the next day with my um wax stick especially around my edges, because my edges um have thinned out and came out a little bit from postpartum shedding so they're growing back in but um they're super tiny, and i realized that once i um Applied the wax stick, it laid a lot better um with with the wax stick, as opposed to me doing it without so yeah, i'm just going in and flat out in my real hair, the hair was already straightened um, but i was super satisfied with the way Everything came out, it definitely felt like i had just got a fresh blowout uh the length that i got was 14 inches. I didn't want anything super long, but for sixty dollars. I think that my hair came out amazing, like it looked really bomb for the price and for me to have done it myself, um. I was able to uh put it behind my ear. The way that i wanted to and yeah it curled pretty well as well too so yeah um. Let me know down below your thoughts. Um the rest of the video is going to be pretty self-explanatory. It'S just going to be me curling, my hair. I hope you guys enjoyed this video and i will talk to you guys soon, even if they say i'm ready is ready, um and i just don't give a i topic and i just don't give a i'll scream it loud at the top of my lungs cause. I know that he's the one now i ain't giving him i even if they say i'm ready, i'm ready

Comments
Lakeisha Griffin: Good to see you Queen Beautiful as always girl slay we here for it
Hi I’m Niasha: Gorgeous!
Chari D: Great work !!!!
Queen Sankofa T: You did soo good
DrivingWithJaz: STUNNING
Katy The Beauty: This is so cute!
Crystal7: Good point and I really like it looks good on you. ❤️
Yaira Peaks: This is so cute
shaune hemphill: Hey boo glad to see you back… how’s the baby?!
LoveeLorynn: Cmon hair.!!! You ain’t even have to go awf like this.
Shae B: Makeup tutorial please
Jasmine W: Okay New video!
PhoenixRising: