How To Natural Texture Hair: Diy U-Part Crochet Wig With Leave Out | Ocean Weave 8'' | Vi
- Posted on 04 September, 2020
- T Part Wig
- By Anonymous
Click here!
Hello everyone, welcome back to my channel!
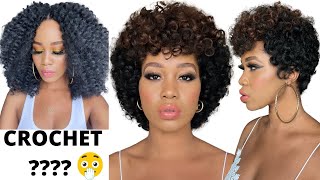
In today's video, I'll be making a u-part crochet braids wig \install with leave out. Please don't forget to give the video a big thumbs up if you find it helpful!
Thanks for watching
Click here
Hair Ocean Wave 8" 4-PACK (color 2) https://amzn.to/31ZurgQ
Wig mannequin head https://s.click.aliexpress.com/e/_dZvS...
Adjustable Wig Stand https://s.click.aliexpress.com/e/_dV9E...
https://instagram.com/vivianbeautyands...
My second channel Style by Viv ( Sewing channel )
HOW-TO: Lace Frontal Crochet Wig Using One Pack Of Braiding Hair! |Straight Crochet Wig https://youtu.be/bVY7Ulf9LfU
How To Make A Lace Frontal Crochet Wig | Yaki Straight Hair https://youtu.be/3PMboDarNCs
DIY 2*5 Lace Closure Straight Crochet Wig Using Braiding Hair https://youtu.be/FbjtbxL_1xU
HOW-TO Braided Lace Front Wig With Baby Hair Using All My Leftover Braiding Hair | DIY Ombre: https://youtu.be/dtU2WsZGsBE
HOW-TO: DIY 8x6 Lace Closure Wig With Kinky Curly Human Hair Bundles https://youtu.be/6BKSo9sNpGE
This video is not sponsored. The links above are affiliate links. Which means I'll make a small commission if you make a purchase using any of these links
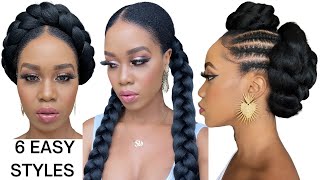
Foreign, hello, everyone welcome back to my channel if you're new you're welcome - and i hope you all are doing well so in today's video i'm going to be making a u-part crochet wig, okay. So with that said, let's go straight into the video all right. I ordered the hair on amazon, so i will put a link in the description box down below so be sure to check the description box. So this is the hair right here hold on. What is something is missing here. Oh just the space okay, so it has like a natural look to it. So this yeah this is the hair i'm going to be using for the u-parts crochet wig. I'M excited to try it out. Look at that dance. How am i gon na blink? My my hair with it, though mine is super kinky i'll, have to stretch it out a little bit in order to blend it. Well, okay, let's begin so, i've already went ahead and pinned the cap onto the mannequin head. So this is the diy u-part wig cap. I made myself, although i don't have a video for this uh wig cap, but you can get a u-pad recap online, so be sure to check online for that. Okay. So moving on to the hair, like i said earlier, i bought this hair online on amazon. I'Ll put the link in the description box down below so be sure to check it out, so the hair i'm using today is a natural texture hair and it's the ocean wave 8 inch hair in the color 2.. So it works well with my natural hair color. So to start, you want to take a little amount of hair using your crochet hook, pass it through the hole on the cap. So next you want to hook the hair and pass it through. So using the crochet hook hook the hair and pass it through the loop again hook the hair and pass it through the loop and pull on it to secure it in place. So i'm going to show you again, you want to take your crochet hook, pass it through the lace. So next hook the hair hold on hook the hair and pass it through. So using the crochet hook, hook the hair and pass it through the loop again hook. The hair and pass it through the loop, so next pull on the pull on it to secure it in place, so we're going to be doing a double knot for this crochet wig, okay, so as for the space you have to give on your cap, that depends On the amount of hair you use for your crochet wig, so if you're using a tiny amount of hair, you have to give it a little space. If you're using a bigger amount of hair, then you have to give it more space. So the space you give depends on the amount of hair you use for your crochet wig, so along the edge of the wig cap, you want to use a little amount of hair and also you want to crochet them a little bit close together and also along The edge of the u-part shape you also want to use little amounts of hair, and you want to make sure to crochet the hair close together. As you can see in this video, i didn't give that much space along the edge of the u-pot shape. So i want the hair to be close together so that way i can blend my hair with it and it will cover up okay. So i bought a total of four packs of hair, but i only used two and a half pack of hair for this u-part crochet wig. So i have one in half pack left and i'm going to be using that for something good okay. So i'm just going to keep it aside for now and use it when i'm ready. Okay, so i'm done with the u-part wig right now, i'm just going ahead to crochet the last one all done. So this is how the u-pad crochet wig is looking so far. So you can see the texture of the hair, looks natural and is soft, as you can see, i'm just running my fingers through it so right here i applied a little, i would say a tiny bit of oil to my palm. I rub it together. Then i applied it on the hair, so you don't want to over oil the hair. So you want to add a little bit. If you don't, if you don't like applying oil on your satiny hair, you can use hair cream instead of hair oil. Okay. So this is how the hair is looking. I love it. Okay, so moving on to the installation, i've already went ahead and braid my hair. So right now, i'm just taking out the braids around the perimeter and also i'm gon na remove the take out the braid on the middle part as well. So i'm just gon na speed that up a bit. So, as you can see, my hair is super duper. Kinky, even after taking the braids out so in order to do a little bit of magic, so my hair can blend well with this natural texture, crochet wig, i'm gon na, have to do a little bit of a twist okay. So, in order to stretch out my hair, i'm gon na take a heat protection spray. Okay, so you can see right here, so i'm gon na spray a little bit on my palm i'm gon na rub it together then apply it on my hair. So i'm gon na repeat that process twice or three. If i need more protection for my hair, because i'm going to be using um hot comb to stretch out my hair. So again, i'm going back in with a heat protection spray and i'm applying that on my hair again, okay, so to stretch out the hair, i'm going to be starting from the tip of my hair, not the words. You always want to start detangling your hair from the tip, not the word, even if it's straight or coily all i want always want to start from the tape. So i just start by combing the tip of my hair, making sure the hair is free to go. The the the tips are free to go so next, i'm just going ahead to comb through the roots. So you can see it's stretched out. Okay, so moving on to the next step to get that loose and wavy texture coils on my natural hair, i'm going to be doing a loose battle. Not not that did my hair is stretched out so by stretching your hair a little bit before going ahead. To do the battle knot will give you the same texture on the crochet wig. You want to get that volume on your hair and still have that wave going on so yeah, so uh and also you don't have to use heat in order to stretch out your hair. If you have the time you can do the heatless stretch. Okay, so for me i want to get the hair done on time for the weekend. That'S why i had to use a hot coal. You don't have to use hot comb guys you can do the heat less stretched out. Okay, okay! So, while the uh battle knot are setting and setting, i'm gon na go ahead and uh uh put on the u-part wig see the hair up close, i love it. Okay, so i went ahead and add two combs on the: u part of, on the end of the u-part shape and also one comb at the back okay, so i'm just going ahead to put on the wig and i'm going to clip the combs on on the Front side in place first, before going ahead to clip the one on the back in place so to secure the rest of the wig in place, i'm going to be using bobby, pin. Okay, that's properly secured, so i rarely use comb on my wigs because i don't like the way they feel on my head, but with this one it feels real great, because it's not the it's not the other kind. This one is really easy. If you, if you face it right, you will have it for a long time without even having to feel that you have the combing there. So this is the next day after filming this video, i'm currently editing the video and i still have the wig on with the comb and the bobby pin in place. I usually do not do this. I usually take out my wig before bed, but with this hairstyle i don't even feel the comb on my head or on my scalp. So that's how good the wig is. So if you do it right, you won't feel the bobby pin and you won't feel the comb that if you do it right, so if it's not done right, it can be painful. Okay, so right now, i'm just going ahead to use a bobby pin to secure the side of the wig in place. Okay, so now that i have the wig in place, i'm just going ahead to unravel the battery knot. As you can see, the the texture of my hair is now wavy, soft and bouncy. Oh man, i love it. Love love, love, love, it love! It love it! Okay! Moving on, i'm just going ahead to separate, so i'm going ahead to separate the coys on my natural hair. Okay, so i went ahead and uh separate the rest of the hair off camera. So right now i'm taking a little comb to comb, my hair and the hair on the wig together. So you can see the the middle part looks a bit puffy right now, but you can tie a scaff around it in order for it to lay flat. But i just like it: i love it just as it is so i'm just gon na leave it like that. Okay, so i'm done. That'S my natural hair. Okay, that's my natural hair! I don't want to hear anything about a wig. I don't wear wig okay! This is all my hair, nobody, okay, so this is the final result of the u-pack crochet wig with leave out, and i love it. Love love, love, love it. You can style it. However, you want, you can do a middle part, a side pad all back or into a bun. Just like this, so yeah, i'm gon na have lots of fun with this hairstyle because it looks so natural all right guys. Thank you so much for watching today's video. Thank you so much for popping by today. As always, don't forget to give this video a big thumbs up if you find it helpful. Thank you all for watching and i'll see you all in my next one.
Comments
belle_graciaz: I really loves this and it definitely looks natural and versatile
Onyix Amadi: That's a very beautiful style I loved it thanks.
Sweetlipskizzy Duncan: Great job, looks very natural..thanks for sharing .
gillian lee: Fantastic! Great tutorial
Jenny O: Came out very nice. Good job.
Maybell Enoghase Enoghase: Lovely
Jennifer Laignel: Very beautiful and nice
Neon Camille: I have a confession I always love your videos before watching...you INSPIRE ME...
Jmac: Yes indeed it’s your hair! . AWESOME JOB ‼️
Immaculeta Ebere: Beautiful
E.D AND FAMILY: You are very talented ♥️❤️
Juliet Okwuagwu: Wow so cute and lovely nice one
las_cosas_ como_son: Éste si me encantó
chiprivan 8: Wow beautiful,
Ida Jobe: I love your hair very beautiful
yahka bosah Nwufo: Viv....you are just so good
Tina Mbah: Hi Vivian I love and appreciate your talents . I follow you on YouTube and Instagram . I`m a nurse by profession but I do hair as a hobby . And will like to buy tools for making hair ( net , crochet , mannequin and swiss lace ) thro the links you attached below your videos . but as I went thro your videos , I didn`t find any links from where I can buy hair extensions like Expression which I commonly use . I sent you a message on Instagram but you`ve not responded . Please I will be glad if you can share the link . Thank you
Learning adventures with Chayanne Gilead: Nice job
JoyLove TV: Nice
Magnificent Meg: Thanks sis
Faith Tanui: For real its your hair!
king unknown: My boss you d best.you my mentor
Ibn Faradan: Please
Hope Htv: Hiii