*Caution* Meltdown This Short Curly Wig Shengji Aliexpress
- Posted on 01 June, 2020
- T Part Wig
- By Anonymous
#curlywig #meltedlace Please note the information of these wigs below the video:
Shop link: http://suo.im/5KP9SF
Wig link: http://suo.im/5vMLF7
Wig details: 370 lace frontal wig, 150% density, medium brown lace color, natural hair color
IG: ali_shengji_hair
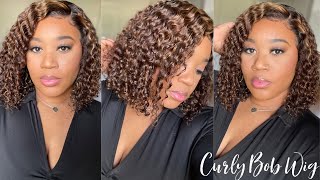
Hey guys and welcome to my channel today, i'm working with sheen jai hair. I believe that's how you say it, i'm not exactly sure, but i believe that's how you say it they um sent over to me a curly, wig and i'll show y'all the wig. It'S a 12 inch, i believe, a 13 by 6 in 13 by 6 front tool, and it has lace all the way around in the back, so it can be a 360. It comes with an elastic band in it and also came with an additional elastic band. I guess in case you messed that one up in the uh box and then it has like four combs in there three around the middle and then one in the back. So here i'm just going in and spraying a little bit of got to be free spray. So that i can protect the hair and the lace and all that and i'm just going in with a mixture of bleach, so that i can bleach the knots and after looking at this wig, i had already started putting the um bleach on it. Looked like the bleach, the knots was already bleached, so i went and it actually bleached just a little bit more than i should have, because i didn't realize that the knots was bleached until after i had already started. Um bleaching the knots, but i didn't want it to still look like there - was any knots anywhere anyway, the um i'm just going ahead and putting the bleach mixture paste or whatever all over the front and right there along the sides. Now this wig can be parted everywhere on the side, because it only has about two inches of parting space on the sides and then the back goes all the way back. I think it's like a six by six closure, but there is lace on both sides and then all the way around is about two inches of lace. All the way around now on the description, it does say that this is a full lace wig and i believe it does has have full lace all the way around, but um most of it is just tracked in with a closure. Okay, so i had a little bit of extra bleach left over and i just went in and put a few little streaks in there, because this is going to be for my niece and y'all seen her before on the channel. This is nisha and it's just nisha on um youtube, but anyway she, i think she's trying to go natural, i'm not really sure what's happening here, but i went in with some pink oil moisturizer. You just want to use as much as you need. So if you need three squirts full or three pumps, full, that's how much you need and then i'm just gon na go in with my blow dryer and comb attachment so that i can like straighten her roots out, because i guess she's trying to go natural. I'M not sure, and she she's been having a relaxer but um yeah, i'm just gon na go through and blow dry the wrist blow dry, her hair out with a comb attachment. It'S already completely dry, i'm just going through, so i can kind of like detangle it. Okay, so that's the hair once it's completely blow-dried straight and then here's the wig after i have shampooed it out. I just went through with some purple shampoo and that's the curl pattern. It has a really cute curl pattern. I believe it's jerry curl, but on the website it says just curly and then those are the little highlights that i put in there and then here i'm going in with the ruby kisses foundation. I think that's the number 10 and i'm just going to apply with the elf steepling brush all over the front everywhere that the frontal is going to be on the wig. I'M just going to apply the um ruby kisses and get it to looking more like her skin tone. If you, if your makeup is not just exactly the same color, i mean don't be alarmed because you just want to get it like a skin color. It doesn't exactly have to be like totally that um color of your skin, because you don't want to have to go out and buy every color of ruby kisses. So you just want to get one, that's kind of similar to your client or your skin. And then here i'm just cutting the extra stocking cap off of the wig cap and i use the rest of my um stocking cap to wipe and clean the face with alcohol. So i do not throw mine away just yet. So i cut it out from the front and and then i cut the back off and then i'm just going in with some 91 alcohol. If you can find that because i know it's hard to find, you just want to clean the face around the face right in front of the cap and the ears, and then here's the wig again and i'm just going in with this same concealer from ruby, kisses And i'm just applying it to the lace so that the lace can match the cap. So you just want to use your brush or whatever you have to apply your lace and just i mean apply your concealer and just put it everywhere and then also to seal the concealer in so it don't transfer. I just put a little bit of got to be free spray, so here i'm using the ghostbund xl and i'm actually going to go in with and apply three layers of the ghostbund xl and then i'm just using the edge brush with the little spatula. On the end to apply the um got, i mean the ghost bun and then i'm just going to do it in three layers. So you may see me only doing one layer here, but i'm actually gon na put down three layers at least one inch wide. Okay and then, if you have somebody or if you have a low hairline, you may have to get some glue onto the hairline, is totally fine as long as you take it off correctly. So anyway, here's the wig right here y'all and i have already cut the lace off of the wig. I found that this gives a more natural. You know, milk. To the i mean, it looks totally natural if you just uh, go ahead and cut most of that lace off now, and then i just kept having malfunctions, i'm having to take hair off of glue and everything. So anyway, i'm just sitting the um the wig down and i had went to the restroom. While i was waiting on the glue to dry and actually was gone too long, so the glue had started to um dry faster than i needed it to, and so that's why you see me laying this wig down and i'm gon na have to go back in And re-glue most of it well not take it up, but just like add some more glue to like the edges, because it did not start to melt into the skin like it should have. It was just kind of sitting on top of the skin. Looking really white - and i did not want that - so i did go back in and add some extra glue so that all the parts that had started drying faster than i needed it to would get re-glued. So but anyway, i'm just going ahead and laying the hair down on the um glue. That'S still sticky and i'm gon na go back in with a blow dryer and make sure that those parts are laid down and then i'm just gon na go ahead and fix that um the edges so that it'll be melted down. Okay, so i did go back in, i don't have the clip for that. I don't know why, but anyway, i'm just leaving out the areas where i'm gon na um put her baby hair and then i'm just going to go in with the blow dryer to make sure that everything is melted down. As you can see, it looks a whole lot better. Everything is laying down like really good it like is blended in with the skin, and then here i'm just going to go in with a little bit more of the guy to be free spray. You'Re going to see me use it a lot and then i'm just going to go in with the elastic band and i'm just going to melt this sucker down. I mean if, if i can get to stay on my melted down, so i'm getting these, should i hold the um hair up because it's pretty short so and then i'm just gon na um tie it down really good. You just want to tie down really really good so that the lace melts right into the skin and even if i had messed up it, still laid down and melted into the skin. I also want to say that my niece is actually 15 years old. I know some people in the other videos were saying that she was too young to be getting lace done and blah blah blah and blah blah. She got a 12 inch lace, frontal wig and she's 15 years old and i'm not going to let her wear anything to grow. So just for clarification for that, i just want to put that in there and then also. I want to tell y'all about how inexpensive this wig is. The wig starts out at 50 and the most expensive length is 132 dollars. So if you're on a budget like most of us are from kobit 19, you can go get this wig for for 132 dollars. Like you, ain't got to beat that so anyway, i'm done taking the i took the um elastic band off and, as you can see, the wig is melted honey. Do you hear me so i'm just taking some tweezers and tweezing the um baby hair out a little bit more because um the hair was pre-pucked. I didn't say that, but the hair was pre-plucked, but it was still really really thick. I mean like even after i put the whole thing. It was still super super thick. So i think that's a good thing, though, because you can just go in and customize it. You won't lose a lot of the hair but um the hair, like i'm just tweezing. The hairline just so that the baby hairs won't be too thick and that um, you know it just won't, look so weak. So anyway, i'm just going through and that's what i'm doing taking my tweezers and i'm just thinning out where the baby hair will be. I already went through and squeezed the area behind the baby hair, but just like i said this wig is like super super thick. So if you like thick wigs this one right here is not going to disappoint you. Okay, yeah i'm just taking my scissors here and i'm just cutting this hair about around like a half inch, i believe, um or it may be, between an inch and a half inch. You can cut it a little shorter if you want to, and also it could have been plucked just a little bit more too, but we wanted to make some cute baby hair. So i think that was pretty decent, how they look so yeah, i'm just taking my scissors and i'm just cutting it, trying to cut all the little pieces really good and then i'm just going to go in and cut the side cut a sideburn also so that You have like a little laid sideburn and then that's how it should look. I don't know how i lost the clip of the um baby hair. Getting done, i'm so sorry, but i did go in with the even gel. It'S just. It looks just like the um got to be glued um edge control, i mean gel, but um i don't know i lost the clip, but anyway i'm going in with some cheese. Bum wax stick and i'm just like defining the part i'm going in with the pressing comb and then i'm just getting the part um straightened out. Y'All can see a little bit that i i told y'all that i had bleached the knots on this wig and they were already bleached, so i kind of like over bleached them, but it's fine. It all worked out. Um really good, because even with the over bleaching knots, it still didn't look bad and then here i just went in with some more got to be freeze plate. Of course, you're going to see me spray this over and over again doing a lace, video or you can use whatever hairspray you prefer, and so i just went in my blow dryer and then just kind of make sure that her spray was dry. And then here i'm cutting off the um paper, wrap that i put around there for the baby hair and that's how the baby hair looks. I don't know how i lost the clip today, but anyway, i'm going in with some nairobi, um foam wrap and i'm just gon na define her curls with the nairobi foam wrap. So after i put the nairobi on there, i use the black denman brush to define the curls even more, then i'm going in with a little angle brush and that same concealer that i used earlier and i'm just kind of like detailing the edges and also defining The part and then i'm just going in with this black hairspray, that i got from sally's, not sure of the name, but you can use any kind that you have available. But this one is at sally and then here i'm just using my diffuser. That came with my new blow dryer and i'm just defining the curls even more, and it just dries. The hair and also you know, defines the curls. So you can use that if you don't have that attachment, then just let it air dry and it'll be totally fine. Okay, hey guys! This is the final look if you made it to this point of the video and you love my video leave a yellow heart in the comments. If you love, my video, don't forget to like comment, subscribe click that notification bell so you'll be notified. Whenever i upload a new video, i have all the links to this um hair listed below and all of my social media. So don't forget to go and follow me. Thank you guys so much for watching


Comments
Olivia Brown: Love the wig! I would definitely love to see you do a review of Straight Silk Spray by JuniorLabs. It really makes my hair soft and flowy ❤️❤️
Sheila Terrell: Really pretty❤
Carla Aldridge: You did an amazing job!!! What lace???
Kendra Hart: hey pretty! any update on the hair ? mine will arrive tomorrow excitinggg! :)
Messina Moore: , you really did that
Iheart_quannie: Hey girl I was wondering when a video was coming
Kendra Hart: ohh yesss!! any tips on cutting lace?
Debbie Proctor: Cute!!!
Ms. Lena: Great job
Shawna Jones: She is so cute
awalker1231:
samara williams:
Ayanna Fraley Moore:
Elaine Johnson:
Telecia Roshell:
Mekel:
Gemini baby:
Sheila Terrell:
Ashley Slayed My Hair: The real goat!
siani Pridgen:
Brittany Shaw:
ColbyAlexandria:
Missy Grando:
jill Brown:
Britney Centino:
Precious Inspirations:
Ina Goodwin:
Sister Choir:
Made by Tiff Designs:
Nicole Francis:
Vicky David:
Ja'Lysa Daniels:
Camya Simone💗.: .
Samantha Morgan:
cutie walker: