How I Put On My Wigs
- Posted on 28 January, 2021
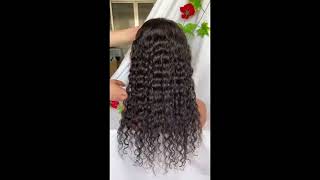
- T Part Wig
- By Anonymous
The wig I'm wearing:
VPfashion wig link: https://bit.ly/2XRx2HL
(24'' lace front 613A# is used in the video)
Use code linzor for $ off
Original video link: https://www.youtube.com/watch?v=oCapd4...
Hey guys, it's lindsayr welcome back to my channel. So today i am posting a very requested video. This is going to be my updated. How i put on my wigs video, the last one i did was just awful and i don't think the wig application was the best and since then i've changed a lot of things. When i apply my wigs, who would i be without wigs? I don't even know. I don't understand how people survive without wigs. I prefer using human hair wigs, but you can also do this method with your synthetic lace front, wigs if you'd, like probably also works on regular ones, i've never tried it, though so there's three ways that i put on my wigs and they're like each at a Level of difficulty more like laziness, though, but yeah if you have any tips and tricks. Please tell me: i'm not a professional. I have been wearing wigs for a long time, but i don't feel like i've reached the ultimate pick of wigging yeah yeah. Assuming that not everybody are like super familiar with wigs and stuff, i'm gon na tell you a little information before we start human hair. Wigs have different kind of knots. Knots is where the hair is tied to the liz cap. The lace cap can have different colors depending on your skin tone, but it can also have different kinds of wear and tear ability. There is each delays and there's regular lids, like i have here, depending on which list you choose the more expensive it's gon na. Be i definitely understand that human hair wigs are really expensive, but the shorter you get the more cheap it is and if you'd like to check it out, i have a tutorial on how to make your own wig and you can get away with it. For about three to four hundred dollars of making one yourself, so that was just a little quick thing about kind of the basics: about wigging, i'm gon na start with the most lazy way i put on my wig, but before that, i'm gon na tell you about Skillshare because it's the sponsor of this video, which you love by the way me just casually telling you that you love it yeah, whatever a lot of you guys, seem to love it. So skillshare is an online learning community, with over thousands of classes for creative and curious people. Just like you, you can explore new skills or strengthen skills that you already have so the first 1000 people that click the link in my description box or the pin comment will get a free trial of skillshare premium membership. You'Re welcome. You can try classes like crafts. Illustration, photography marketing, so you know i've been focusing on drawing, but i thought it would be fun to like implement something new with that and not only show you the same thing all the time. So i found this very cute class that was about drawing, but not only that it was like a guide on how to like mentally cope, while drawing drawing as self-discovery by mary andrew i'd feel very happy if it could help any of you guys, because she was Talking a lot about the struggle she's had, and i feel like that - really resonates with the times that we are in right now, and maybe some of you guys can help yourselves with some drawing therapy. She also talked about how to like cope with not having to be a sad artist. You can be a happy artist too. It works as well. So if this sounds interesting to you, don't forget to click the link in my description box and please let me know what you think of skillshare. So far, i've heard so much good from you guys. Learning a new skill is always so appreciated and you feel accomplished when you get better at something so go check it out. Now i'm gon na put on the wigs. Let'S go the lazy way of doing wigs yay. So if you haven't already seen her, this is the wig we're going to be working with this entire video. This first step is just pretty ridiculous. I'M just going to be really quick about it step. One i brush through my hair step, two which you were all going to die for, is that i shaved my baby hairs on some of my hairline third step is to brush back my hair and tie it in a knot. Next up is the real magic and it's a my god to be glued. This is what we're going to use for all the applications of the wig. The fourth step is to spray down your hair in the front for this lazy version. I don't do a lot because i want to keep my hair as clean as possible. I also brush that out with my comb and then i use my hair dryer and blow that so it gets stale the hair is glued down. I think it's time for step. Four or five we take the wig, we just loosely put it on and put it by the parting. We take the gold to be glued and we spray right here about a fingers length, take your hair, dryer and dry it for about five seconds and then you're at step, six, which is just to pull down your wig and place it by the glue you're gon Na use your comb to push it down and the hair dryer to make the wig stick to your forehead and the final step is just to tuck in your own hair and, of course, brush it. But you know that already and then you're done this seriously takes like three minutes to do. Let'S go on to the next way to do it, because that's the way i prefer to do it. This was just a quick run-through, so let's go welcome to the second way i put on my wigs. This is the in-between one and the way i do my wigs the most often, i think this is very time efficient and looks absolutely grand the difference. This time is this a wig cap. I told you guys before that i prefer to stay away from wig caps, because i think they hurt my head, but i'm going to show you how i use it without it hurting my head. So first step is to have the parting on your hair kind of the same parting as the wig is mine is the mid parting. So i have a mid parting excuse, my hair. By the way. Next up, you can either tie up your hair with a rubber band, or you can do as i do and just put on the wig stocking right away. Oh, i look just fabulous. Thank you to avoid even more headache and just push the hair into the wig cap like this. Next up, we use the got to be glued and spray so that the wig cap sticks to your forehead. It'S very important that you don't just do it on the hair. You need to get some on the scalp, depending on your forehead size. You can do it more or less. We'Re then going to use the hair blower air blower. We'Re then going to use the hair dryer and the comb to just push it in place. I do two rounds of this, so i double spray it to make sure it sticks to my scalp forehead so now that you've sprayed it in place, you have the fun part to do and that is to cut the wig cap. I try to leave as little as possible here because this is where we stick the wig same thing here. I really don't want a headache, so i don't want to keep too much of that ribbon that keeps it in place, but i don't want to cut off too much because then it won't keep my hair in. We are now going in again with the spray to make sure that this blends as good as possible with our skin, this can kind of loosen it so make sure you're quick. Then you push down with the finger to make it smooth after it's down to the best of your abilities, bring up the wig brush it through, as always put it by the parting of your own hair, pull it back a little and then spray it don't let It go down swipe blow dry, just a little to make it tacky clear off the hair and then just pull it down and then start blow drying and pressing with a little comb. I start by pushing the edge of the wig down and then i start doing this downward motion. These two motions are very important, in my opinion, to make the lids look as blended as possible. The further up you spray the glue, the more you can glue the wig down. I did a very shallow one. This time. The reason we don't have the cap all the way down here is because i think it's a little bit difficult to attach it here. The cap is meant to cover the original color of your hair, so, as you can see, there's no shine through of dark hair. Here, i'm not going to attach the wig to the sides because i think it's uncomfortable hence. This is why this is another lazy tutorial for everyday wear of wigs. That doesn't mean i'm done, though. Yes, i look crazy. As you can see, i still have shine from the glue which you can either remove with rubbing alcohol, some hot water, or i just sometimes dab with this one. You don't want to get makeup on the lids, though it makes it looks really bad, so we want it to be flatter here. We need to tuck all our hair in under the wig and make sure the wig is clapped back um. We can use some water to just spray it more flat if we'd like brush the water through to make the hair flat, and then we have this trusty guy again to just make sure it is as flat as possible. So this was our round two. This is how i put it up when i'm lazy and i don't really want to do much style it to your choosing. Okay, this isn't much, but i just did my regular hairstyle thing now. We'Re completely done. Let'S see my third and like most intense way, to put on my wigs if we're like going to the oscars, as i said, the oscar gala i were going, this is, i guess, how i would do it or i would just shave my whole head and because It'S the oscars. Why wouldn't i just like dye, my hair, then why would i shave it? How my mind works, so our first step is actually what happened before i turn on the camera, as you can see, she's on the headstand. The reason for that is because i actually washed the lids before every time you wear a wig. You should just wash it off, because obviously it will blend better since i attach and reattach them every day. I don't bother to do that. Look at that gorgeous length. Clean as a whistle, but for now i'm gon na put her back because our steps before putting her on is what's important here. So in this version, we're adding one product, and that is the goth to be glued water resistant, spiking gel. But today we're gon na use this to slick down our hair and make it as flat as it can possibly get just squeeze. Some out of your hand, warm it up a little with your fingers and then apply it to make your hair as flat as possible, which is the goal for this. This is going to make your hair like a helmet, which apparently is a desired outcome of this comb. It through and slick it back. Now that we've done the front, we're gon na do the sideburns, so we can build a nice foundation for the wig to just attach on brush it out and brush it back now that it's slicked back we're gon na do the same thing on the other side. Okay, both sides are done next step, so since the goal is to get it as flat as possible time to brush it back and put it in a ponytail there we go. I am also going to use this clasp. Make sure that this really stays flat same thing here, if you're not like me, make sure you've put this where your baby hairs are here too, that is going to make a really nice difference. When you attach the wig, let me demonstrate it doesn't get better than that. You'Ve already seen me. Do this step tuck the ponytail under here. The only difference this time and we're gon na cover all the hair, not just the forehead part god. This is messing up. My eyebrows, as you know, take the got to be glued spray. It do it twice, use the hairdryer to dry quickly. Just like last time. Oh my god, i can't barely like open my eyes. Let'S just cut this off. Oh nice, oh my ear that looked so satisfying now that we cut this off as nice as we could. Let'S continue doing what we did last time and spray the edge you've already seen it. So let me swipe past, you like it thinks it looks pretty good as good as i'm gon na get it next step out. Just take a beauty blender and do a little foundation here in the middle place, the wig make sure it's aligned with the parting, and then we do the exact same step as last time. We just do smaller sections, so let's glue the wig on remember to spray. It high up the front is attached: let's keep on doing it on the sides. Let'S see, if i my wig fits, i don't know why it seems like it's not gon na, because it should. I have some parts that it are loosening. So i need to put some more glue there and to get it more precise i'll. Do it on the tip of this just comb out any like hair that got stuck in the glue if there's any same thing on this side. Next step is just to take a little q-tip, bring some water on it and then let's get rid of that shine. So the final steps you kind of already know we have pulled the wig back and attached it in the back and we are flatting it flattening. It with this one i just have to make a comment of how nice the wig lays when you put it all down, it's really like it's. Your hair gets that little look at it so part it flat it god it is so nice and then you do like that. And no one knows it's the wig. Okay, it's not the best application. I have ever done. I'M gon na be honest. I like never really do this technique, but it looks hella good oil don't be scared. Put some more. This was all my three ways on how i put on my wigs from simple to hard. I don't do baby hairs, i'm so happy watch this. I love you guys so much and i'll see you in my next video. I hope, because you better be subscribed, i'm kidding, i love you, you can do whatever you want. I love you. Bye.


Comments
Shannon Sweigart: Where do you buy your synthetic wigs?
cristina santos: Is Linzor wearing a thick or a normal wig?
Skylar Gloom:
Alex's hair hideout: can i please have some extensions i will view them on my channel
Alex's hair hideout: can i please have some extensions i will view them on my channel
Alex's hair hideout: can i please have some extensions i will view them on my channel