Deep Side Part Frontal Wig Install | Ali Pearl Grey Highlight Wig
- Posted on 13 September, 2022
- T Part Wig
- By Anonymous
Shop Now➤https://bit.ly/3zaK5pf
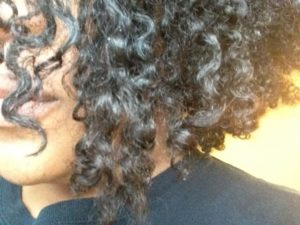
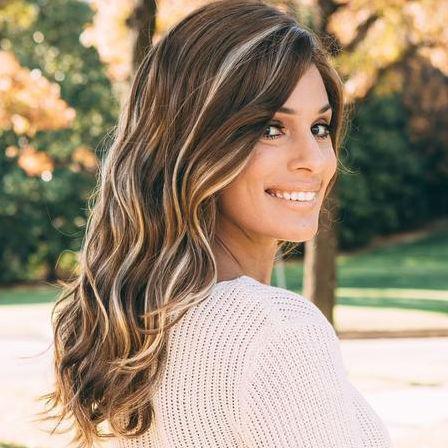
Hair Info: 24 inch platinum highlight 13*4 lace frontal wig 200% density
❤#AlipearlHair Official Store:➤https://bit.ly/3zaK3O9
Up To 50% Off, Lace Frontal Wigs!➤https://bit.ly/3oCLvnq
In FB Group, EXCLUSIVE DISCOUNT!➤https://bit.ly/3O1I8ku
1. 24h Flash Sale!
2. Free Hair and Cash Back!
3. Unlimited Coupons!
#alipearlhairwig #alipearlhighlighthair #alipearlhdlacewig
Instagram @alipearl_hair: https://bit.ly/34I3Oyd
Youtube @Ali Pearl Hair: http://bit.ly/2H0Gmmc
WhatsApp: +86 15890076489 E-mail: [email protected]
So, what's up everyone, it's your girl, young africana, back at it again with another install video and today i'll be showing you guys how to do a nice c curved deep side, part on your front toe. I have this beautiful highlighted, hair from ali pearl. So if y'all want to see how i achieved this entire install then go ahead and keep on watching. So this video is sponsored by ali pro. I have their 24 inch, platinum highlight wig and the 200 density, and it is 24 inches. It did come pre-plucked and i didn't pluck it at all, but i did go off camera and bleach the knots and right now, i'm just gon na go ahead and just you know, measure out the wig from ear to ear, just to see how it's fitting and Stuff and to map out this wig even better, i like to go in with my hot comb on the hottest setting and i'm just pressing out the hairline just to see what i'm working with. So i know exactly what i'm doing um i don't know. I can't work with a puffy hero line. I feel like it looks a little bit more dense than what i'm expecting it to, but once you like press it out is completely like you know not dense anymore. So that's what i wanted. So i'm going to go ahead and go around, and now i'm going to go ahead and cut off the excess lace around my ears, just so that the wig can fit ear to ear and the lace is not over my ear now on to the c part. Y'All, so i'm just using my rat tail comb, i'm using the metal part and i'm just parting out the hair, i'm kind of just curving as i'm you know, parting and stuff, and it's going to keep take a couple of tries for you to do this. But um it's pretty simple! I just like to go in a slant in the beginning and then kind of curve around and y'all just gon na see how i'm doing it. It'S pretty self-explanatory. You'Re, just gon na have to play around with that until you get like that perfect c curve and then towards like the ending or the back of the front. So i'm going to curve it even more and now i'm just going to go ahead and go in the back and go in a straight horizontal line just to get some hair to cover up the tracks in the back. You just want to make sure that that the part is nice and straight and now to have this bad boy flat. I'M going to go in with my carry care, wax. Stick i'm going to just use down the roots and then use my hot comb on the hottest setting and just press that out and as i can see like it made a huge difference and now i'm just applying some more of the character wax stick on each Side of the part, and then i'm going to go ahead and use my hot comb and i'm just pressing it out and, like i said, huge difference like the difference, is literally night and day uh, and i just like to do this just because you know i Want to see what i'm working with you know, i want to make sure everything is nice and flat and, like it looks nice on my head before i even continue on with the styling, because there's no point in styling if you're part incorrect - and i personally like To style off of my head and like on my mannequin head, because i like to make sure everything is together, i like to work, smarter and not harder and be you know, doing whole arm exercises on my arms. Now i'm cool so yeah, i'm just going to go ahead and just press that out and just press out both sides and as i can see, we're looking good now onto the styling, i'm going to go ahead and use my um organics moroccan argan oil. I'M probably going to use like a dime size on each parting and then i'm going to go in with my con air infinity pro flat iron. This is the titanium flat iron and i'm just gon na go ahead and do the trace method with my comb in front of the flat iron. Just so it's nice and straight and as you can see, i'm only doing one pass like this flat iron is the business okay y'all. So i'm just gon na go ahead and do that all over the hair, and i do have the flat iron on its hottest. Setting as well too - and i like to save the frontal for last and i'm just going to go ahead and just you know, flat iron, the hair make sure it's nice and flat ironed and i'm going to go in sections so that everything is nice and flat. And boom, these are the finished results of the styling y'all. This is looking late already, it's not even on top of my head, all right so on to the fun part, i'm gon na go in with my 91 alcohol, as well as an alcohol pad, and i'm just going to go ahead and just rub down my forehead Of any of the excess makeup i had from, like you know, tinting my cap or just you know dirt and oil in general, and i'm just going to go ahead and do that twice. Make sure that everything is nice and clean and then i'm gon na go in with my erica j watermelon skin guard, i'm gon na spray that around my forehead and then i'm going to go ahead and plop the wig on y'all. Now, at the temple areas, i'm gon na go ahead and just cut some slits, and this just helps me. You know, move the wig a little bit better and also helps um lessen any type of rippling and stuff when i'm pulling the wig so yeah. It just gives you more leeway to move the wig around and stuff, and after i have my wig placed where i want it to be, i'm just going to simply just roll it back and then i'm going to do two layers with my erica j hold me Down adhesive, as you guys can see, i'm just kind of going in squiggly lines and i'm getting it on the cap and a bit on my actual skin as well too. And then i'm going to go in with my baby hair, um spatula tool and i'm just going to go ahead and just spread out that glue and again um. You want to make sure that it dries completely clear before you do your next layer again, i did two layers and then i'm just going to go ahead and put in my wig once the second layer is dried, clear all right. So now that the second layer dried clear, i'm just going to go ahead and start off with the middle section. First, i'm just going to place it and then start off with the sides. You just wan na make sure that that the middle part is just nice and flat and like there's, no rippling and i'm gon na end up just pulling just the sides and stuff just so. I could get it um stuck on that glue and before you press it down, just make sure that you have it in front of the glue. You don't want it behind the glue or right on top of it, but literally a little bit in front of it and then once i have a place where i want to be at i'm going to go ahead and just kind of smush it down my hands And then i'm going to go ahead and work on the other side. Now i did run into a little issue and it wasn't my fault because the wig it fits me, but it's still a little bit small on me still, so i ended up still having like some like excess lace when i was cutting it off. You'Re gon na see i'm gon na point it out to y'all once like you know, i'm done and stuff, but we ended up fixing that though, but i have a big old head, so this is like a reg for me to be honest um i just didn't Get lucky this time and i apparently i didn't pull it enough, but it's okay, it's all right! I fixed it. So that's why that matters so again, once you're done just want to press it down, make sure that it's nice and attached to the adhesive. You do not want your wig to be slipping and sliding y'all. Now, once that's done, i'm going to go in with my eyebrow razor and i'm just going to go ahead and cut in a jacketed motion starting off with the middle part. First and i'm just going to make sure i cut as close to the hairline as possible and again you want to make it real, jagged and messy. You don't want it to be cookie cutter because it's going to show and the lace would be more visible when it's like cookie cutting just straight across you know, so just keep it jagged and stuff yeah. I'M going to see what i'm talking about in the next clip. I hope i'm i'm banking on it but yeah. I hope that you guys see it. No, you guys, don't see it not yet okay, so i'm gon na do my little detailing and stuff. So i'm gon na lift up the lace of any like lace. I didn't catch and i'm just gon na go in with a little bit of glue and my rat tail comb and i'm just going to go ahead and apply two layers of that. And i'm just going to kind of like outline where i cut out the hair. Well, the lace um with the glue and then i'm just gon na go ahead and let that dry clear before i press it down. This is like the same method of what i did earlier, this one's just a little bit more tedious, though you just want to make sure that you don't get no glue in front of the hairline. So just try to like map out the perimeter of the hairline with the glue see boom. There we go as you can see, it's looking a little lazy, but we're gon na fix that um with baby hairs. Baby hair is on the way to save the day as they should um, so i'm gon na go ahead and just carve out the baby hairs. I was gon na do baby hairs, anyways and the baby hairs level i was going to do were a bit more on the dramatic side for the look. I wanted to do. Anyways so thank god um, but yeah, i'm just going to carve out some baby hairs and i'm only just doing baby hairs on this side. Usually i would do the other side, but because i just have it flat and like i'm not showing that side at all. I'M just going to just do it on the side, that's showing, and then i'm going to use my hot, my hot, my hot comb, to press down the baby here. So it's nice and flat and then i'm gon na go in with my spritz mega hold. I'M trying to spray that, on my forehead, as you guys can see, i am struggling y'all. It is spraying all over the place. So if, if you see that is sprinkle all over the place, just try to use your hand to like um, i guess - apply the spritz and stuff but yeah. I was still trying to make it work and it wasn't working off, but we make it work. Just use your hands just to apply the spritz if it's spraying all types of crazy and then i'm just going to go in with my lace tint, because my lace is still a bit light. This is a transparent lace, so you know because of my dark skin girl, it's a little bit harder to tint the lace because it's transparent um, but nevertheless we covered it up with makeup and stuff afterwards. So we're good. So i'm gon na go ahead and use the headband that they gave me the elastic band and let that sit for about 20 minutes and once 20 minutes is up, i'm taking it off. Oh lord, i'm gon na go in back in with my hot comb. Just to press it out and then i'm going to go in with my eyebrow razor and i'm going to cut the baby hairs. I like to cut it about like an inch or inch and a half long and then to curl my baby hair. So i'm going to curl it upwards, using my t, vicks curling, iron or flat iron actually - and i got this off amazon. This is, i think, the 3 4 of an inch one and then i'm just going to go ahead and just you know, curl the baby hairs upwards and then using my nairobi setting lotion, i'm going to go ahead and apply that and then use my baby hair Comb just to you know swoop my baby hairs, so yeah just play around with it and stuff, and once i'm done with that, i let that dry and did my makeup off camera and once that's dry, i'm just going to go ahead and comb them out because You know your girls, don't, like you know, crunchy baby hairs now, so i just went ahead and combed it out. I went ahead and just cut off a little bit as well too, because some of them were a little too long, and now i'm using my spritz and my baby hair comb and again i'm just cutting off any of like the excess hair. That'S just you know. Lingering around my forehead and then i'm going to go ahead and use this brush just to carve out the baby here so that you know they stay in place, but without it being crunchy, and these are the finished results. If you guys want to see the makeup. Look on this, i have a separate video coming out for the makeup. Look tomorrow, so stay tuned um, but i hope you guys enjoyed this video like comment subscribe to my channel, if you have not click that bell notification. Just to get notifications of when i drop videos and stuff um super excited to be back, i'm back i'm big and big and big, but i hope you enjoyed this video go ahead and just comment down some pink hearts. If y'all feeling this look and i'll catch you on the next one later


Comments
Young Africana: It’s really the contacts for me y’all . What’s y’all favorite thing about this look?
Angelia Heart: You’re such an amazing stylist Love everything
Ali Pearl Hair: Gorgeous still Thanks for sharing our hair!
GeniusWigs: Wow so beautiful! You always slay colorful wigs!
BärbïéRøśē: Girl you always be looking so bomb in all you videos it’s to the skin and the contacts for me ❤️✨✨.
ItsMe Dee: This upload was right on time!! Could you do a tutorial on you installing an old wig ?
Janisha Black: Oohhh we need a tut on that eye makeup!! It is GIVING
fidelis ogaldez: Vivvv!! Girl that makeup with the hair! Guurl is always a slay!
Zainab Jimoh: Eyes matching the hair goes crazy
Coco Sampson: Stunning as hell!
Zainab Jimoh: This look is giving
Sammy Da Goat: Bomb Install Lovely Look
katakuna ikari: I keep a foundation powder because when the transparent lace be acting ignant sometimes
Rashaid: I missed you girl haven’t been seeing your vids pop up …. ❤️
_Trish_glam_mua A.:
carrie_stylez salon lavish:
TheRealMary: Yessss
natacia.joseph:
Lita Arnold:
kay wonderboy: Fire!
Степан: Alles sehr schön. Aber zuerst zusammen die Nummern 10 und 1. Eine warmthhh.Online Brünette und eine anderem Blondine. Es wäre unfair, wenn ich 4 wählen würde
Гитара Нужна?: ❤Only for fans over 18 year⤵️ Alles sehr schön. Aber zuerst zusammen die Nummern 10 und 1. Eine CountryGirll.Space Brünette und eine andere Blondine. Es wäre unfair, wennf ich 4 wählen würde