Tips On How To Make A T-Part Wig Look Natural| Lucky V
- Posted on 31 August, 2022
- T Part Wig
- By Anonymous
Thank you all for 2k❤️ the support means everything to me❤️❤️❤️❤️❤️
Follow my hair page for affordable custom wigs ❤️ https://www.instagram.com/reel/ChD5cNI...=
Comment for full Handsewn tutorials ❤️
and follow my social media’s!
And tik tok: https://vm.tiktok.com/ZMJT3y3Fv/
Follow me on tiktok on the road to 30k❤️❤️
Insta: https://www.instagram.com/p/B9cju14gXj...
Twitter: https://twitter.com/_lvckyy/status/123...
TikTok: https://vm.tiktok.com/ta3jmM/
SNAPCHAT: https://www.snapchat.com/add/lxckyyyy
Facebook: https://www.facebook.com/profile.php?i...
#LuckyV #wigtutorial #wiginstall #handsewnwig #wigtutorial #wigmaking #
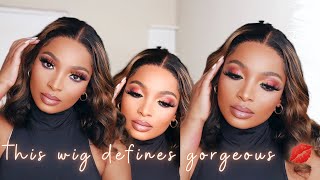
What'S up y'all, it's luckyv back with another video, if you're new here i'm lucky and i do wig content in other wig videos. I know i got the retainer in so it's going to give mike tyson today we're going into how to make a two part. Wig look natural, i don't even know what to say, like the lace is so thick and there's so many things that i could say about this wig, but i'm not going to do that. Instead, i'm going to say we're going to make this look like it's coming out of our scalp: okay: okay, if you like wig content, wig videos or anything that has anything to do with um me go ahead and like and subscribe so first things. First, we're not bleaching the knots on this wig. I cannot believe snots on the teapot wig the company wanted me to, but i felt like it would be better to just use some foundation and then put it on the small piece of lace that there is and then, after that, i'm just shaping the wig onto My head, the wig, is going to be linked below. I will say that it came glueless and the hair was amazing. So if you want an affordable tea party, wig check my link in my bio, also as you're straightening. This out on your head. Remember do not try to do no side part, because it's not going to be even because it's giving bob so it's going to be giving asymmetrical, and if you can pull that off, go for it. But personally i don't recommend it with a tea party. I really don't make sure you give it a little wiggle make sure it's moving. If it's not moving, then maybe you should wash it and then i would like to pin the hair back. I love pinning it back just to make sure nothing's messy, because we're going to be using a lot of glue in this process. I like to do this little comb test, just to make sure that it was leveled up to my head and then always remember to pull the lace slightly above your actual hairline. This gives you room for error and it helps you not to keep any glue on your hairline. That'S like a super big deal for beginners. I will say i've been wearing wigs for three years and i still got all my edges. I'Ve never had any rashes and stay away from uh ghost bond because that actually gave me a really bad breakout before so remember those little three tips make sure you test out the bobby wobby make sure you pull the hair back and make sure you pull the Lace slightly above your hairline and then pull the hair back period now we're going in and making three parts just to make sure that you start in the middle and have an evenly layered wig guys. Please ignore that ball cap, my ball cap was not giving on this install. My next install the ball cap was phenomenal, so yeah, but do you guys ever notice when somebody's lace is like lifting up a little bit? It'S because they didn't start in the middle with their process always start in the middle. If you have to like cut your lace into three sections like this start in the middle and work your way through the sides, you rather have it like lifting up on the sides that way you can fix it, then lifting up in the middle, because that'll ruin Your entire look, i also like to make little marks on my wig to let me know exactly where i need to put my glue because one it saves product and two. It keeps you from putting glue in the wrong areas and just makes everything messy, and i know when things get messy for me. I get confused and i get overwhelmed so especially for my beginner friendly babes. Get you a little marker. Get you a little lipstick pen whatever and then just tap tap tap on there and mark your spots, and then i like to push the lace back too, just to make sure nothing touches the lace as i'm putting the glue on there. But you don't have to do this part if you don't want to. I am using my luxury lace. Melting adhesive guys this is going to be linked below this glue is amazing. I use two to three layers. I mostly use three layers, but you can do as many as you want. I am using really big layers because i'm used to installing wigs - and i know how to work with this but make sure everything is evenly placed and for beginners i recommend using very small amounts blending it in and then going over with another layer once that layer Dries you're going to notice after i put this goat spray on here, everything's going to be white before i actually put the lace on top of my head. Remember that oh, not white, y'all, i'm so sorry, everything's going to be clear! Y'All are going to see on the video everything's going to be clear before i actually put the lace on top of my head, and that is when the glue is at its stickiest, so yeah. This is about three to four layers. Actually, this wig install lasted me. Three weeks, so, if you want it to last longer put more glue on there but remember to make sure it is clear before you put it on top of there or else all of your effort was fruitless for lack of a better term, so yeah, i'm blending That in really nicely - and i love this glue - because it's kind of like a lipstick tube and it allows you to like blend it without using your finger without using any type of comb. So once i put this goat spray on here, which is a phenomenal chef's, kiss you're gon na automatically see this start to clear up and it's gon na look so clean. I'M gon na wipe my forehead off a little bit because you don't want it to be super messy after you do that wait till it's clear and then throw that lace on there and it'll start it'll start giving. Why would i spray my eye there? We go nice and clear nice and clear pull that slightly above your hairline and make sure you got a little excess lace on the glue make sure the glue does not start exactly where the hairline of the wig starts, because that way you'll have room to actually Make your edges if you want and fix your lace, if you need to i like to use a comb as well to like push the hair back. I think that this keeps everything super clean and neat so yeah, as you guys, can see, i'm keeping that hairpin back and combing the hair to the back of the head and i'm pressing down using the comb. As i do that do sorry guys. My dog is crying. I have no idea what all right now, i'm going to use my luxury lace, melting band and i'm just going to tie it around the hairline just to keep everything nice and neat. This stays on for about 15 to 20 minutes, or until it is dry, a big tip that i can use for you, ladies and you guys to period wig wearers in general, make sure y'all are cleaning or washing you guys lace bands, because it can ultimately mess Up the entire wig install if it's not clean or if there's other bacteria or glue from previous installs so as y'all can see. I started feeling myself, but after i took the band off, i began plucking. Now this is a tea party wig. So the lace is only in the shape of the tee. It'S a really small amount of blades, i'm just going in and plucking just so i can create my edges, but i recommend keeping plucking to a minimal on t part wigs simply because the more you plug the less you have to work with as far as actually Creating your edges, which is what's going to make the wig look natural, so less is best for this, and as you pluck, if you notice that the lace is lifting before you even cut it make sure that you go back in and use that glue and like Put small amounts of glue on the lace to lay it down, but if you use my method earlier and put that three to four layers of glue on there and then use some spray as well, your stuff should be laid down perfectly like nuance: chef's, kiss perot And now i'm going in with a razor, not scissors, get a razor dollar at the beauty supply and i'm cutting at an angle to just snatch off all the excess lace. You see how easily that's cutting that's, because everything is glued down properly and i didn't rush. The actual length and melting process so everything's glued down properly and right at the ear you're going to actually use scissors to cut that so that everything can be straight and it can lay on your hair properly. And i know you guys noticed this harsh line. Don'T worry we're going to get to that, i'm going to show you guys how to fix that as well. There we go just cutting at that angle and it's looking really good doing the same thing on the other side and it's looking amazing there's not a bunch of glue or messiness on my forehead either. As you can see, that's one big tip. I can give you guys clean as you go with this and make sure you're using those like signals in those spots where you basically use like a marker and show yourself where to put the glue. This really helps with saving your product and keeping your face from being messy and breaking out make sure you clip that hair back again and then we're going in to fix this harsh line any excess i just cut off unless it unless it's needed. Obviously there we go, i'm feeling myself y'all, i'm listening to music in the background. So sorry, so i'm just going in with a a tint. That'S like a shade lighter than my skin. I would say: don't use anything darker because you don't want like a harsh dark line on your forehead. I should have used some alcohol to clean off those red marks, but i'm to do that later in the video so just go in with the foundation. I put the foundation first, just because i don't want the foundation to be on top of the glue, and then i go back in you can use bold hold you can use, got ta, be glued. You can use any kind of spray that you want. I am using goat spray because it was given to me by a company to promote - and that's also gon na, be linked below, because i love the spray. It really holds really nicely, along with the nice adhesive notice, how i'm using my finger and just dabbing that glue on i'm not doing the most with that. You don't want to put too much on there, because that goes back to making the hair hard we're not trying to do that. We want it to look super natural. We just want to melt that in once. That'S done you're going to use that band and put it right back on top of the hair, like you did earlier, let it dry a little bit and then put the band on boom bam. Pal yeah make sure you call me hair out of the way too. So blou now, while this is actually drying and melting, i'm going to redefine my part just going in a little bit now, tea parts already come with the middle part. So really all you have to do is make sure it's stationed properly on your head and i am actually about to flat iron it. I didn't do that on screen. I did that off screen, but i'm going to show you guys how the wig looks flat ironed. The hair was really good, i'm not even going to lie. I really recommend you guys get in this wig just for something easy to throw on. It is glueless, but personally i just was not messing with that. I wanted it to be on my head for sure. For sure, and what i'm doing right now is just making edges just so it could look a little bit more natural because tea part wigs do be looking a little funky. I'M not gon na lie. They look a little bulky, so yeah, here's how it looks. It'S getting very much willy wonka after a perm, and i love it. I would hate for it to give kat williams, because his be kind of stiff, sometimes not even gon, na hold y'all. But nonetheless, if you guys want to see the actual look of this, because i didn't put it on this video go check out my instagram and go check out my tic toc and also my youtube short shows you guys how this wig came out and how it Looked after three whole weeks of me wearing it, so that's super cool right now, i'm just making edges and i wanted to just give you guys a few tips on how to make a wig look natural. This wasn't necessarily a full blown installs. More so just some pointers for my beginners or my people, who want to learn more about making wigs look better on their heads, so i'm just going to kill it here. I want to say thank you guys for watching my content. Thank you guys for supporting and if you guys, love this video, if you guys like this video or if you guys want to see any other videos make sure you comment like and subscribe, so that you guys can stay up to date with any wig content that I'Ll be putting out i'm just loving how i'm making the edges, as you guys can see. I did push that hair back before i started, making my edges and i'm just putting them to the side. So, there's that okay, i'm gon na go ahead, go lucky, be out y'all, i'm out bye. You


Comments
Michael Myers: The voice over was amazing very informative step by step an the beginning took me out not Mike Tyson