13X4 Deep Wave Lace Frontal Wig Dyed Ombre Blonde (Diy) - Ft. @Amazon
- Posted on 10 October, 2022
- T Part Wig
- By Anonymous
Hey Everybody,
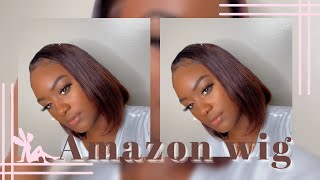
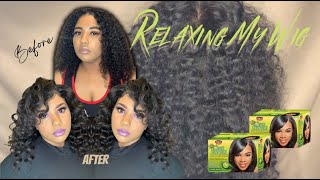
Check out the review of this 13x4 deep wave human hair lace frontal wig from Amazon that was dyed ombre blonde and then ombre red.
I hope you enjoy the video!
**I do not own the rights to this music**
Wigs For Sale on My Website: https://msebonyveesbeautystore.bigcart...
Binge Watch My 2021 Playlist:
https://youtube.com/playlist?list=PLgA...
Long Human Hair Wigs Playlist:
https://youtube.com/playlist?list=PLgA...
Customized Human Hair Wigs Playlist:
https://youtube.com/playlist?list=PLgA...
How to Bleach Knots: https://youtu.be/mGy3h0-GUvg
How to Pluck the Hairline: https://youtu.be/2rg_WWFfLP0
Video Schedule:
Mondays – Human Hair Slay
Wednesday – Synthetic Wig Reviews
Fridays – Budget Friendly Fridays (Wig Reviews under $25)
HAIR/PRODUCT INFORMATION:
Deep Wave Lace Front Wigs Human Hair 13x4 Deep Wave Frontal Wig with Baby Hair 180% Density Deep Wave Wigs for Black Women Curly Lace Front Wig Human Hair Pre Plucked Natural Hairline (13x4 Deep Wave Wig, 20 Inch)
Price: $117.00
https://www.amazon.com/Frontal-Density...
TIMESTAMP:
0:00 – Intro Video
0:14 – Welcome
0:37 – Wig I’m Reviewing
1:02 – Unboxing & Styling of Wig
1:20 – Dying the Wig
3:04 – Styling the Wig
3:52 – Installing the Wig
6:34 – My Thoughts on Wig
8:03 – Wig in Ombre Red
8:39 – Price of Wig
9:25 – Closing
9:38 – 360 View of Wig
9:50 – Bye Shug Muffins!
HAIR SPECS:
COLOR: Natural Black (Dyed Ombre Blonde and then Ombre Red)
CAP SIZE: Medium
LACE: Normal Lace Frontal
TEXTURE: Deep Wave
LENGTH: 20”
PARTING: 13x4
SHEDDING: Heavy
TANGLING: Moderate
OVERALL RATING: 7/10
Follow me on social media!:
Instagram: https://www.instagram.com/msebonyvee/
Facebook: https://www.facebook.com/msebonyvee
Snapchat: @Ebonyvl
Twitter: @vee_ebony
TikTok: @msebonyvee
Email: [email protected]
Please be sure to Like, Share & Subscribe!
**FTC Disclosure: This video is NOT sponsored.**
If you want to send me something, please send it to:
MsEbonyVee
P.O. Box 184
Locust Grove, GA 30248
Music: Epidemic Sound – Here’s my referral link: https://www.epidemicsound.com/referral...
“Black Lies” by Daniel Kadawatha
Foreign welcome back or to my channel if this is your first time here. Thank you so much for joining me today on this channel. I do like to bring you a lot of hair related content, especially with wigs. I thought when a few little other videos as well. So if that's something you're interested in, please do consider hitting that subscribe Button, as well as that notification Bell, so you don't miss any other videos and if you're, returning, hey sugar, muffin, alright y'all. So today we have another human hair sleigh and of course it is yet another Amazon unit. This is a 13x4 deep wave lace, frontal wig. I have it in 20 inches with 180 density. She did come with a natural black color, but, as you can see, I decided to give her a nice little ombre effect, so let's just go ahead and dive right into the unboxing, The Styling and the installing. I like it all right, y'all. So, let's get into this dyeing process, as you can see, I already have the hair sectioned out in pretty large sections. Might I add so I'm going to be using this bw2 powder lightener, along with this 40 volume developer. From my experience, I do highly recommend that you use a lower volume such as 20 or 30 volume. So, as you can see, I added about three scoops of the powder and I just kind of I judged the amount of developer that I use. I don't really measure the developer. I just continue to pour in until I get a very loose consistency so that the product can glide all over the hair easily. So I'm starting off with the first section by brushing through the hair, to make sure there are no Tangles and then I'm just going to go ahead and put that foil piece behind the hair and begin applying the bleach product. Since these are large sections of hair. I am working very diligently to ensure that this product is evenly distributed through all of the hair strands, and I you know, go from middle to end and then I even go ahead and brush through the hair to make sure that the product is being evenly evenly Distributed so I basically fold the hair up in this foil and pretty much repeat the same process throughout the rest of the wig, and this is pretty much what it looks like. As a result. Now I'm going to go ahead and start checking the pieces of hair in the foil to see if they have turned and as you can see, they have it turns very fast, especially with 40 volume developer. That'S why I highly recommend that you use a lower volume. So that it doesn't work as fast as you can also see the back process much faster than I was able to get to the front, so I had to let the front sit a little longer now we're all processed. I have went ahead and washed. The hair off camera also used some purple shampoo to get rid of the brassiness. Now I'm going in with these two products that will give me the wet, wet and wavy. Look I'm starting with the Alaska, feels like Silk styling gel all throughout the hair. Then I'm going to follow that up with the Mixed Chicks morning. After redefining the foam. Now I'm just brushing through the hair using my Felicia Leatherwood brush and then I'm just going to scrunch the hair up so that the curls are nice and defined. So before I install the wig, I'm going to go ahead and tint the lace using my Maybelline Fit Me powder in the color 360 mocha. This is what the hair looks like after it has air dried for a few days. I'M going to continue with my normal installation process so continue watching. Would you break up just because I told you I recall the times give me a chance to make it right. Just let me touch you like the first time. Just let us we can find our way. You remember all the times. Let me touch you like the first time. We don't need answers somewhere in between our secrets. There'S an imminent storm, unavoidable, yeah, all right y'all. So let's go ahead and get into my thoughts on this one. Most of you already know. If you watch me frequently one of my favorite Style deep wave units like I just love the Deep wave Style, one of my faves perfect length at 20 inches now. Of course they clean to come pre-plugged but y'all know me. I decided to pluck it a little more and I feel like it's looking very natural, like the hairline is really nice here. So you saw me go through the whole process of changing the color with a little bleach, so I think it turned out fairly well, I will recommend it. This is something that you try using a lower volume developer, I used 40, which is very high. So if you do something like this, try using like 20 or 30 Max because it starts processing very fast, as you saw um, and that's why I have like some like a couple of spots of discoloration. As you see, right here same on this side, a little bit um because it was in areas where I needed to like get it off, and you know I was like working in sections here. So you want a lower volume developer so that it processes a little slower while you're working through the rest of the hair. With that, I do plan to dye this unit again using the watercolor method. I'M gon na go for a reddish color, so stay tuned. For that video that will be coming soon, hey y'all, so I really just wanted to jump in and let you see how I did change this color to Red. I like it so much better with this color. So this is the final state of this wig and I'm quite pleased with it. So I really didn't have too many issues with this unit um, it seemed to melt nicely. The cap is pretty spacious, all hair friendly for sure now it does shed quite a bit, and that could be a result of me with doing this. Dyeing method could be me, I don't know, but it does no tangling, of course, but we're so, let's get into the price, as I mentioned before, you can find this unit on Amazon for a whopping, 117 dollars, plus some change pretty affordable for this length and style Of wig and for it to clean to come pre-plucked with baby hairs already, I think that's a pretty decent cost, especially for 20 inches um, of course, as always I'll list. All of the information down in the description box below so feel feel free to check it out if you're interested. So I mean that's really all I don't have a whole lot to say on this unit like I just like it, if you have made it this far in the video go ahead and leave me this little fall leaf right here, since we are now in the Fall season down in the comments, so that I know you made it to the end should muffin. You know I love and appreciate you for that. I thank you all so much for rocking with me today. As always, please be sure to give this video a big thumbs up hit that subscribe button. If you have not, and I will be sure to catch you beautiful people in the next give me a chance.


Comments
patrice moore: Heyyy Ebony !!! I love the way this turned out !!!!!! You did a great job !!! At first I thought that it came this way until I read the title again and watched the video . I love that red color as well. Good job
Blackberry- Rose: ♥️ the ombré in the blonde and especially the red I also love how natural you made the hairline. You look Very Beautiful in both color ombre’s. Tyfs
Silky Saks: This came out nice especially with the red. You melted it nicely. Thanks for using your Silky Saks Wig Mekt Band. Appreciate you . Nice video
Love Yourself: Happy Monday This is really pretty and I love how you ombre the hair. It looks nice with the red color. Great job. Have a Blessed Week and Take Care Every good and perfect gift is from above, coming down from the Father of the heavenly lights, who does not change like shifting shadows.
Sammy Da Goat: Third Comment Happy Monday This Is Such A Pretty Wig Beautiful Color
Chanda Williams: