How To: Half Up Half Down Quick Weave W/ Swoop| Quick & Easy At Home Hairstyle
- Posted on 11 October, 2022
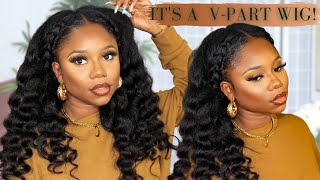
- T Part Wig
- By Anonymous
Hey Girlies!
Welcome back to my channel! Todays video is a tutorial on how I achieve a half up half down quick weave. I love doing this hairstyle because its simple and easy! It's also really cute for any occasion. If you don't want to use any glue on you're hair you can always sew hair in or use clip ins.
Hope this tutorial helped! If it did give this video a thumbs up and don't forget to subscribe!
Foreign, so in this video I'm going to be showing you guys how I do my half down half up ponytail with a little side swoop. So right now, I'm just showing you guys everything that I used in this video all right y'all. So, as you see it's not looking too cute right now, but basically all I did was I divided my hair in half um, but just pay attention to how um I'm pointing out the parting. I didn't part um. I didn't part straight across I kind of made like a u-shape on my head. That'S going to come into play later on and it's going to help the hair lay a little bit flatter. So don't part your hair straight across make sure it's more like a u-shape, because essentially that's going to help the hair lay as flat as possible and you'll see. Why, later on in this video, and then as for my hair, that I left out, I just pretty much blow dried. It um added some oil to it, nothing special! So then, as for the hair I left out at the top, I pretty much just washed it blow dried it and added some oils, and so now you just see me pinning up the hair to just pretty much get it out of my way all right. So I'm just gon na take a wig cap and I'm gon na put that cap over the little buns I made and the braids in the back um. I put it over the bun um just a little bit just to stretch it out um just so. We can lay a little bit flatter and then you see I'm just trying to make sure everything's tucked in the back of my head. My hair grows so weird like, as you see I don't know, so I just try to tuck in all those little baby hairs and then now I'm gon na go in with some gots to be glue and we're gon na spray. Three layers of this on, I just do three for Extra Protection so that, when I'm ready to take it out, um, it's really easy to remove. So, basically, the gots to be glue serves the purpose of like a barrier. Basically, so it kind of freezes the hair and freezes the shower cap so that, but when you put the glue onto your hair, it's not sticking to your hair, but more so the cap. So when you're ready to remove it, it's not tugging on your hair. So I just do one layer and then I blow dry and then I'm gon na do another layer and then I blow dry and then another and when I'm doing these layers, I'm feeling around to make sure that it's kind of seeping in everywhere - and you know I don't miss any portions of my hair because I really don't want the glue to stick to my hair. I wanted to stick to the free spray and the shower cap. I mean shower cap y'all, the wig cap, so now that it's all dry um, you can feel it it'll feel really crusty, really dry foreign just blow drying some old bundles that I have y'all, don't judge this hair because I have used this so many times. I mean it still looks really great, but there's just glue all over it and it's just chopped up. But you know it's still really good for these type of hairstyles or even just a regular ponytail, because it's all chopped up. So I don't really have to worry about cutting it to my head, shape or ruining any like good hair. Okay. So now I'm just putting hair glue onto the hair and I am going to place it onto my head, like I was saying earlier about that u-shape. As you see, I'm not going from left to right, I'm kind of making a u-shape and the reason that I'm doing this is because at the end, it's going to help conceal the tracks better like. If I went from left to right - and you pulled my hair to the side, you would probably see where each track started versus this u-shape. Each weft is going to cover up the last weft um, just a little bit better and it's going to make it really hard to see the tracks and it just helps conceal each track like, as you see here, it's already covering up Each corner foreign. So now I'm going to go ahead and I'm going to cut the top of the wig cap. I wait until it's like halfway glued on so that the Gloom kind of holds it in place, but now I'm just going to remove it so that I can see a little bit better and know exactly where I'm placing each weft. So I'm just going to go back in with some gossipy glue and I spray a little bit more. Do the same blow drying thing again, I'm just doing this because when I cut the the wig cap in half it kind of it kind of pulled the wig cap a little bit down, and so my hair was kind of showing. So I'm just spraying more gossip glue to just protect it basically and then I'm just going to continue to go up my head. I know it's looking a little crazy right now. Y'All, but just just follow me just follow me um. I know my part is not completely straight, but I mean I really couldn't see the back of my head, so I did the best I could y'all, but yeah. I'M just gon na continue to place these tracks on my head foreign get out all right. So basically, I'm done with the bag, as you guys see, um I'm showing you now and it's pretty concealed from side to side, and when I lay my little and when I lay my hair on top of it, it's literally going to be seamless and so the Hair was a little bit wet still, so I'm just going in brushing it blow drying it. As you see, this hair is still in such good shape. Um it blow dried and straightened so good. I absolutely love it, but, as you guys see, it's laying so flat, so good um looks so realistic and it came out really all right. So now I'm just sectioning each part and straightening it. I probably should have did this first, you know just made sure the hair was blow dried and straightened, but I was being lazy, y'all, so yeah, I'm just about to straighten this hair out and you guys can watch me do that real quick foreign all right. So now we're gon na get on to the the hard part and I'm about to straighten my actual hair um, this just the hard part, because it's so time consuming but yeah. Basically, all I'm doing right now is just straightening. My hair, I added a little bit of oil and then, when I get to the front, you guys will see how I um lay it down a little bit better and then, if you guys are wondering this is the baby bliss flat iron um. I think it's. The one inch one, but I I absolutely love this flat iron. I got it as a gift and it works so good like as y'all see it is steaming. It gets hot foreign foreign foreign get out foreign once you feel, like you've, created a really good base or really good line across your head. Um just go ahead and straighten that hair that you want to cover up the track and then that's all I'm pretty much doing right now I mean I guess I didn't have to straighten it again, but I just wanted it to be extra flat. So I went ahead and did that anyways foreign foreign and then I'm gon na put some of my wax stick on it. Just so that my hair can kind of stick to the extensions and I don't have to worry about it like separating or I don't know it's just an extra layer just to make sure it's like laying flat and it's not going nowhere foreign right now, I'm just Trying to basically create a square, I feel like it's easier when you create a square and that's going to be your swoop, so everything I'm making in this little square is going to be my swoop and I'm going to just kind of part it away, which you'll See in a second thank you, so for me I just like making this little square because I know like it'll, be easier to pin up it'll be less hair to pin up so I won't have to use as much hairspray to try to like you know, mold Hairs because really I'm only molding a little bit of hair versus like swooping everything over and then trying to mold. All that, like it, just makes everything so much easier by just limiting the amount of hair that you're trying to swoop. I hope that makes sense so once you braid that little square away, You're, basically going to start um trying to brush your hair back foreign, the ponytail I like to do one side at a time. I feel like it's just easier to work with, so I'm going to go ahead and go in with that wax stick and the gots to be Gloom and then a hard brush, and I'm just going to do one side and then I'm just going to do one Side at a time, and then I'm gon na rubber band that side and then move on to the other side and then eventually I'll combine the two sides together. Thank you, foreign elephant, okay. So once you like how everything's looking and you've brushed all the hair back and it looks really Sleek um to your preference, um you're, just gon na tie that up and then we're gon na move on to that square that we put away earlier all right. So now I'm just unbraiding that piece and y'all as y'all see I'm trying to see how this swoop is gon na look and then I'm gon na straighten it because it kind of got a little. You know a little wrinkly or whatever from the braid. So I'm just straightening it out make sure making sure it's Sleek. I am going to add some little pieces to make it a little bit Fuller. So, basically all I did was I took a weft. I cut it up. I measured it to where I'm trying to place it and then I just added some glue to the track and then put it on my hair. So you might be wondering why am I not spraying got some glue there kind of as a barrier? I'M not really worried about it, just because I've done it so many times that I know like it's gon na slide out on its own, to be honest, um. I think it's just from all the oils and stuff I already have in my hair. So I'm not too too worried about it, but as y'all see it looks so good and that hair Blends so well, and so I'm just brushing it together and then be sure when you're gluing it to your hair, that you don't put it on your scalp. You want to put it a little bit below your scalp, so boom everything's looking cute and now we got ta move on to a little ponytail, so I'm gon na braid, my hair, but I'm not gon na braid, my hair, all the way down. I'M going to braid it like halfway down, because I feel like the more down you go when you're braiding the bulkier the ponytail is so I only go halfway because I don't want the ponytail to be bulky. I want it to be a little bit more natural. Looking because, if you think about it, the farther down you braid, your hair right is, that means the more weft and the more tracks you're gon na have to wrap around it, which equals less bulky um. But if you do want a thicker ponytail, though then definitely keep braiding down and it'll help your ponytail be thicker, but for this half up half down look I wasn't really focused on like a thick ponytail. I just wanted to look. You know blend in with the hair that I have at the bottom. Like I said earlier, this is some old hair, so it's already chopped up. Basically, so I just took each piece I added some glue on it and I started at the bottom of that. Braid trade on for the ponytail and I'm just wrapping up real quick. I forgot to mention my bad this. This is going real, fast um. I took some gossipy spray and then the remainder of that uh wig cap that I cut up. But if you want to use a different wig cap, that's fine. I just used a wig cap, I wrapped it around the hair and then I sprayed some guts to be glue and that's basically going to serve as a barrier from the glue same way. We did it kind of with like covering the braids up, it's the same thing, but just on the braid instead and then, as I'm wrapping up, I am going to be blow drying because it gets real sticky, like my hands, have glue all over it yeah. This part is a little bit messy. I don't know if it's just me but like the glue just gets everywhere, so just be real, careful wrap it around slowly. I know I'm kind of going fast, but I was in a little bit of a rush, so take y'all time wrap it up, wrap it all the way around for the best results and then, when you're completely done just blow dry it real quick. So this is kind of the fun part. Well I don't know I just like this part. You'Re gon na take a piece of hair from the bottom, make sure it's the bottom, not the top. I kind of messed up here but you'll see yeah. I grabbed a different piece: you need to grab it from the very bottom, it's very essential that you do that and you're going to take that hair spray, some gas to be glue on it and wrap that hair around the bands um of the ponytail and make Sure, when you're wrapping the hair, you're smoothing it out, you don't want that piece, you're wrapping to be like bundled up or anything. You want it to be completely smooth so that you can wrap and cover all those tracks really seamlessly so make sure you spread the hair like I'm doing and wrapping and each time you go around just keep adding some gossipy spray to it and keep going around. If you feel like you need to blow dry it at the moment, make sure you blow dry it, because that will help freeze it and then it'll help you be able to manipulate it a little bit better. So I'm just wrapping spraying and then you'll see me blow dry in a second all right. So, as y'all see that's a cute little band, I did it's covering everything: no tracks, no rubber bands, no hair ties. Everything looks really good all right so now. This is how it's looking straight, but I felt like you know I needed a little bump. I need a little bit of like a curl, so I'm going to go ahead and curl it, but, as you all see like, I love the density I did for this ponytail because it makes it look so much more natural. It doesn't look like you know. I added anything like it looks so good in my opinion, but yeah. So now I'm going to take my red curling iron. I don't know how how many inches this is. I think it's like an inch and a half barrel and then once I curl it, I'm just gon na clip it up to try to hold the curl but y'all. I was rushing a little bit when I was doing this, but I mean it still looks cute, but take your time and curl it a little bit better than I did foreign taking it out. As you guys see, the curls held for a little bit, but they kind of dropped, but I'm re-curling that bang piece, because I didn't like how that curl came out so yeah and for the bang I didn't cut it. I just pretty much tucked it behind my ears. I didn't even need a bobby pin it just laid real nice. You could add a little gossipy spray um a little gel if you want and boom you're good to go. But if you want to throw a little bobby pin in you can do that as well. I just didn't feel like it was necessary foreign but anyways. Thank you guys so much for watching. I hope this video was really helpful if it was go ahead and give this video a thumbs up and then I'll see you beautiful babes in the next one, don't be scared to try this hairstyle out. It'S really not that hard just take y'all time and you can do it.
Comments
DZB: Wow! The hair turns out amazing and you look stunning as always.
Yvette Hudson: Yesssss I loveeeee a good side swoop bang
Semaj: i’m loving this whole videooo☺️☺️☺️☺️
Aymen: It’s the Earrings for me
Yvette Hudson: First of all I know Mama did them good ass braids