Styling A Wig For A Bridesmaid, Bride Or Formal Event.
- Posted on 24 August, 2020
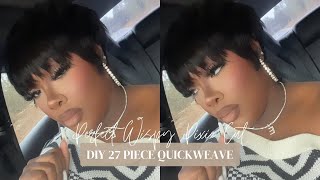
- T Part Wig
- By Anonymous
Wig : https://www.suziexo.com/product/nia/
They usually have 15%-25% off. Provide your e-mail address to get notified about sales.
Face shield from www.heroesshield.com
Hair attachment https://www.ebay.com/itm/100-Wrap-Mess...
Products used
- Biosilk Silk Therapy
- Tamanna 3 in 1 curling set
- Motions Foam styling lotion
- One n Only argan oil
My social media
Instagram: https://www.instagram.com/dextrose.ivy...
Facebook: https://www.facebook.com/quinprice
IG - @suziexo__
Welcome to being a bridesmaid in 2020, where you have to cover your face. Oh, my goodness, oh by the way i got this face, shield from heroshield.com and the shipping is really quick and it matters to me that they're black owned, so i'm gon na put a link in the description box, see how clear it is. No, they did not pay me to say so. Let'S talk about this wig that i styled with the bridesmaid in mind, and i need you guys to tell me in the comment section as a bridesmaid. Would you wear this and it's okay to be honest? Okay, you can be honest about it all right, let's get started, don't forget to like don't forget to comment and don't forget to subscribe. We are going to be using the nia wig from susiexo.com and i prefer this wig because it is an average density. So it is full, but it is not too full. It'S just full enough. The density is 200 grams, and this is a body wave. The wig is freshly washed, there's no product on it at this time and we're going to start with the part. The knots have already been bleached and the part has been kind of customized, i'm going to customize it. Some more. I'M going to use this serum that i used to straighten hair i'm going to put a link in the description box. Of course, i'm going to start by setting the part to be really flat with the curling iron and i like to apply my product with a makeup brush, because i don't like to get my fingers messy. So i just applied a product right there on the edges. I don't put it on the lace just at the roots, where the part is, and then i'm gon na use the curling iron i put it on the highest and the hair can resist, because it is really good hair and i use a comb to guide it. Where i want it to go, and then i use the hot iron to press on it to make it really really flat, so the iron is very hot, and it's supposed to spend more time on the hair than on the lace. Do not burn your lace. So when you do this process, the iron just glides over the lace and it spends more time on the hair so try to avoid the lace as much as possible, so it doesn't burn now we're going to get the hair with that spray bottle. It just has water in it and when you spray the hair, make sure it does not go to the top that you already did now. The top part has to stay dry. We don't want to mess it up with water, so apply water to the hair. Just so that it is slick when you try to pull it back and hold it in the ponytail okay. So some of you are learning from me, but i'm also here to learn from you when it comes to this style. If you have any recommendation as to what could help the hair stay down slick like really sleek and stay there without flyaways, i would like to know what you would recommend, because i was kind of reluctant to use gel on the wig. I know gel would be a good choice, but i don't know about applying gel on the wig, so i ended up using just mousse, but i had some flyaways, not too many, but not as many as i was comfortable with. So if you have a product that you would recommend that would prevent fly-aways for the style that would help it stay down really really solid and last through the whole night. You know how weddings are. If you know of such a product. I am open to welcoming that. Please leave a comment and let me know so. I want you to take note of the ponytail placement and also notice that i add water as i go and yeah i add mousse and i should have used more mousse, but i was running out and i was just i was just being cheap on this day. So i did not use a lot. You need to use a whole lot more than that, so i apply mousse and i want you to see the position of the ponytail. You see how i raise it up a little bit, so it is not all the way at the back of the head. Try to raise it off the nape of the neck by, like a few inches, see i'm trying to lift it up a little because you don't want it rubbing constantly to the back of your head. So i put it that's like maybe three inches higher than where the wig cap meets your neck at the back and if you've watched my other videos, you would notice that i like to use thread, because i find that thread holds a wig better in place than An elastic band, an elastic band, has this flexibility that does not really keep it solid in place. So when i want something to stay in place like a ponytail or whatever i always use thread, i just double it over a few times and then i wrap it like really really tight and then i do like a double knot when i'm done, sometimes on top Of the thread, i can add a few elastic bands. I actually recommend it. You should, because this is a wig you're going to do a lot of activity in you're, probably going to be dancing you're gon na be taking photos. I know bridesmaids, sometimes they're really busy. So we're gon na need that wig to stay in place all night see how natural that ponytail looks. Look at the density! That'S why i really love it for this look and um again, that's just water, i'm using and we're going to form curls at the back, and i really recommend this length as well, because the curls it produces are really tight. If you use hair that is longer than this, the problem you're going to face is your curls are going to fall. That'S mousse that i'm going to use. I think i ran out of the other bottle, but i really love this one. This is my favorite mousse because of the smell it smells so so good it actually smells yummy and for this look, you're going to need a lot of mousse, so apply the mousse generously. Okay, don't be cheap. Like me now, here come the flexi rods as for size go for the smallest. You have the smaller the curls, the more they're going to really last long and stand out and form at the back like a ball because well that's the look. We'Re going for so use the smaller size, flexi rods, i don't know what size this is, i'm sure, just by looking, you can probably tell, and if you need details on how to use a fluxy rod, i have a whole video with details showing you how to Use a flexi front and get the best curls and what direction to twist it and how to wrap the hair around it. I have another video to that effect. If you just look through my other youtube videos, and for this, it's really important that you use very small portions of hair. If the hair portions you use are too big, it's going to take forever to dry now, first of all, i'm using small portions and it still took a really long time to dry. It is summer, so i put it out in the sun. But if you do this in the winter and you cut your hair too big, it's going to be days and it's still going to be wet so in the winter. My shortcut is that i put it over the air vents. The air vents that palms hot air into the house and it dries faster. So this is how it looks when you're done and let the drying begin actually use the hood dryer to help out to make it go faster. Now that it's all done, we are going to take off the flexi rods. You see those flyaways, i told you about they're starting but um, oh well. It is what it is. This is just an example. This is just a demo, so we're going to take this off and you're going to notice how tight the curls are. I will not recommend using the curling rod to make these curls, because i feel like they're, just not going to be tight enough. I feel like they're, going to fall like they're, going to be affected by gravity, but these ones are really tight, like you see how they recoil, even when i straighten them. If you do that, with um curling iron curls they're going to fall they're going to hang low, so i'm going to separate the curls using argan oil. That'S my favorite! I'M going to put it down in the description box and i'm just going to go ahead and separate the curls. So how i do this is, i pick up a portion of the hair that was wrapped around the flexi rod and i apply a little bit of oil on it, a little bit of argan oil and i separate that piece into several here's a close-up. So i pick up one and then i grasp like small portions of it, and then i wrap it around my finger and i let go get a small portion wrap around your finger. Let go just keep doing that and you're gon na do that to everything at the back everything that was curled, so just do it and try to make it as smooth as possible. I know i could do a better job than this, but i was just being lazy, so it looks okay at this point, but i need to add some accessories, so i got this from the beauty, supply store and um. I just decided to experiment with them. It is clams and i'm looking to add it - to increase the volume, because with special occasion here for me, is go big or go home, it's a special occasion. Okay, so you always have to really go big, and these are from the review supply store. They'Re, like a dollar, each they're really cheap, and i was looking to get a look like to add it at both sides. But i do not like the color. It does not really match with the human hair that i'm using. So it looks a little bit different. It looks a little bit off. It is black yeah, but that synthetic look is too present. So i'm not gon na use this one. You can check your local beauty supply stores and see what they have. I'M just looking to increase that ponytail at the back. So if it is just for a normal daily look, let's say it's just your birthday. I don't think you have to add these accessories, but, like i said, if it's a special location, like you know a wedding or an anniversary, i think you really have to add something to the back of it like that. Actually looks good, but i'm not feeling that color at all, it is showing some kind of separation. So this is another one that i got from ebay. I'M gon na put in the description, and i think i like it better. It'S like um, it's like a scrunchie and i'm just gon na fit it around, and i think this one is a way better match and it's not heavy at all. It'S not gon na pull your wig back, so we're going. I think we're gon na go with this one. I think the color matches a little bit better and trust me. Nobody is going to be looking at your ponytail that closely to notice that you have a tiny synthetic piece in there nobody's gon na. Look that closely. No one would even know and um i'm just experimenting with different looks, but i'm gon na go with this one and just to make things clear. The wig itself is 100 virgin hair and the attachment is a synthetic piece from ebay just to clear that up now. It'S time to try it on, and i don't think i mentioned before, but this is a lace closure wig. I try to stick with lace closure weeks, because more people are comfortable with it. I am having trouble just picturing a situation where all the bridesmaids in the bridal party are okay wearing a frontal, so i kept it to a closure wig. So it is a lace, closure wig. Now i'm going to um i'm going to slick down some baby hairs later in the video, and i just wanted known that it is my real baby hairs that i used, because since it is not a frontal, you can't really do baby hairs on the sides of It unless someone has a method they use and also about those flyaways, i used pump it up the pump it up spray to help with the flyaways so yeah. I do the baby hairs at the front. The baby hairs at the front are from the wig, but the baby hairs at the sides are my real baby hairs which i do not have a lot of, but i managed with what i had and as always, baby hairs are optional. Baby hairs are always optional. I just decided to do it for myself and i sleep down my baby hairs using the got to be gel in a black container, that's just another accessory that i use and always attach it with clamps. You see that clamp, i'm trying to open and close it and make sure it's. This very small size see it's hard to even hold, because it's so small, so when putting ornaments on a wig always use clamps. That'S just another piece from ebay that i was playing around with, and i don't know where i was going with that, but it did not turn out well juices. You

Comments
Amina Kandulu: Thank you. Detailed tutorial
Rkeit002: Wax should help everything stick
Omowunmi Adediran: Spritz works well
Joyce Addai: Wow