Easy Space Buns Tutorial | Cheap & Easy Hairstyle
- Posted on 12 January, 2023
- T Part Wig
- By Anonymous
Y'all I finally did this style and it came out superrrrr cute Let me know what y'all think and other styles I should do. Don't forget to like, comment and subscribe! Also, turn on your post notification bell so you won't miss the next drop!
#spacebuns #hairtutorial #sleekponytails #easyhairstyle
✨PRODUCTS USED:
**Can be found here:
~EBIN EDGE TAMER
~EBIN ADHESIVE SPRAY (BLACK CAN)
~SANEX STRIP
~MODEL MODEL DEEP WAVE 24"
~SMALL BLACK RUBBERBANDS
~HAIR PINS
✨OTHER VIDEOS YOU MAY LIKE:
✨KEEP IN TOUCH:
TikTok: https://www.tiktok.com/@teaunca
Instagram: https://www.instagram.com/t.e.a.u.n.c....
Twitter: https://twitter.com/Teaunca
✨Business/UGC Collabs:
XOXO,
Teaunca
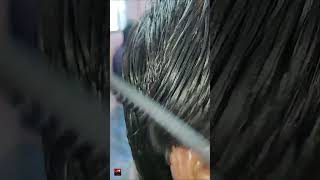
I'M really feeling myself right now. The baby hair is definitely didn't cooperate, but they came together. Hey y'all, welcome or welcome back to my channel, I'm tianka, and if you like, all things, lifestyle, Beauty and doing things yourself, you might as well go ahead and hit the Subscribe button and join the family. Today in this video, we are going to be doing. This. Look the space buns I've been wanting this hairstyle for so long y'all. I just been lazy and trying to be a wig influencer. I'Ve been wearing wigs lately, but I definitely want to get back into doing my own hair in regards to these type of styles. My Locs or silk presses whatever, but today we finally did the space buns and I'm so excited, I'm so happy with how it came out, I'm very impressed, so I got y'all. I am going to be showing y'all how I got this look in this video okay, but yeah. Y'All just want to thank y'all for being here with me today and if you haven't already go ahead and hit the Subscribe button and the like button and definitely leave me some comments in the in the comment section below. Let'S have a little chitchat all right. All right, so we about to get into the video I'll, see y'all next clip all right y'all. So I done already washed blow dried and straightened my hair, and I got my sister to do a middle part and now that I'm looking at it on this camera, you don't really look straight, but y'all know how I am with these middle parts. I can never get them right, so we just going to leave it, how she is all right, so I'm gon na go ahead and get started just with one side and then do the other side. These are the products that I will be using. I'M going to be using some black rubber bands a coma brush. This is like one of them heat resistant, Combs, um, some hair pins, some San X strip, some even edge control. This is my favorite edge control and I'm going to be using their adhesive spray. Using these two for my ponytails instead of the wax and I got to be glue or they got to be sprayed um. I know this lays my hair down for effect, so I just want to try it with the adhesive spray. I hope it doesn't turn it white, but we gon na see together, y'all all right. So again, I do love this edge control. It is my favorite and I use that for my wigs, but those are the supplies, the main supplies and I'm about to show you the hair, all right y'all. So this is the hair. I'M using model model deep wave 24 inch in the color of one. It was 10.99 a pack and you can actually I don't know it is or straighten it up to 400 Degrees. I am going to work in sections your work instructions, so I'm gon na just start by parting, the back of my hair. Actually, let me see where I want them to go, because I want them to the back. I know that, but I know I don't want them like all the way down. I want them up a little bit, so I can have some little curlies hanging down. You know so I'm thinking right there will be cool all right, so I'm gon na Park this side into all right and we're gon na work on the back. First, let's get you out of the way so with the wax or the Murray's wax. You usually like melted a little bit and then put it on and then put the blow dryer. So I'm gon na do the same thing with the even I'm not going to melt it, but I am going to um, take a look, live out and just start molding up on yourself all right. So all right, let me see, let me see, let me see, make sure I'm in frame y'all all right. So when I was straightening my hair, I really paid more attention to the perimeter because I don't want nothing curling up, you know in the bed yeah cause. I got I got that my hair, not nappy, but I'm lying. My hair will definitely get nappy. It'S not like my daughter's hair, where it would look super matted, but it's not here is so soft but yeah y'all. I like to use the comb first and then go in with the brush, but you just put your um edge control or your wax on whichever one you decide to choose and you start to mold your ponytail and I really hope I am not messing up. My part Joy because I can't see in the back, like I said, I'm just molding my ponytail and I'm going to put a rubber band in it. So I put the ponytail in and I'm just going back and just flattening out the ponytail, I'm going to take the hard brush now and brush it into place even more before we blow dry all right, so I got it to where I wanted to be. I'M going to spray it. I really hope this doesn't turn white, but we're going to spray and comb that in all right and you want to hold it where you want it to be it'll. Be this part right here that I could never get like it? No matter how straight it is, it just won't go up in the ponytail right too short or whatever I'm sick of this blow dryer y'all every time I use it and then go to turn it off and then try to turn it back on. It won't turn on, but it's not broke right. It probably is we had this for years. I got it. Working y'all I'ma blow dry. This little part right here, the little BB's on cool, so I can stay in place and then we're going to secure it with everybody all right y'all. So I think it's as dry as it's gon na get for now. I'M gon na go ahead and secure it with rubber bands and then we're going to move on to the top and bringing that down all right. We'Re going to combine the top with the big and I'm gon na. Take my baby hair out um. I don't know where I want them. It'S long all right. I really don't know where I want my baby hair, so I'ma just part a line going down and whatever I don't use I'll just you know, call me back up into the ponytail. Let me get some baby here, oh and I like to just take some edge control, put it on the baby here, so I could lay it down and keep it out of the way dissectic. I really don't be having baby hair I'll be having full grown hairs. Look how long that is. So that's what we're going to do there and now for this. I'M going to part this in two and do the same thing: we're just working in sections here, y'all, it's easier, especially if you have thicker hair you're going to have to work in sections. If you want a Sleek looking Little Pony or space buns, whatever all right. So now I'm gon na just mold this into place all right, and let me try just to spray yeah, I'm gon na just try to spray, and then I'm gon na get the comb hold it in place and blow dry. Oh, it came right on this time. Okay, so yeah, I'm just going to use the spray, I'm not going to use the eBay y'all, see how that's molding into place I'll be getting excited when my little hairstyles come out right that I do myself, you know hey so now we're gon na mold that In there again well put that in there put the same ponytail, and here they go again. I should have gives you a spray deck there. All right, I'm gon na, go back in and fix that a little later, but we gon na come to the top, because this hairstyle is like literally super easy super quick um and not to mention cute right. So we are going to put her back, or should I put her down to the side, like I told y'all before I hate that I hate that look. Let'S just move her back yeah she's, going back all right hold up hold up hold up; okay, okay! For her, where she need to be my little baby hairs out, you want to make sure you get this part here too. I'M gon na start right there with the spray combat and brush it in foreign. Okay, so y'all see how that's in place and that's lifting up that's kind of in place. That'S what I wanted to get all right. So now we're going to do the same thing. Y'All, it's literally spray mold blow dry. It'S literally the same process. You parch it here, you mold it into the pony, set, well form it into the ponytail. You spray your spray or use your wax, and then you mold it into place with the blow dryer. Then you go back in with your little baby hairs. You know Spruce it up how you want it and you want to make sure that you are combing whatever product you put in your hair combing it all the way through, so it won't leave any white residue on your ponies right. I don't know why. I just keep going in there, wait you damn all right keep moving, and this is the front, so you definitely want to like take your time, although this is a quick style, you still want to take your time. So it'll look great. No, let me just get this front a little extra care, because this is only staying in for a week or so not even a full week. Look at that yo, it's so flat! I am liking it. I just don't like this part here I don't know. What'S going on right there, but she wasn't. Currently, there was like she was curling up, but no, we just want to spray a little bit more product on it. Brush it to prove pull it back holds it. This side is almost done more than the base of the space bun or pony whichever one y'all doing. Let me know in the comments: if you're going to be doing some space funds like me or if you're going to be doing like a ponytail but there's two ponytails one ponytail I'd be scared to try different styles y'all. I really do but space buns is something that I did before and I'm scared of color. I'M scared of different styles, like I want to do that. Barbie ponytail. I think it's called where little bangs and then I got like a little flip Pony and then I also want to do a little half pony, not a half ponytail um, a five ponytail. I don't know what they call y'all, I'm yeah. I don't know what they're called. I just know it when I see it, that's what I want. I'M gon na go ahead and do the other side really quick and it's literally the same process I'm going to pour it into mold. The back part. The front part for the front. Okay, let me stop what I'm trying to say. What am I trying to say? I'M going to part this in two all right, the back calf. I am going to mold that fit in the ponytail, the top I'm going to do. The same thing I did on this side, so this side part the top part and two mold that part back and then move the front and, of course, lay the baby ears. But I think that's probably my favorite part doing my baby hairs when they want to cover operate because sometimes they don't. So let me go ahead and just get started, and these two little sections here do not have to be perfect. You could have more in the back than the front. It all depends on how you feel and comfortability when it comes to molding a certain section. So if you're not um experienced or you feel as though you're not going to be able to do it with a large section, just start with smaller sections and my hair is getting its thickness back. But I don't really have to do too many seconds because it's not as thick as it was but, like I say, if it's thick do as many sections as you possibly can so I'm gon na put this in the ponytail first see where they at make sure They are same size and I'm gon na spray, I'm not going to use the edge control and I'm just spray this they got to be. I mean the even like I said, I'm not going to use any more of the edge control to make the extra ponytail. Let'S just do this see how it lasts, because you might not even need the wax I'm trying to see what is the waxable if the spray hose it down. Just with the spray foreign I invested into my little YouTube channel, I can't wait for my little other item to get here, because this whole phone situation is not cutting it, but y'all, please I don't know I can never. I don't know what's wrong with me. I can never get a middle part. I can never get a top knot in the middle. I can never get the ponytails to be the same. One be up here. I really don't know, and then it's like by the time the hair is done. I ain't going back to fix it; they just won't have to stay how it is, but the back of this side is molded we're going to go ahead and move to the top this phone, I'm about to throw it all right on this side. I didn't get this little area like I did on the other side, so we just want to go back over it. It'S okay, it's okay! It'S okay! This! This hairstyle will usually take about 20 30 minutes after your hair is already pressed and everything. But it's taking me forever because I'm trying to show you all the deeps and everything with my phone. It'S not cooperating! It'S really not cooperating, but I'm gon na just go ahead and hurry up and blow dry this part and I'm gon na come back in. Do the top there we go I'm at the top and I'm just parting, my baby here for this side, this side of my baby hair is much shorter than the other side, like a lot shorter. So now we at the top and I'm just gon na - do the same thing. Yo same process mold this to where you want it. I don't know when you can let go and it's still like as an appointment. So that's how you know it's okay, to go ahead and turn the blue dryer off all right that don't feel like it's on the same side as the other one. It don't look symmetrical. It doesn't look symmetrical to me y'all. Let'S see um, oh no! Okay! So that's oh y'all, see that I don't like this. Don'T do this little Edge part again, like the other side, foreign X strip, y'all thought this was on the ponytail part right. No, oh definitely talk is that's for me. The talking mess, that's exactly what I did. These Jaws always rent. Let'S put another book, it's okay, it's okay! We gon na get it okay. Here we go all right all right. Boom baby, I just gon na be late. Ponytails gon na be on squeaky yeah. All right, so I got ta rub it in here from all right. So, like I said this is not staying in long, so I'm not putting any glue or xanax strip around my hair. I am just going to actually I'm gon na just ponytail this I'm gon na put this little. I'M gon na put this in a bun and just do like a weave ponytail, because I'm doing space buns so it'll be fine yeah. This is definitely further back. I feel like because I'm turning too much okay and listen - I always tell y'all, I take care of my kids here. Not mine, it'll be okay, because I'm not breaking it down. No ma'am! You owe near all right. So now I am just going to Bun It Up another little rubber band. Maybe I should have brought them down a little bit because that look a little a little high now that I think about it. Let'S hope this one ain't, the same one foreign. So now let's get our hair and we're just going to put it in our hair. Just like a simple weave: ponytail, no glue, no extra sand next strip um. I don't have time, even though the glue it does all right now when it comes to the ponytails and using the sand, extract and the glue. I don't know if I'll be doing it wrong or not, but sometimes some glue still get on the hair and it's not a lot. But it's still something where you got to take your time and comb it out or rinse it out. But the conditioner just said, and I'm trying to get these videos out back to back to back to back right. So I really don't have time to be waiting for no glue to loosen up. Even if it's just a little bit, I told you all the time. I'M lazy all right guys, all right, so we're gon na make this easier on us and, let me see, do I want the whole thing in here: yeah we just gon na. Do the whole thing all right, so we come just like this to make it easier on us we're going to double it, get a hairpin! Stick it through both wefts of the open side right there. We have it and when you go around your ponytail, you want to start in the middle of your bun bun. Well, at least that's where I start and I put the gear pen upwards. I know you're just going around and you want to put hair pins and you know when necessary and I am pulling the um they weave, hair around tight. They just keep wrapping around until you get all the way up to the base, but I've been wanting this hairstyle for so long like, and I don't. I don't know why I never did it. I know why I didn't want to do my hair, because I wanted to keep installing wigs, but that's not so that's you know too much of something is, is never good, so we're gon na take a break from the little wigs right for like a week or Two - and I think I want some - I know I want some locks. I want another Little ponytail Style, I don't want. I want braids, but I don't want braids. I feel like it's just too much of a commitment and it's the same with the locks too, but I don't know like I ain't gon na sit all that long time and then take them out within a week. No right, you can't do that. You can't do that that'll be pointless, real, pointless, okay! So now I'm going to take this and I'm going to basically open it like that right. Take a rubber band can't get too okay put that on there, so it should be looking like this. You got some up top and some end of the bottom. So now you just want to see, that's not tight. I need that to be tight. I know that yeah all right so now you just want to take your extra hair and just wrap it around. You can go forward or backwards. You can take one and wrap. It, however, way you want for referral, so I am going to rip it big to the front. Got your little rubber band, all right, it's literally just wrapped around any which way. Then you just take a bunch of hair pins. You stick them in every which way it was a little inclusive, though all right, so I put some little pieces out y'all and I think I look real cute what's going on here. We just want to take you up foreign all right that looks so cute yeah why'd. You not do my little makeup and put a little lash on y'all ain't. Gon na be able to tell me nothing. Little quick, 10 20 hairstyles be looking bomb all right, y'all! I'M about to get into the side and y'all know I love a hoop. Let me lay my baby ears. Wait up. Let me do this, I'm getting oh hi, I love when they come out the way I want it too, young all right. So we gon na get into the next side. Um look y'all! Look at my little space, I'm so hyped! I'Ve been wanting this hairstyle for a long time, but let's get into these baby here, foreign! That'S as good as it's gon na have to get all right. Y'All, so this is the final look she's, nice and messy, and I love it. I kept my same shirt on. I just put some hoops on the face on really quick but which are big. Let me know in the comments. I really I'm really feeling myself right now. The baby hair is definitely didn't cooperate, but they came together. The whole look came together, but I love it y'all. I love it. Leave me some hairstyles in the comments below which I want to see me, do um see if I can find like an easy way to do any kind of style that y'all got for me. I feel really pretty. I really do it's like, though I was like no but y'all look. This was what twenty dollars. I think I already had all the other stuff. I had to go. Get the hair 10.99 22 for this style. You can't beat that it's nice and cute simple. Could last you a good two weeks if you know how to lay your baby here and you know, take care of the outer areas, these they messy they're supposed to be messy, so the older they get the better. They look um, but yeah y'all thank y'all for watching, don't forget to like comment, share and subscribe and tell a friend to tell a friend to come on and join the family join the family. Our numbers they're like slow down a bit, and I don't I don't know what's that about. I don't know what that's about. Maybe y'all missing me and I'm not posting enough. That'S what it is. Yeah, that's what it is. So yeah me, coming back to back with the content, definitely drop me some comments in the comment section below. Let me know how I did how I achieved this. Look. I'Ve been wanting this hairstyle for the longest for the longest and I finally got up and did it. I wasn't lazy today and I'm proud of myself.


Comments
Keeping Up with Short Girl Bella: Ouuu your hair is nice and I love your background Room cute