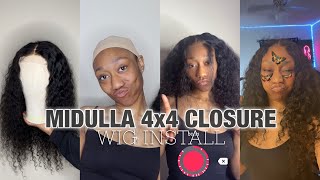
Glueless 4X4 Hd Lace Closure Synthetic Wig Install | Using Beauty Supply Hair Under $40
- Posted on 25 March, 2022
- T Part Wig
- By Anonymous
THANK YOU FOR WATCHING !!
I slayed this affordable 4x4 closure wig install using beauty supply hair. You can never go wrong with beauty on a budget! This is a beginner friendly 4x4 closure wig install.
#4x4closurewiginstall #HdLaceSyntheticWigInstall
#GluelessLaceClosureWigInstall #BeginnerFriendlyGluelessWigInstall #SyntheticLaceWigInstall #BeginnerFriendlyClosureWigInstall
**This is NOT human hair**
Hair Details:
Brand - KIMA Signature
(1 Pack Solution)
Color - 1B
Length - 18" + 20" + 22" + HD Closure
Cost: $29.99
**Bought @ Local Beauty Supply Store**
Products used:
-Ebin Wonder Lace Bond Adhesive Spray (Extreme Firm Hold)
-Sally Hansen Airbrush Legs (Medium Glow)
*Used to tint lace*
-Maybelline Fit Me Matte + Poreless Pressed Face Powder, Toffee (330)
*Used to conceal part*
Link:
(Electric Hot Comb) https://www.amazon.com/dp/B001BODO2A/r...
Be sure to follow me on my social media and my business pages
**I make custom made wigs, email me if you want a wig made** (Shipping in the US ONLY)
IG: @ iamjustjocelyn
Business IG: @ jocelyns.wig.vault (Custom Wig Service COMING SOON)
Tik Tok (business): jocelynswigvault
Tik Tok (personal): jocelyn844
Hi guys, so this is my quick weave wig. As you can see, this is the inside of the clap and the glue is completely dry, and this is the 4x4 hd lace and i'm just going to jump right into this video and i'm just going to put this wig right on and initially it just looks. So good like i went in, and i tinted the lace beforehand and by doing that, i went in with my airbrush leg spray and i believe it was in the medium glow and i can just really brush through this hair. It'S so nice and just look at this lace like it's so beautiful and now i am just going to go in and part my hair before i do anything. I thought i wanted a middle part at first, but i decided that i wanted to go in with a side part. So that is what i am doing right here now. You may notice that i am doing my side part with like kind of like a curve, and i'm doing it this way, because i am working with a closure and i do want it to look as natural as possible, so i wouldn't want to do it straight Back like i would on a frontal, so it's just kind of give it like almost like a frontal effect, and i think you'll definitely see what i mean by the end of the video. But this is definitely how i prefer to do it, and now i am going to go in with my mousse, and this is just so um. I could lay my hair down flat and have that part to set in place and also have no stray hairs. Now i'm definitely a perfectionist when it comes to my parting, so i just went in and cleaned up the part just a little bit more to my liking, and then i was pretty much all set and now i am going to get into cutting the tabs off This lace - and this is what is going to make or break um your lace, because you want it to be like flat and as natural as possible and having those tabs on. There are really not going to help you and i try to like cut them off. The best way i can without cutting off the lace or the hair, so this is the way i do it, so i just want to show you guys this part, because i know a lot of people have a lot of trouble when it comes to cutting off This part, so i definitely suggest always using small scissors and normally i just take this out of my nail kit from when i'm doing my nails so yeah. Now i'm going to go in with my oven, lace, spray, and i'm just going to put this all on my lace directly and dually note. This is where i made my mistake and granted you are going to make mistakes when installing your wig, i had put my lace down too low and eventually, in the video later on you're going to see, i had to post my legs back and fix it off. Camera, but the steps are still the same, so i still showed you guys this part, but yeah, i'm pretty much going in with my oven, lace, spray and i'm just putting that in and spraying it and also like pushing it in and rubbing it in with my Finger just so it gets all up in there and then i'm going to go in with my edge brush, and this is just so. I can brush the hairs um out the way so when it gets time to blow drying i'll be all set. So now i'm gon na go in and take my elastic band and i'm going to tie this down and while i'm tying it down, i'm also going to go in and blow dry it. So this is going to take me some time. I'M not going to you know, be repetitive and show you guys this entire step, because i know that would be very annoying but note that when you are blow drying your lace, you also do want to blow dry it on cool for the best results. Now i'm going to unravel and take off my elastic band and what you see there is the residue from my makeup um. It was a really bad idea that i had put on my makeup beforehand, but now i'm just gon na go in and cut off this lace and kind of like a jagged motion um with my scissors and it my lace didn't really dry all the way. So i am going to have to go back in with my spray and lay it down, but either way i had to redo my lace. So it's fine! So now i'm going to take the end of my edge control and i'm going to use the rat tail end and take my ebb and lace spray and i'm just going to apply it directly on where the lace is lifting. And then i am going to go in and blow dry it and that way the lace is going to hold into place, because i'm really not entirely sure why it didn't dry, the proper way, the first time but yeah, so sometimes you're going to have to do This, if i did this with glue, this wouldn't have happened, but you know sometimes working with the spray. It doesn't always dry properly. The first time i don't know, that's just me and my experience, but other than that it's actually really good and yeah. Okay. So now that i have the lace in place, i am going to go ahead with a alcohol wipe and i'm going to rub that excess spray off my forehead, because it did entirely make a mess, and even though i am wiping off the rest of my makeup, I will go in and fix that later. It is not of importance right now, so yeah. So now you know what the install process is like. I did go back and off camera. I fixed my lace and now you can see it's so much better placement wise and i had pushed it back more because it was just too low, and i think that was because i was working from watching on my camera angle. Instead of working with a mirror - and oh my god, so now, i'm just going to go in with my mousse and push my hair back and just begin um cleaning up my hairline, because i have our mapping tight as oh, okay, real tight, because i wanted this Lace to just stay down in place without me, having to you know, do everything all over again, because i already had to just look back so i'm just doing that and pretty much just getting it to my liking. So now that my hair is in place the way i want it and it's set with the mousse, i am gon na go in with my electric hot comb, and this is just so. The hair at the top can lay as flat as possible, and this also gives it like that. Nice sleek shine, finishing look, and i just love that look, especially when i'm working with straight hair. Just so, it can look as straight in me as possible and i'm just going to run it through like a few times, and it's just looking so nice already and i put mine on like the highest setting. I put mine on about 20. i'll link where i got this hot comb from i got it from amazon. I believe it was like only like twenty dollars, so it was really good, and now i'm going to run my hot comb over this hair, real quick. It really didn't need to be hot comb that much because, like straight out the package, this hair was just so sleek, so shiny so straight, and i really didn't really need to have much done to it, but i just went over it with the flat iron. So it's just as neat as possible, so this is the final look, and i am so obsessed with this and the fact that i only spend 40 dollars well technically, i really spend 40 dollars because for some reason they didn't really stock my card, so i worked Out rabbits but yeah um, this hair, i love it, it's so soft and natural and honestly it does go past, like my boobs, so i'm gon na stand up um. So it is that long and i love the feathered ends like the ends. Look so natural. I didn't have to do anything to this hair at all. I did like pluck the hairline like just a little bit, so it was just like a little bit more natural, but i definitely love the fact that this is hd lace and you know good quality, synthetic hair um, because this is human blend. You know it works and honestly you can make it last as long as you want it's just honestly, just taking care of it and i'm not going to wear this like all day long. I did want to go out today, so i do plan on running my earrings, but i do really love how this came out. I haven't had straight hair in a long time, so i was so glad i got to do this quickly. Wig, if you guys are definitely interested, i will definitely be doing like a tutorial later on on how to achieve a quick weave in 30 minutes and yeah. I definitely loved it. This install it was like kind of complicated because you know i'm a little rusty and i had to go back and fix it because i had it entirely too low. I i had looked back at the footage because i was just like recording on my phone and not using the mirror and i wasn't paying attention and i had it entirely too low. I was like, oh no, no, no we're not doing that. So i had to go back and i fixed it and now i love it and it looks so cute and just look at that natural shine and just look at that movement like it's not stiff at all, and i can literally just run my hands through this. I did get the um um, which budget i believe it was 18 20 and 22 inch, and then it came with a 4x4 hd closer. I will be linking the hair that i got um down below because i do believe they sell it online, but i got mine from the beauty supply store man, i'm out of bathroom um, but yeah. And if i sound weird, it's because, like my allergies, are really kicking my butt it's hours this season and it's not fun, but this is the final look and i hope you guys enjoyed this video. I know i've been gone. A long time definitely comment down below other videos that you want to see if you guys definitely love um, more wig tutorials. Definitely let me know that down below in the comments - and i will definitely see you guys in the next video but before we go, you already know the video don't forget to like comment subscribe and i will definitely see you guys in the next video. So

Comments
Nyla Grace: I love videos like this