How To Properly Sew Down A Lace Closure On A Wig Cap
- Posted on 13 January, 2023
- T Part Wig
- By Anonymous
In today's video, I will be showing you a beginner-friendly tutorial on How To Properly Sew Down A Lace Closure On A Wig Cap!
Please don't forget to give the video a big thumbs up if you find it helpful.
THANKS FOR WATCHING!
✨IG: https://instagram.com/vivianbeautyands...
✨ Email: [email protected] (For business inquiries)
✨ Based in Abu Dhabi (UAE)
✨ My second channel https://youtube.com/c/StylebyViv (Sewing channel)
How To Make: Half Up Half Down Crochet Wig Using Braiding Hair | DIY https://youtu.be/jZKrtAEhsgw
Prepping For A Crochet Wig: Drawing the hairline | Hair Cutting Hooks & More https://youtu.be/9lSJkQGq3yE
HOW-TO: Installing A Lace Front Crochet Wig | Straight Red Hair https://youtu.be/3RywJfRWrUY
Where I purchase my materials/tools (Aliepxpress Links )
Wig mannequin head https://s.click.aliexpress.com/e/_DBvy...
Adjustable Wig Stand https://s.click.aliexpress.com/e/_DmvX...
✨SWISS LACE NET FOR WIG MAKING✨
1/4 Yard Swiss Lace For Wig Making https://s.click.aliexpress.com/e/_DFsm...
Closure/Frontal Lace (4x4'' 13x4'' 2x4'' 2x6 and more) https://s.click.aliexpress.com/e/_DdhI...
3 Pcs Pin ventilating needle https://s.click.aliexpress.com/e/_DnBt...
Small/ Tiny Latch Hook https://s.click.aliexpress.com/e/_Dkjq...
✨✨WIG COMBS✨✨
5 Colors lace Wig clips Steel Tooth https://s.click.aliexpress.com/e/_DkiK...
✨✨CAPS✨✨
Mesh Dome Caps (Small-Large Size) https://s.click.aliexpress.com/e/_DFnG...
Spandex Dome Cap (Small-Large Size) https://s.click.aliexpress.com/e/_Dnaj...
Thick Mesh Dome Cap (Net Free Size) https://s.click.aliexpress.com/e/_DFRj...
Elastic Band https://s.click.aliexpress.com/e/_DFrJ...
AMAZON LINKS
Swiss Lace For Wig Making https://amzn.to/3tiErPJ
Small/ Tiny Latch Hook https://amzn.to/38U5Kc2
4 Pcs Pin ventilating needle https://amzn.to/3tk64Yz
Spandex Dome cap & Mesh Caps For Wigs Making (Small-Large Size) https://amzn.to/3NYCxLU
Black Elastic Band For Wigs https://amzn.to/3NpendS
#learnhowtomake #4x4laceclosurewigtutorial #curlylaceclosure
#beginnerfriendly #wigmaking #easywigmaking
This video is not sponsored. The links above are affiliate links, which means I'll make a small commission if you make a purchase using any of these links
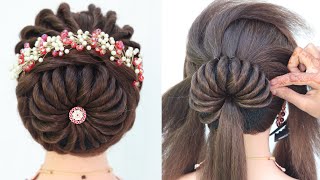
Hello guys and happy happy New Year to you all. I hope you all had a wonderful celebration and welcome to my very first video of the year 2023., if you're new to my channel you're welcome so in today's video, I'm going to be showing you how to properly sew down your lace closure to your weak cap. So this is very beginner friendly, so keep watching pay attention all right. So you want to start by pinning your black cap to your mannequin head. So next grab your lace, closure and place it where you want it to sit. So if you want to see it in the middle side, go ahead and place it where you want it so the next step you want to make sure to pull the lace forward. So that way, the hairline on the lace is a little bit away from the edge of the black cap, I'm gon na zoom in so that way you guys can see it so take your lace, closure place it where you want it to sit and Pull It Forward the hairline on the lace forward a little bit just away from the edge of the black cap, as you can see right here, okay, so hold that down, Pull It flat. Okay and next pin the ends of the lace in place right there take another pin and pin the lace to the edge of the black cap, now repeat the same thing on the other side of the lace. So this time you want to pull it towards you. So that way, that part will lace flat across the forehead. You want to make sure to pull it towards you to make sure that the the hairline is laying flat across the forehead of the mannequin. So now take your pin and repeat the same thing: first pin the end of the lace in place now take another pin and pin the edge, pin the lace and the edge of the black cap in place. Okay, so once that is done, you need to take another pain, so this time you're going to be placing it at the center point of the lace at the front, pulling it a little bit so make sure you have a little bit of the hair. The hairline hanging over the edge of the black cap so once that is done, go ahead and take another pin. Now you want to place this one make sure to to um to pull on the lace to make sure it's laying flat on the cap so now place a paint at the curvy point of the lace closure. Okay, now repeat the same thing on the other side, so once that is done, go ahead and pull the hairs into a ponytail or Puff work just to get it out of the way. Take another paint and place it at the back or the crumb part of the lace to secure it in place. So moving on to the next step, take your needle and thread go ahead and thread your needle and tie a knot at the end of the thread. So once that is done, take a needle and pass it through the black cap making sure to pass it through the elastic band on the black cap and through the edge of the lace. So, as you can see right here, okay, pull it through to secure the trade in place. So now again take your needle pass it through the black cap, the elastic band and the lace. So you want to secure the lace to the elastic band. Okay, pass it through just like that, now to secure it or to tie the knot, you want to pass the needle through the loop once you pass, the needle through the loop pull on the thread to secure it in place, so that will will tie the knot And make sure to pull it towards you and when pulling you want to make sure to place your thumb on that particular point to prevent excess um stress on the lace so again pass the needle through the loop and pull to tie a knot. We want to secure the lace to the edge of the black cap, as you can see right there. So once that is secured in place, you can go ahead and sew down the rest of the lace. Okay, so quick tip when pulling out when walking on the side of the lace when pulling on the tray to secure it in place, don't pull it upward instead pull it towards you. So just pull it a little bit towards you. This will help to ensure that the lace is laying flat on the mannequin head. So foreign securing the thread in place place your thumb right at that point and pull it towards you. Do not pull it up, pull it towards you to help pull the lace. A little bit tight on the mannequin, this will help to lay. This will help the lace to lay flat so moving on to the crown part of the lace this time around you're going to be pulling it towards the right, if you're walking on the right side or pull it towards the left. If you're walking on the left side of the cap, so as you can see right here, I'm passing the needle through the cap right there. So now again, I'm placing my finger right at that point as I'm pulling on the thread. At the same time, I'm pulling it towards the right, because I'm currently currently walking on the right side of the um of the lace, I'm going to show you in a second placing my finger on top and I'm pulling it towards the right. So, as you can see right there, it helps the lace at the crown to lay flat onto the mannequin head, so you this prevents any bumps on bumps. When sewing the lace to the cap, you want to make sure when walking on the crown part of the legs of the lace, you want to pull it towards the right when securing the thread in place, if you're walking on the right side or towards the left. If you're walking on the left side so go ahead and stop at the middle point of the crown area and cut the thread, don't cut it too short. So now you need to repeat the same thing on the other side of the lace. First start by securing the edge of the black cap and the lace in place. Thank you so real quick. If you're standing in front of the mannequin head, then you need to pull the thread downward to the side. So, on the previous clip I was standing on. The side of the mannequin, so that was the reason why I said: pull it towards you. So if you're standing on the side of the to the side of the mannequin, then you need to pull it towards you. If you're standing in front of the mannequin, then you need to pull it downward to the side of the mannequin. So, just like I'm doing in this video so right here, I just switched to the side of the mannequin, and now I'm pulling the thread towards me. As you can see, right here, so go ahead and repeat the same thing make sure to sew through the elastic band, to secure it, uh to secure the lace and the elastic band together. Foreign. So, like I said when you, when you get to the Quran of the lace on the cap, depending on the side, you are, you need to pull it towards the left or towards the right, depending on the side. You are walking on so down to the left. If you're on the left left side of the mannequin, sorry, if you're walking on the left side of the mannequin or down to the right, if you're walking on the right side of the mannequin at the crown area. So, as you can see in this video, so once you get to where you stop the other um trade, so go ahead and cut off the tread right there in the needle make sure not to cut it too short, because you need to tie both ends of The thread together to secure them in place so go ahead and tie a knot. You can tie two to three times depending on how secure you're wanting to be so once it's properly secured, you can go ahead and cut off the excess trade. So here's how it's looking so the next step now is to cut off the black cap under the lace foreign. So take your scissors and cut off the black cap under the lace. Careful gently cut around the edge of the um of the black cap, close to the lace, do not cut the lace, do not accidentally uh cut the lace, so pay attention to what you're doing and cut off the black cap. Just like that. So here you go and just place it on the mannequin. So that way you can see just like that perfect. So now you can go ahead and sew down your hair bundles to the black cap. So once you're done sewing down the um, the bundles in next step is to cut off the excess lace from the front of the wig. So right here cut it close to the hairline, but do not called too far. You don't want to cut the hairline, and so you just cut a little bit close, but not too far just cut off the excess lace. Again. Be gentle pay attention to what you're doing so. You don't accidentally cut into the hairline foreign on the lace closure as the final result so yeah. This is the final result right here. As always, if you find this video helpful, please give it a big thumbs up and also, if you're new to my Channel. Please go ahead and hit the Subscribe button down below. Thank you all so much for watching. Thank you all for subscribing and I'll see you all in my next one foreign


Comments
Monsie babe2: That was so easy to follow and so much better than my technique. Thanks for sharing will you be doing the bundles next ? I’ve been using the waterfall method. Each end of the row hides the one below because you sew the ends of the row in a slightly upward angle. I haven’t quite mastered it yet but I’m learning. Do you have any tips please?
Glotorial Extra: Nice video....thumbs up .
Nakiguli Hellen: Hi dear , thanks for the content Which type of hair is that?
Tevina Vintage: We’ve missed you on here. ❤
Melonie Smith: I made the 200 view, lol