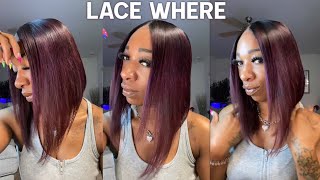
Part 2: How To Make A Side Part Wig + Style Baby Hairs On Wig!
- Posted on 25 May, 2020
- T Part Wig
- By Anonymous
This is part 2/2 video! Watch this full video to see how I make a side part wig and style baby hairs on a wig! Comment below what you think and comment what videos you’d like to see on my channel next! :)
THINGS YOU’LL NEED:
Closure
Bundles
Dome cap
Mannequin head
Needles
Thread
Scissors
Mousse/Styling foam
Hot comb
Silver pins
Combs
Instagram:
Business acct | https://www.instagram.com/slayedbyduca...
Person acct | https://www.instagram.com/felicia.duca...
Snap: felicia.ducasse
CLICK THE LINK BELOW TO WATCH MY LATEST VIDEOS & OTHER VIDEOS YOU MAY LOVE!⬇️⬇️⬇️
https://m.youtube.com/channel/UCRH3BNw...
Email: [email protected]
LIKE, COMMENT, & SUBSCRIBE!
Comment below videos you’d like to see next!
#feliciaducasse #sidepartwig #babyhairs #slayedbyducasse #hdlace #hdclosure #wig
Welcome back to my youtube channel today, I will be showing you guys how to make a side part closure rate using this closure that I'm showing you guys now it's a 5 by 5 HD closure and it's 16 inches. This video is part 2 of the first video I made, showing you guys kind of plucked in Bleach enclosure, I'm using the same closure that I used in part 1. So if you haven't watched that video, yet I suggest you watch that before watching this. These are the bundles that I'll be using. The lengths are 20, 22 and 24, and this is a dome cut I'll be using to make the weight first. You want to get started by placing the dome cap on the mannequin head. Then you're gon na use your t pins to hold the dome cap in place when you're placing the T pins on the dome cap. You want to stretch the cap on both sides when you're finished with the dome cap, you're gon na start placing down your closure. You want to make sure that the closure is a little bit above the dome cap before you start placing it down with your TP. This is what the closure should look like when you finish pinning it down when you're pinning down the back of the closure. You want to make sure that you stretch it out to the shape of the closure. This step is very important because when you place the wig on your head, you want the closure to lay as flat as possible, now you're going to start to sew down the perimeter of the closure when you're sewing. You want to make sure that the stitches are very neat and close together. This is what the closure should look like sewn down. Now we're going to get started with sewing down the bundles. You want to take the longest length, bundle and pull it apart when making a wig, I like to double the tracks when sewing using the open side of the bundle, you're gon na, take the needle and place it through the cap and do the bundles making your First knot, when you finish making the first knot, you're gon na continue sewing down the bundle when you're sewing down the rest of the bundle. Placing the needle through both tracks is not necessary. The wake will still be secured, placing needle through one track. Also, when you're sewing the bundle down, you want to make sure that you're not sewing on top of the band. You want to take the first layer of the dome cap in so on top of that you only have to worry about sewing on the band for the first track of the wig and the beginning and end of every other track. Basically, just the perimeter of the dome cap when you get to the ending of the track, you're gon na do the same thing that you did for the beginning of the chart. Placing the needle through both tracks is what I mean by the same thing as the beginning sewing what a wig is different from sewing on a person's head, because when you're sewing on a wig, you want to make sure that all the tracks are spaced out. So all the bundles can fit. If you don't spaced all the tracks out, then all the bundles will be very close together in the back and you won't have any for the top of the week, it's better to sew the bundle spaced out rather than so. I don't close together because you can always go back and sew the rest of the bundles in when you come upon a track that ends in the middle of the week. You'Re gon na end it just as if you're ending the track on the perimeter of the dome cap and start it off the same way to continue watching to see what you should do when you get up to the last track of the week, because I'm making A side part wig. I made sure that most of the bundles went on the side where most of the hair should be you'll, see what I'm talking about. When I get to the other side of the week. As you can see, there is more space for hair on the right side of the wig, where most of the hair belongs. When you're sewing down the last track of the wig, you want to make sure that you don't slow. It too close to the closure, because in the future, if he wants to do a closure, replacement it'll be too hard to remove the closure. Now that you're finished with the week you're gon na flip it inside out and cut out the part of the dome cap that you won't be needing now, I'm going to begin with a styling process of the wig. First, I'm gon na get started by parting out. The side that I'm gon na use and flattening down the top of the loop, I'm gon na be using mousse and the hot comb to flatten down the top of the weak part by part. You want to make sure that you're leaving part of the closure out on the back to cover the tracks for this week, I'll be styling it in big wand. Curls layered continue watching to see how I'll be styling the baby ears. This is what the wig looks. Like after I've pin curl to the pension so that the curls can sit while I do the baby ears, this is actually my first time trying to do baby hairs on a league. So I did ended up doing the baby hands one by one. When you doing your baby hairs, remember to cut them short, because it'll make it way easier to suit them. I really don't know how to explain how to do the baby hairs, but because you're doing it on a wig, you won't have to worry about any lace. Lifting or any of that, so it should be easier for you to style them when you're finished styling. The baby here is that you're satisfied with your gon na. Let them sit for a while to dry. My baby hairs aren't completely dried, but I did begin the styling process by hot combing, the hair line of the closure, when you finish hot combing, the hairline you're gon na use the hot comb and hot comb, the top of the wig. So it can have a neater look now that I style the top of the closure. I took the pink curls out at the front and I'm gon na layer, the curls when layering the curls, it's way easier to use a razor Pony, but I didn't have that. So I ended up using scissors instead, when you finish layering the wig, how you want it you're gon na, pin it back up and let it sit a little bit with the curls you just made. This is a finishing look of the side part. We continue watching to see what it looks like when the curls are draw remember to watch part one if you haven't already and like comment and subscribe thanks for watching you


Comments
I Am Auntie Kee: Great tutorial. Detailed with great camera angels. Thanks
Tina Shanice: Love this wig!!! Great video. Very informative.
Ariel Rose: this just helped me out so much! you are so talented
Its the wigs for me: Yessss so helpful!
BossyBree TV: This was very informative & you speak so well !
DEE BABY: U deserve wayyy more likes !
rfrempong87: Great video! What mousse did you use?
Kevillie Washington: When sewing down your closure it was hard to tell if you sewed it on the center of the dome cap or did you tilt it a little off centered to get the side part?
Shemar Rochester: Okkk hunny, come through with the “what lace” great video!
Iesha Green: Great job sister wish u had put it on for us thou
Fancy Williams: what curling iron do you use i can’t seem to find one i like
nia jamie: Where are the bundles from?
ChrisstyLuv: What kind of thread do you use ...
Wynekia Holston: Hello you did that wig. Good job
Hadja K •:
Peety’s Playhouse: What brand hot comb is that