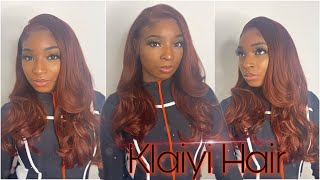
13X6 T Part Ginger/Orange Lace Wig Install | Glueless Install| Amazon Wig Review| Ft Cenhiee Hair
- Posted on 16 August, 2021
- T Part Wig
- By Anonymous
Ginger T-part lace wig install
**I MAKE CUSTOM WIG UNITS for $100** (You supply the hair)
I am working on building my wig business, email me if you are interested. ([email protected])
Support my YouTube & My wig business
paypal.me/jocelynprophete
Hope ya'll enjoyed this quick wig install + hair review. This was my first time trying a colored wig as well as a t part wig. I actually love the color. Let me know in the comment section if you prefer a frontal, closure, or T-part wig.
Sorry about the audio, not sure why some parts were louder than others,
Time Stamps:
Intro 00:00-00:11
Wig Install 00:12-03:31
Baby Hairs 03:38-06:12
Styling 07:10-10:06
Hair Review 10:18-15:00
Products Used:
-She is Bomb Collection Wax Stick
-Aunt Jackie's Grape Seed Frizz Patrol Setting Mousse
Hair Info:
Color: Ginger/Organge
Hair Type: Curly
Density: 150
Length: 18 inches
Price: $138
Hair Link:
https://www.amazon.com/CENHIEE-Colored...
Be sure to follow me on my social media and my business pages ☺️
IG: @ iamjustjocelyn
Business IG: @ jocelyns.wig.vault (Custom Wig Service COMING SOON)
Tik Tok (business): jocelynswigvault
Tik Tok (personal): jocelyn844
Twitter: @ Iamjustjocelyn_
Business inquiry: [email protected]
Hi guys, so i'm just going to jump right into this video. The lace is already cut, as you can see so now, i'm just trying to adjust it because my edges do come down a little lower on the sides which i kind of hate. But you know i typically make it work like, as you can see like right here, like that's how low my edges come. So i'm going to try to push the sides of the wig down to cover that. But now i'm just going to go in with my got to be spray, and this is the only product i'm really going to use to hold down my lace and because um, my lace is already cut, i'm going to try to work like in small sections. So i'm going to start by laying down the middle. Now i'm going to go in with my blow dryer just to dry this section and then i'm going to move on to the next side. So this is where my edges hang a little bit lower. So i am going to pull the lace down like a little bit, but not to the point where i have no forehead, because that is just unacceptable. I know people with smaller foreheads than me be struggling with this part, so this is just how i do it, as you can see, i'm back with that got to be spray. I don't typically spray a lot just enough and if i need to go in with like another layer, i will and then i'll blow dry all over again, and just so you guys know i do blow dry it on cool, because that is the best way to Get gossipy to dry faster when you have it on hot. It does not dry quick enough, and it's just like a waste of time. So now, for my least favorite part um, i have to go in and lay down the side tabs of the wig. I feel like this is like the most hardest part, because i do have longer sideburns as you can see, but i am going to fix that in the end and you'll definitely see how so you don't see my sideburns but yeah, i'm just repeating the process of You know applying the got to be and bro dying now that you can see. I completed this side, i'm going to do the other side off camera, so this is what it's looking like, but i definitely have to go in with my alcohol to clean up the perimeter um, because the got to be spray does leave like this excess little white Residue, so i'm just gon na clean that up as best as i can and then i am going to go in with my makeup to clean up my hairline. So this is what it's looking like before. I am going to take my makeup brush and take my l.a colors pressed powder in the color toffee and just you know, put um some of that on my hairline, so it can blend in with my skin as much as possible, because you know this is not A hd lace, you know i got ta finish a little bit so now it's time for me to take care of them sideburns. So i am going to take a little bit of hair on the sides. Um, just like a thin layer of just like how like your natural sideburns, would be, and i am going to cut it in like a diagonal way, so that it looks as natural as possible. But remember this is like colored hair and normally i would prefer not to do baby hairs, but it's just necessary at this point. So just watch me do this process. Now, i'm going to take my edge brush and use my got to be spray to lay down my sideburns. I just kind of like swoop it in it does not lay down like at first so, like i just had to like keep going in, but eventually it just laid down on its own. It was kind of a process, but it was honestly worth it because i did not want my own sideburns out of my wig like that. Like that just be embarrassing. So i made it look as presentable as possible. So now i'm going to do baby hairs and i'm only going to do two um, because this is just a middle part, and i am not going to cut these because i did not want to cut them and mess them up. So i just took out a thin layer of hair and i am just going to do the same thing. I'M going to take my gotcha spray and scoop it in to the wig. So now that i got this side done, i am going to go ahead and do the other side off camera. So this is how the baby hair is looking, and this is how the words looking so far. So as you notice, i did not do the ball. Cap method, i never do the ball cap method for my installs, but i am going to go in with my pressed powder and i'm just going to define that middle part and boom no line. You can't even see where the wig cap is, and i'm just going to go over like a little bit with my hairline and i'm just going to um blend this in with my finger also. So the line is not so harsh because i want it to look as natural as possible. Okay, now it is time to style this wig. I am going to go in with my cheetah bomb collection. Black stick, and this is so my wig can lay flat um and then i'm going to go in with my hot comb. I have it on the highest setting which, for me is 15.. It was just necessary, so yeah. So now that my wig is really flat. I am going to go in with my spray bottle. It just has water in it. I didn't want to use any leave-in conditioner this time. I'M not sure why i just like chose not to so i'm just going to go in with my spray bottle and also i am going to go in with my mousse to define these curls and we will almost be done and through with this video. So i'm going to go in with my aunt: jackie's fridge free, um mousse. I love this move. It is very lightweight and it does not like have your curls feeling crunchy afterwards like when it dries. It just has like a nice light hold, but it really does define the curls. So i just love that, and i'm gon na go in with my denman brush, also just to you know, detangle the hair, even though it's not really tangled and just like get that product through. So i'm just finishing up with the side of my hair, like you can totally see the difference like it is so cute. I love this color so much and now i'm gon na give you guys like a little close-up of this curl pattern like it is so defined, and i love it and now i am going to show you guys. The finished look, and this is how it's looking. I am completely in love with it and yeah soon enough. We will be getting into this view right about now. Okay, so i'm back and now that i have finished installing this wig um. Let'S talk about it like this is my first time trying a teapot lace. Wig, it is a 13 by 6, with a one inch wide. I think it's one inch wide deep part um and, as you can see, this hair is curly. This is a beautiful curl palette. Actually it didn't like define like what type of curl pattern. This was on amazon, but this is so nice and it is really soft surprisingly, and it's not dry like when i first got it out. The bag like the hair, was just super soft and like even when i wet the hair. It was just like soft. I didn't really even need product. I just put mousse so like the curls could last longer, because you know when they'll color your hair, like the curls, they don't typically last all day and it'd, be hard to make them last all day got my spray bottle everywhere. You go you brighten up your hair, like it's a lot of work, but um yeah, and this wig is 18 inches. I don't know why, but it feels longer honestly like it comes down to like just like above my my chest. So that's good and this at least isn't even hd, but it like they held it down like this place, is actually really nice um. What else can i say? I definitely will get this way again because i think, like tea party, wigs like they actually beginner friendly honestly, because i am not a experienced professional wig installing type person. So for me to have this on my own a very impressed. I did mess this up when i went to go in something but yeah um. What else can i say this wig? It did come pre-plucked. But if you didn't see my previous video before this one, you do know that i did customize this bit to my liking and i cleaned up the part. And what did i say when i put that parting? It was really going to be looking unique when i concealed it like, and definitely if you didn't see my previous video on how to customize a two part wig make sure you watch that it is definitely beginner friendly, because that was my first time. Customizing, a two-part wig, it was kind of difficult, but i made it work, i think mainly because with this tea party, it definitely had more lace in the front to where you could pluck it more. Unlike other tea party that i've seen before um, they pretty much kind of um only came with like a little bit of spacing and if it was reflected or not, that's just what you had to go with glad that that this wig wasn't fat so yeah i, Like how this hair doesn't really tangle, like it curls all the way down to the bottom, i did have like a little bit of setting. But of course, when you're dealing with curly hair, like you're gon na have setting like do not expect that, there's nothing. No setting, even though, like amazon, always advertise but advertises it like that, like there's like no setting, it's like no there's no setting once it's on your head, there's no setting once it's on your head, that's working so yeah! This came out really nice and i think definitely if you haven't tried a two part wig. You should definitely try this one. This is like more for the fall like this color, but it feels like the end of the summer. I'M just like. Why not so this came out really good and yeah. I hope you guys enjoyed this video, i'm so upset that i lost my first footage because i really want to show you guys, like the entire process of how i cut the lace and all that. So definitely, next time i get a two-part wig, i will be showing you guys how i do that process from start to finish other than that um. I hope you guys enjoyed this video. Definitely let me know on what other videos you guys want to see. Um yeah so before we go, you already know that, though, like comment subscribe, and please don't forget to turn on that post notification bell to be notified every time i post a new video

Comments
PrettyLanae: Thanks for the review sis! The hair is beautiful on you and your brows are poppin!
Lex Sinclair: Girl you slayed this install!
Twanisha Green: Love itttttt !!!!!you look so good I been wanting to do this color
missyfw3: I was gonna get 20 inch tile I saw this one I want 18 beautiful!! Thank you
Ohh Mhi: How long did it take you to receive it? I ordered mine October 26th it shipped October 26th said it would be here October 28th my birthday is November 1st so I'm celebrating Saturday which is October 30th now it's saying it will not arrive until November 2nd through the 8th
Essence Butler: Does this unit allow you to do a side part?
Cupcakes And Milkshakes: Where did you get this wig and how many inches?
Cameron Davis: Can you do space buns with this wig
Afiya Gasoline: This color is your color I love it