613 Wig Customized & Installed Using Hairbyerickja Hold Me Down Ft Hairsnstn || Assalaxx__
- Posted on 08 May, 2020
- T Part Wig
- By Anonymous
Welcome to-#hairsnstn #hairbyerickaj #wigs
Hey Babes,
Welcome back :) ! I hope you guys Enjoy it! Thanks for watching and dont forget to subscribe and like this video !! XoXo.
SHOP WITH ME:
IG: ladylashbyash
IG: hairsnstn
Connect with me :
IG: Assalaxx__
SC: Assalaxx__
Twitter: Assalaxx__
Email: [email protected]
Subscribe to my channel :https://www.youtube.com/channel/UCILXe...
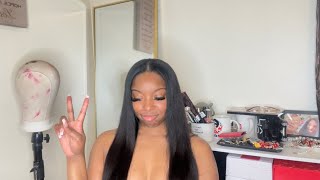
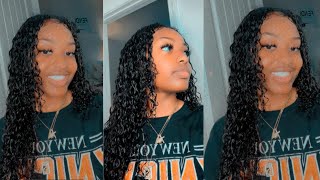
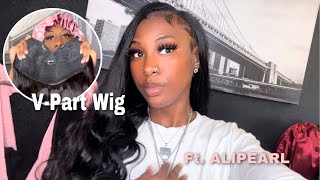
Hey guys and welcome back to my channel in this video, I will be showing you guys how I customized and installed this wig. I will be teaching this wig on camera and well as I and then doing the install and everything. So if you want to see how I got this look, then please keep on watching. Actually it won't start this video. Let me just continue okay, so please do not forget to subscribe to my channel hit that notification bell, so you are notified whenever I post and leave all your comments down below. So the things that I will detain that I used for this video is the tailored crowns least tint, and I use the shade almond and all that it was just sprayed all over they here and then went in with the blow dryer to make sure you know. Sorry that tint was dried and soaked in and pretty much melted in the release. So all I did was just spray the hair chain on it and then use the blow dryer to blow it. I also forgot to mention that this area is from my hairline here sensation and I will be leaving all the links down below. This is my 613 here in the length 13 inches. Now all the waves do come creep, Lots and customize. So if you're supposed to order away from me, it's always plucked and customized bleached, and all of that, so I am just plucking this hair a little bit more and if you realize the way how I am plucking it. I am parting out some of the, like. Almost know what that area of the head is called, but I almost wanted to give it like the pea look. I don't know if I'm saying the right term but yeah like those two middle section that you see me part out and I went back and I kept like going back with it. I wanted like that part's pretty much be empty, like I didn't want any hair there. So I was mostly you know in the car the corners to get somewhat of a hairline, so I didn't want it to just go straight across. I wanted to look like I actually made a hairline. So that's why, as you can see me doing the the pattern that I wanted it to be almost like a snake party right. So that's what I did and then I am just putting a little bit more tint on the front part of the please. So the entire list is tinted, not just the middle part that I will be writing, but the the hairline as well cuz. That'S the main thing to make sure the the hairline is blended, so you can have like a flawless and solid. The hairline is not it's not blended properly, then the install will not come off great. You know I'm saying so. I went ahead and I tinted the hairline also just so it could blend a little bit more and then I am pretty much just doing what I always do for all of my hair videos. The center part, if I'm doing a center part our side parts, are normally good party on whatever party that I want, and then I use my hot comb, my flat iron, either straightening or curl it and you know the whole nine yards. So I'm just gon na. Let you guys watch other customers is here and then come back when I'm doing the install. So now, I'm just using my fancy foundation just to blend my stocking cap a little bit more. So it looks more realistic and to my skin tone also, I had already sprayed down the stocking cap with my gut to be spray. So that's why it's already you know stuck down on my head: it's not anything off or anything. I already did that, and I will be using the glue that I will be using today, actually is from here by Harry J, and I will be using her pulled me down. Adhesive, glue and anyways I'll be using the glue from here by Erika J and just trust me guys. It is the best thing since sliced bread, because I didn't even do the proper install with it and it still melted my hair, I what I used my makeup. Remover actually to remove the makeup that was right at the hairline at the stocking cap, because I didn't have any alcohol to do that and I was just like you know what, since my wipes, normally cleanse my face like a normally take the makeup off. So maybe I could just do that so I ran out of alcohol and that's why I had to use that so. Like I said, I didn't. Do the proper, proper install or the proper proper process of need to hear the installation of the hair and it still came out nice to me? Okay. So just imagine if I had really followed like the actual steps of using the alcohol and you know doing three layers, because I think I only did two layers actually for this install. I didn't do the full three layers and it still came out cute so yeah. Okay, you did your thing with the school sis. I also forgot to mention that I did use the foundation on the wicked stuff as well. I went in and I did a little bit more blending with it because, like I said I was really trying to get this hair to look like my hair. You know what I'm saying I was really trying to get. It blend it to my skin tone and even though I've been doing with four wigs for like couple months now, I'm still not yet perfect. Okay, so I'm still learning the two techniques here and there - and I just wanted literally just get this here down to the T like I wanted it to be installed powerfully so bad, like I took my time actually with this install and yeah I'm just gon na. Let you guys watch as I you know, do this install because it's pretty much self-explanatory. The only thing that I did different was cutting the leaves, so you will see when I'm doing like the cutting off the list to put down the rule. I pretty much cut the list, is the list into small sections and glued it into small sections, and that way like I could. I handle the hair a little bit better and I was in control of where I was placing the glue and all of that you guys will see exactly what I'm seeing but yeah yeah okay, I started doing it right here, so I did like small sections cut. It into different different sections and then went in with the glue at different different. You know sections and whatever so now I am just you know. Gon na show you guys exactly what I think and then I you know I'll get back to you guys because it's pretty much self-explanatory. I just put the glue, use the hair to mark it to make sure it's not over the hairline and more behind the hairline. So if it needs more glue fine, but if it's too much, then it won't come out looking pretty so I'm just gon na. Let you guys watch as I do. Okay, so it just came back to mention to you guys that the heat, the level that I was using for this part was the highest. So it was very hot, but I didn't keep it on one side on one section too long I should say I kind of you know went back and forth because it was hot, like I did it on the highest heat, so my hair would literally melt down. Okay, so yeah, and now I'm just cutting off here the least I should say and whatever needed more glue. I went in and added more glue, whatever needed to be fixed. I went in and I fixed it so yeah. Also, this thing that I'm using to cut the lathe you can get it from any beauty supply store. I bought one. I think it was probably two dollars and it came with to me in the pack so yeah - and this is the final section. I are the final part of the video just putting some bio oil in there and pretty much just doing the finishing touch so yeah. Thank you guys for watching. Do not forget to subscribe to my channel hit that notification bell, so you are notified whenever I post and leave all your comments down below and if you guys want to see more hair tutorials and please please, please let me know - and I will definitely do more For you guys, but until then see you guys,


Comments
Jasmine Miller: best install ive seen in a long time
Shea Shea: You make this look so easy ! Lol
Caramel Crunches: It's lovely your a beauty
Jamilla B: How did you tint this wig
Onitaaa___: This nice Asf
Autumn Francisco: Did you bleach the knots first or just tint it?
Deandra Miller: Gyal nice eeeh
Tiffany Banks: But where is the hair from